Selfmade - Site
This is the
Selfmade - Site
All pictures from detail improvements or reorganisations to your GTS ' sens sent by you are shown on this side. It was simply necessary for this to set up a site of one's own since I get more and more pictures of you. Many thanks for it so and carries on please. The one or other perhaps are encouraged for screwing by this gallery.
Click on the picture and you land at the Yamaha USA. These have the workshop manual with explosion drawings online. If I am mistaken, please correct me but I think the spare part numbers are not compatible with the German or European models. The explosion drawings but identically and very good. Follow the 1-2-3 steps and feel loose. Rainer, many Thanks.

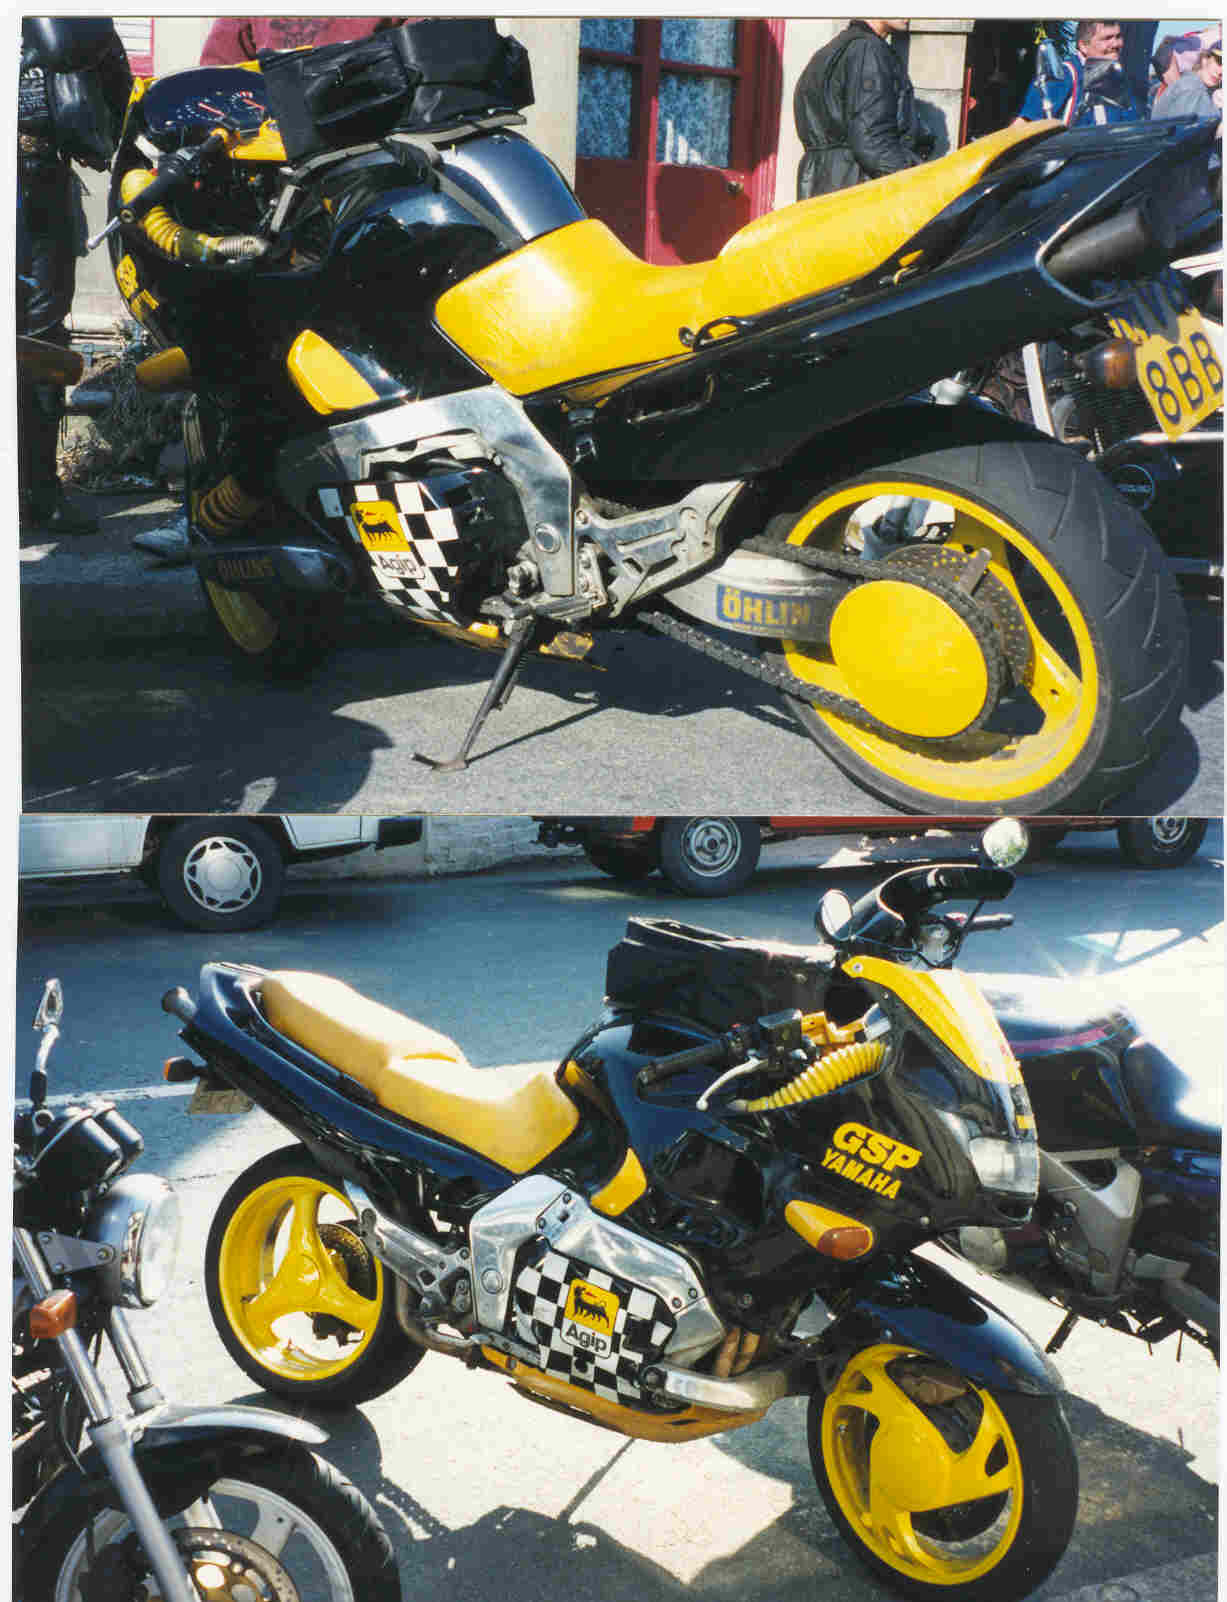
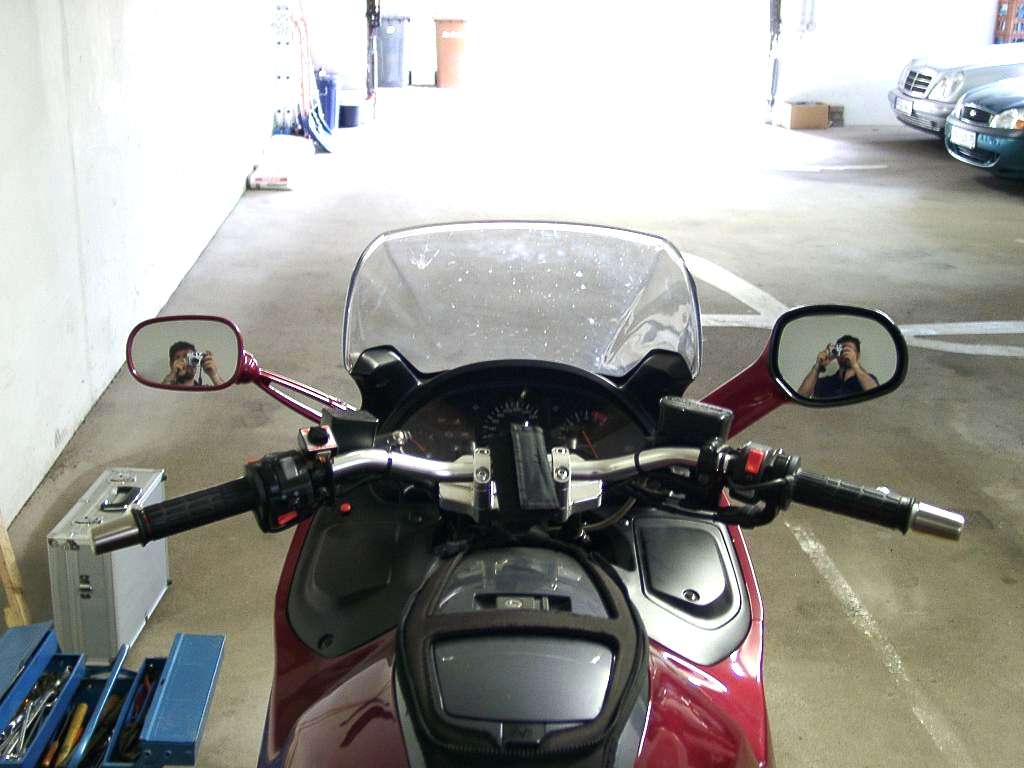
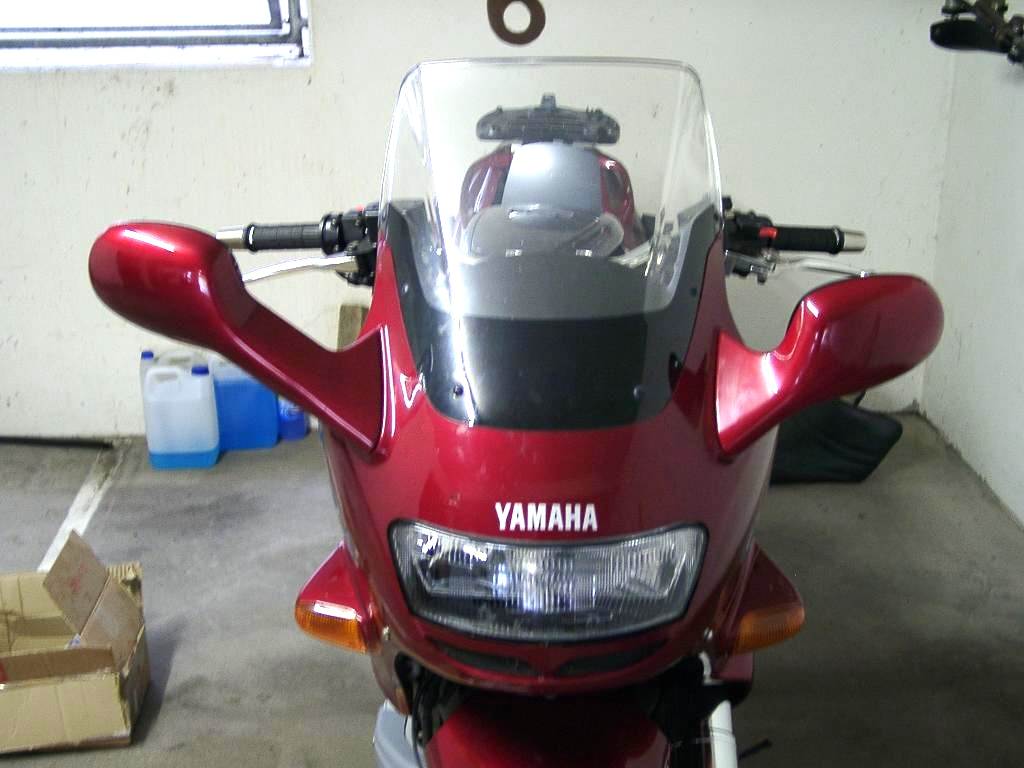
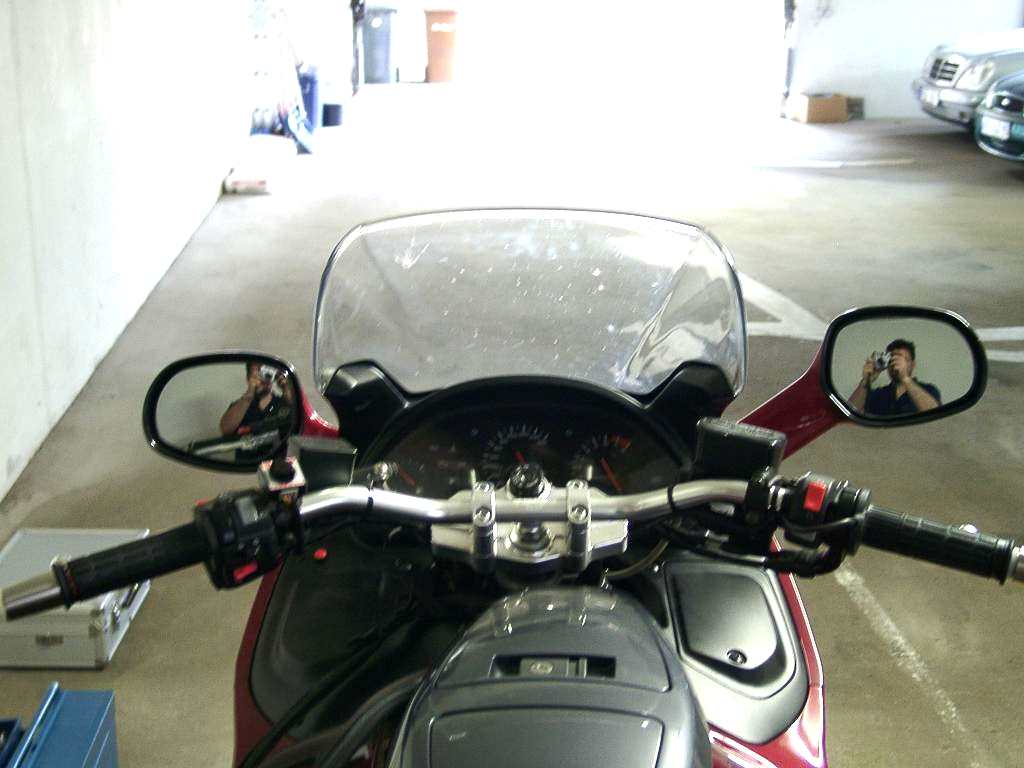
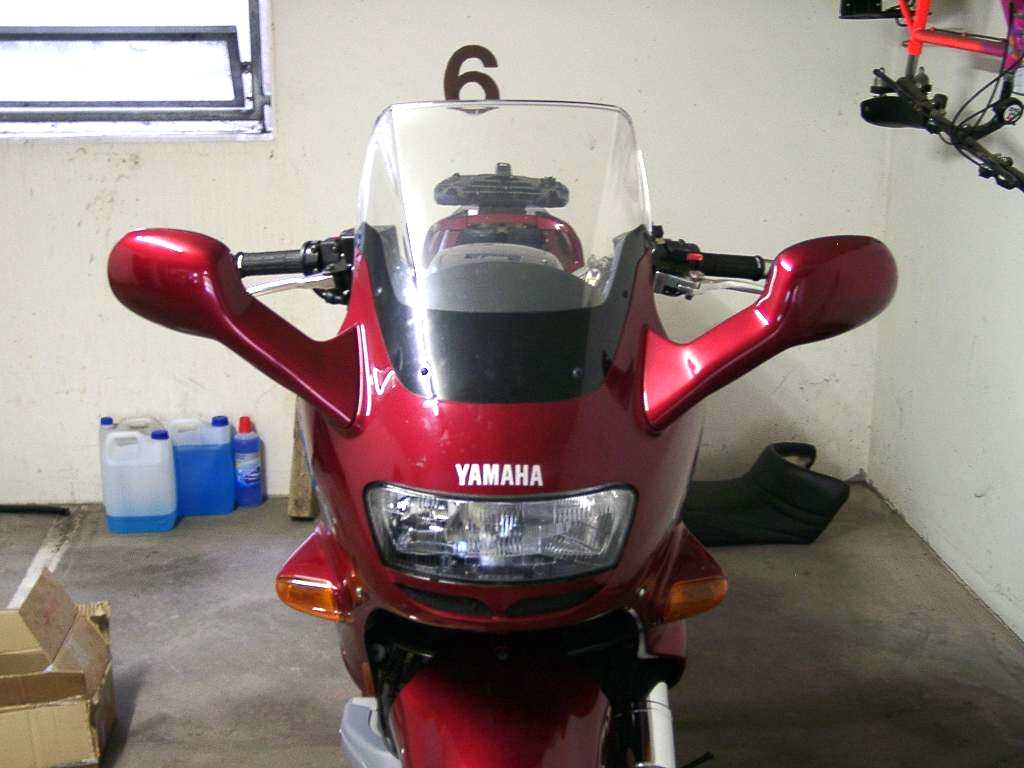
These pictures and the description come from Reiner M:
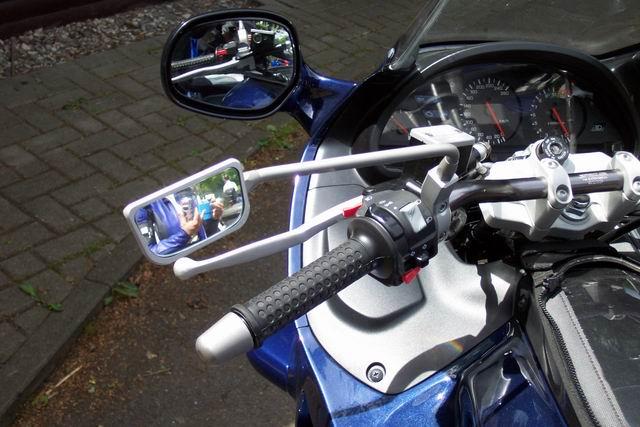
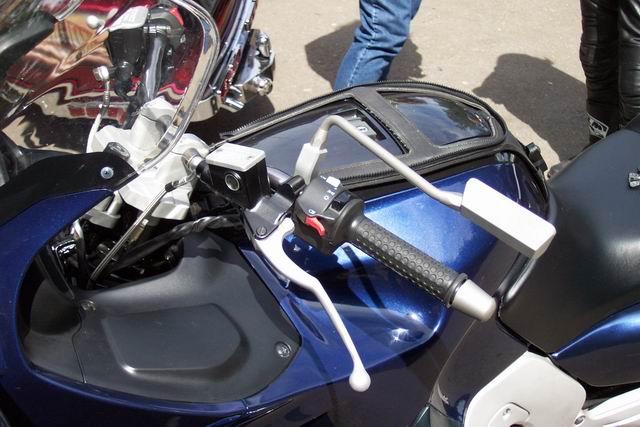

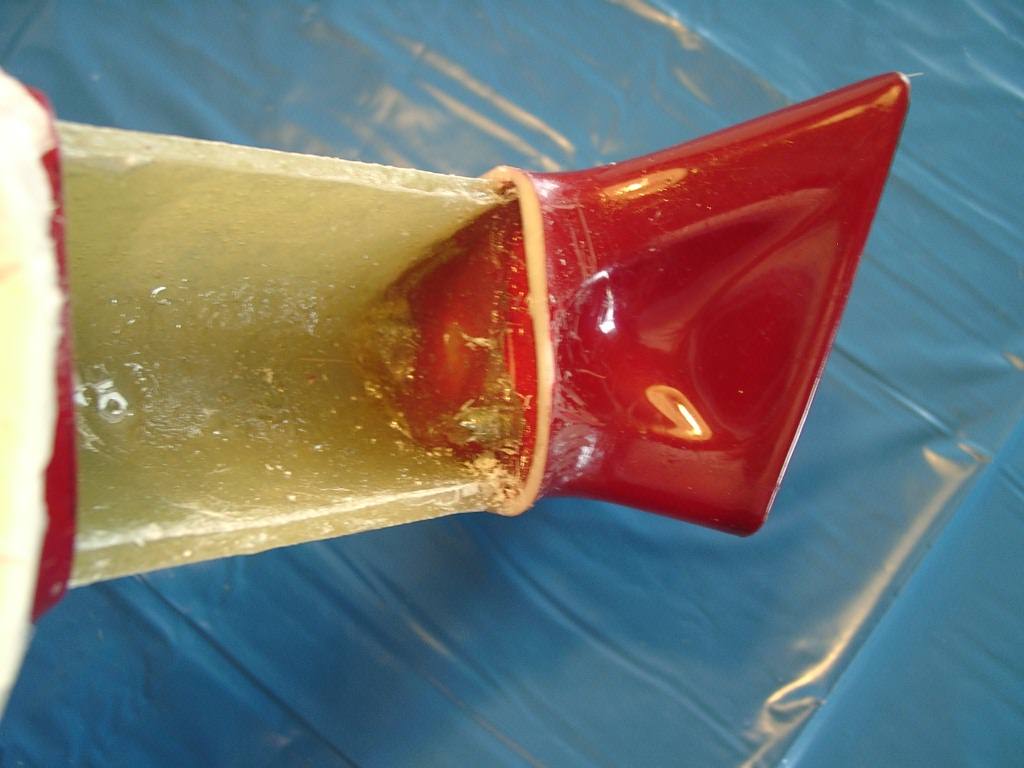
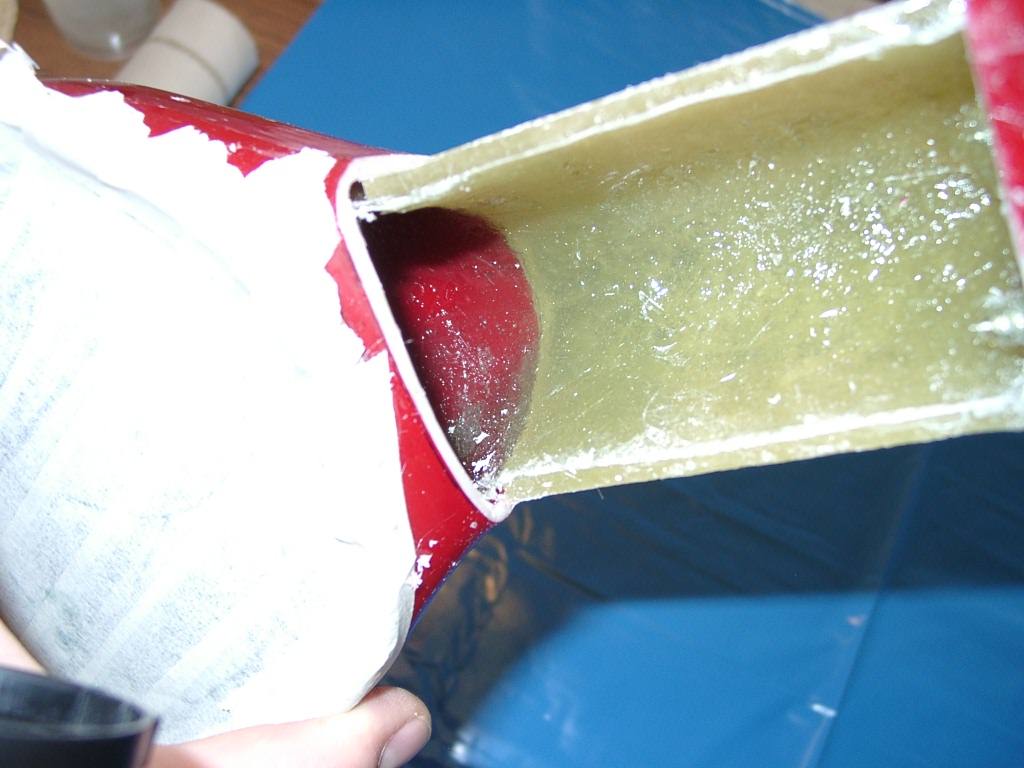
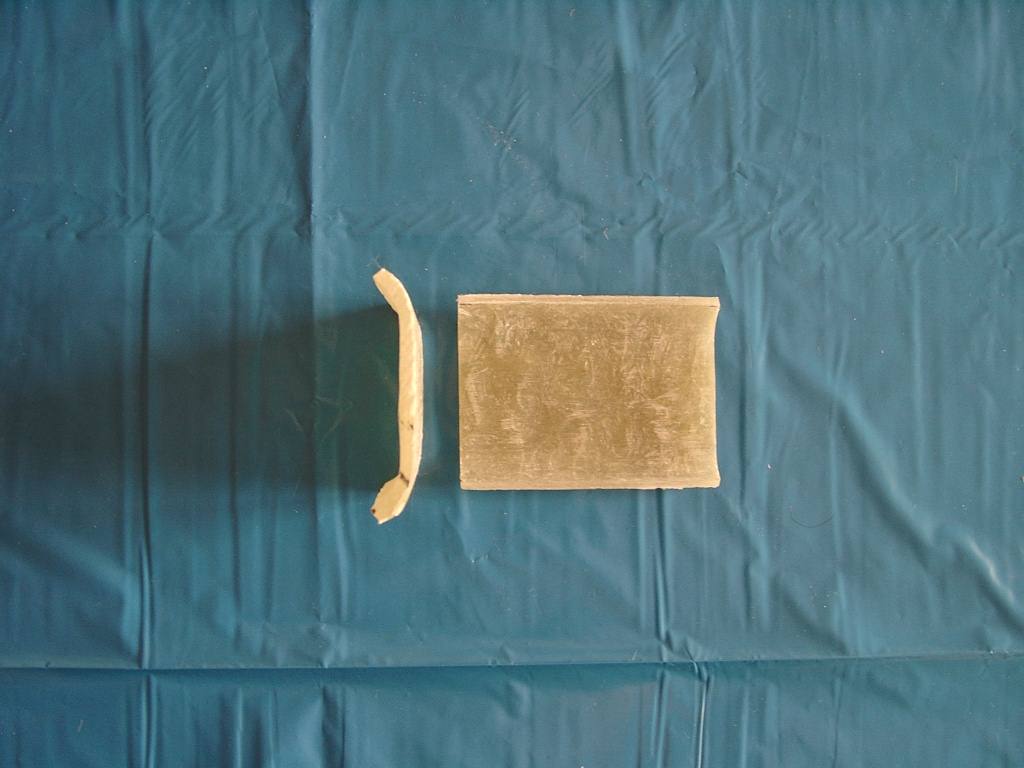
Form 1 and 2: It is at it a visually doubtful and costly mirror prolongation superfluously makes itself to it around a third mirror. I do not know neither twist head nor raise the arm like the consideration with the prolongation is, with the third mirror excellent, of needs is. I had the fork bridge at my first GTS I had equippedly to raise the arm on the left or on the right through this with a 170s handlebar with that I could see something. The greatest deficit: One had to cut the slice out on the left and on the right. I still had a new 120s handlebar at the new GTS in the cellar. After the assembly the great disillusionment, consideration the same zero because the handlebar hangs fully in the mirror. The plate cuts advantage, none out necessary. The third mirror is fastened to a newly milled half-shell by the clutch handle instead of the standard ones. Mirror glass bought, mirror case and fastening through personal effort.
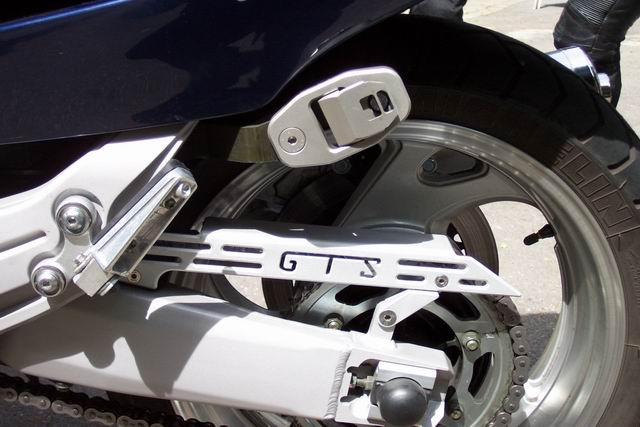
Form 3: Chain guard made of aluminium. I did not like the massive originals.
Form 4: Here I have made 2 cover caps from aluminium since the suitcases if it comes up perhaps 2 times in the year I use, I was for me there the suitcase holders visual a thorn in the eye. No picture has made from aluminium and provided with a GTS stroke the suitcase holders completely (unfortunately available). It sees since still it is the original GTS stroke's turn not particularly out if the suitcase holders are permanently put together. Well, I hope for it you can send others my changes and I also learn a couple of ideas of GTS-Ownern get (one wants to have to make what)! in this meaning REINER.
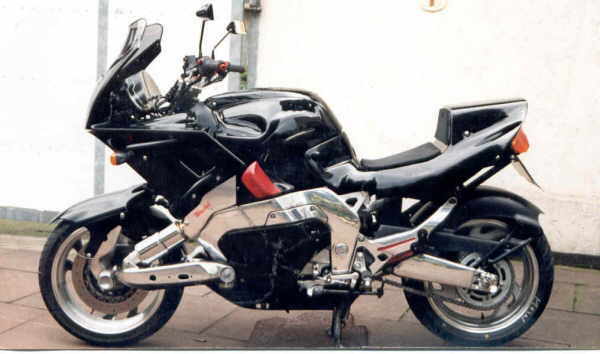
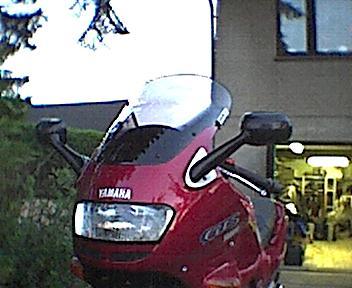
Visual comparison of the high Windshield of Matisse and MRA:

The respectively left GTS has a Matisse, the one just besides that´s an MRA.
The pictures and comments being from Knut B. below:
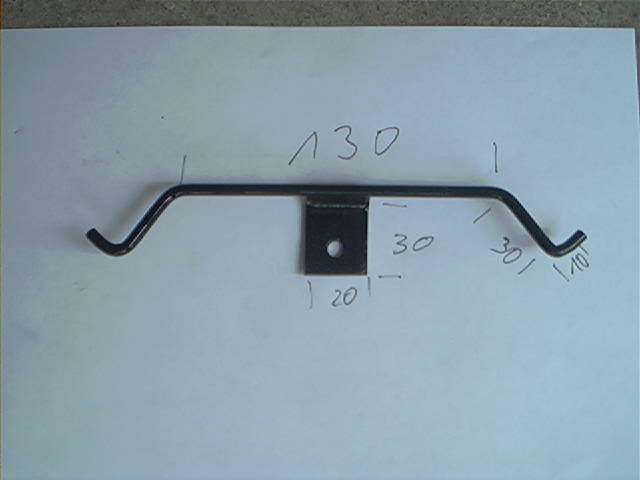
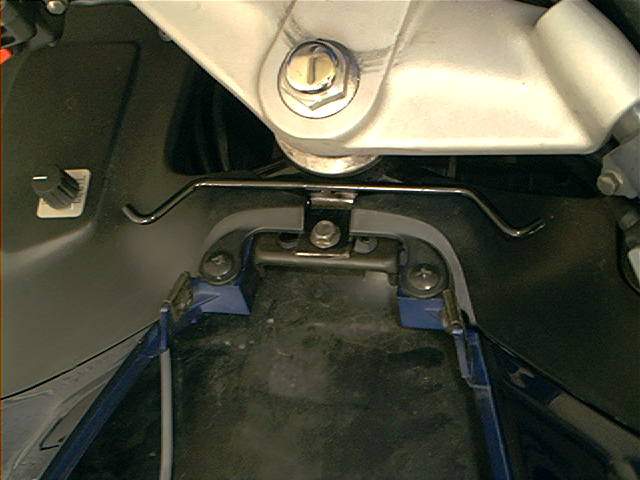

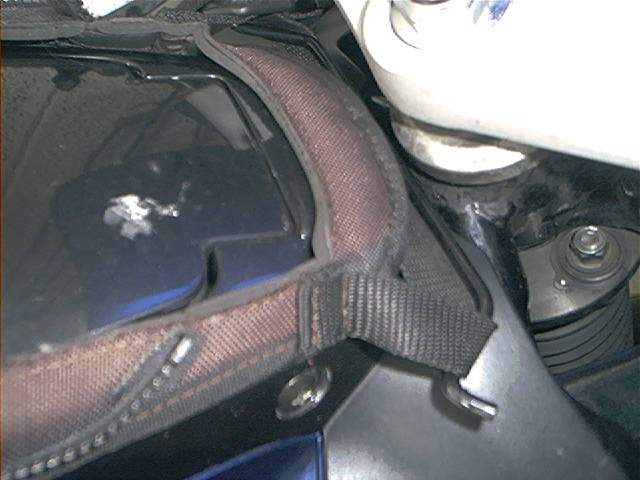


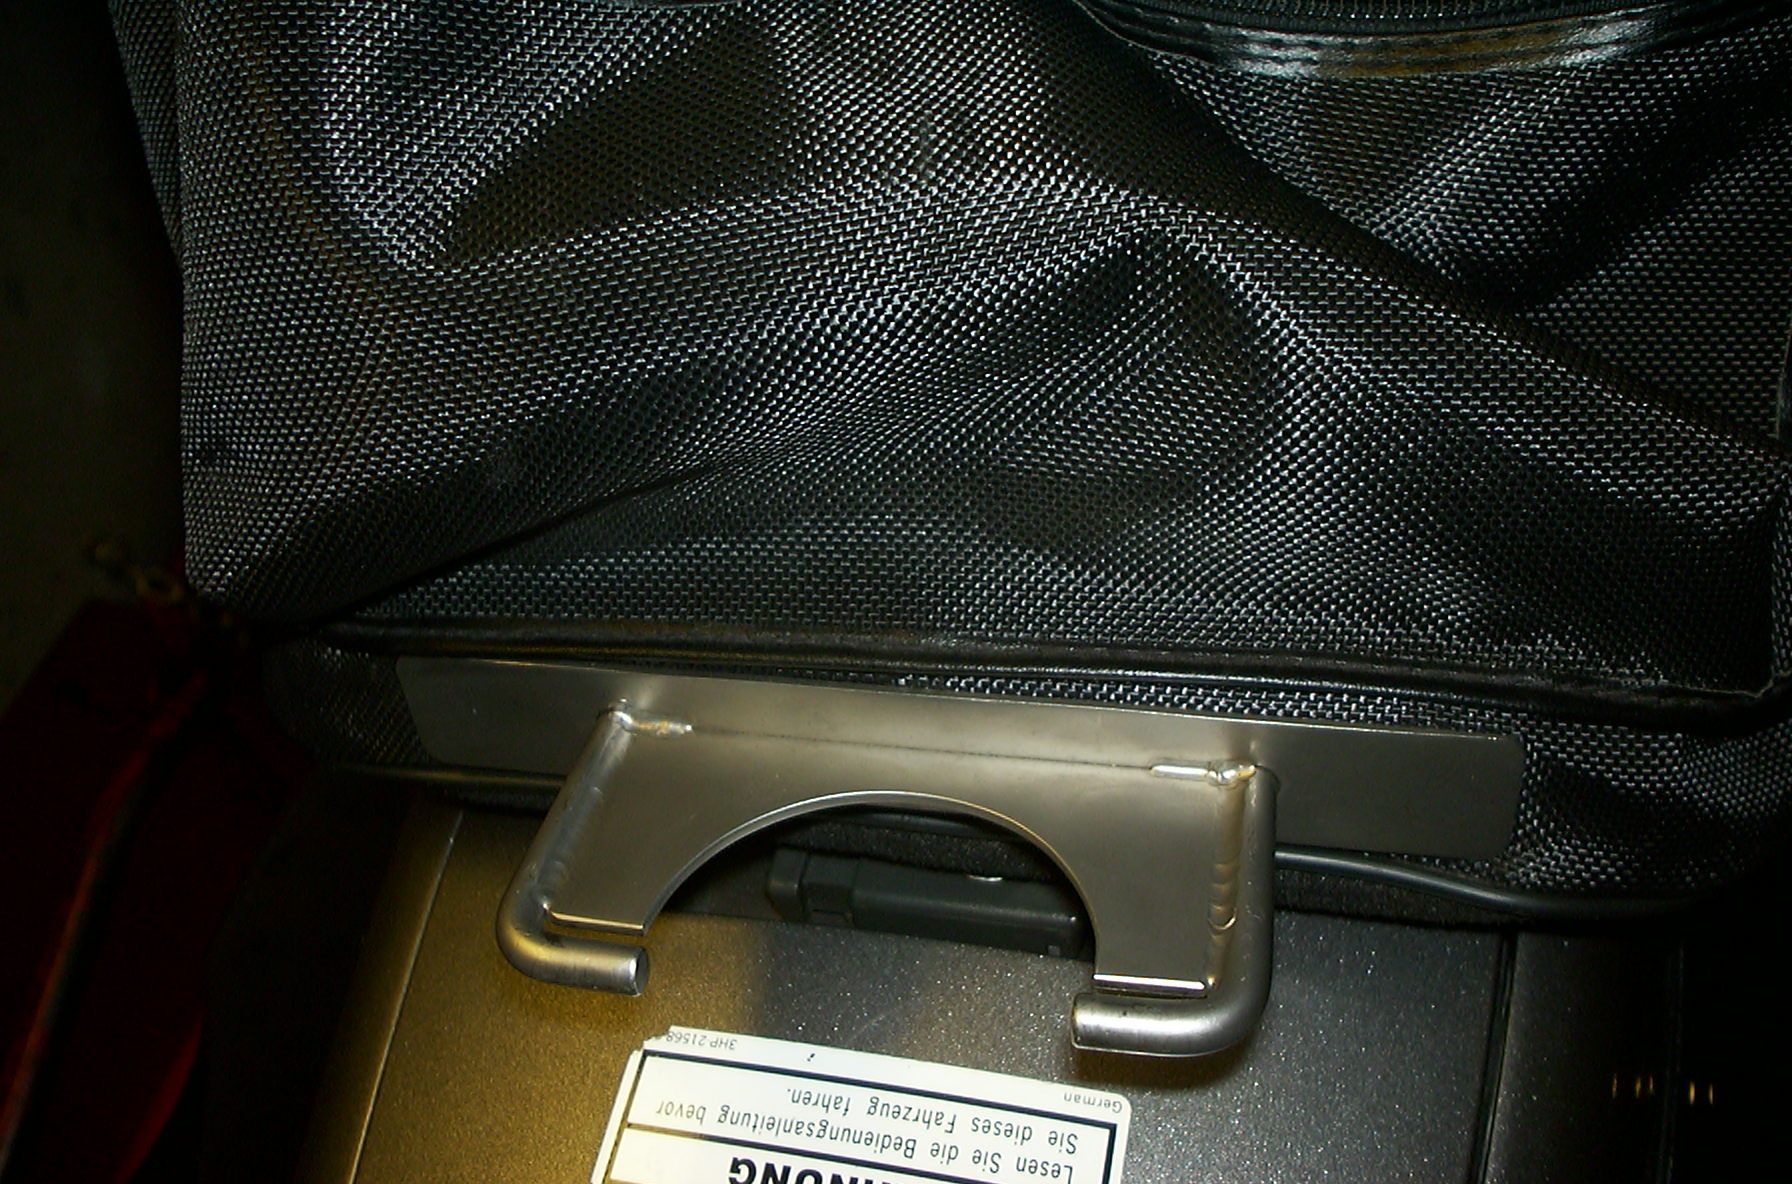
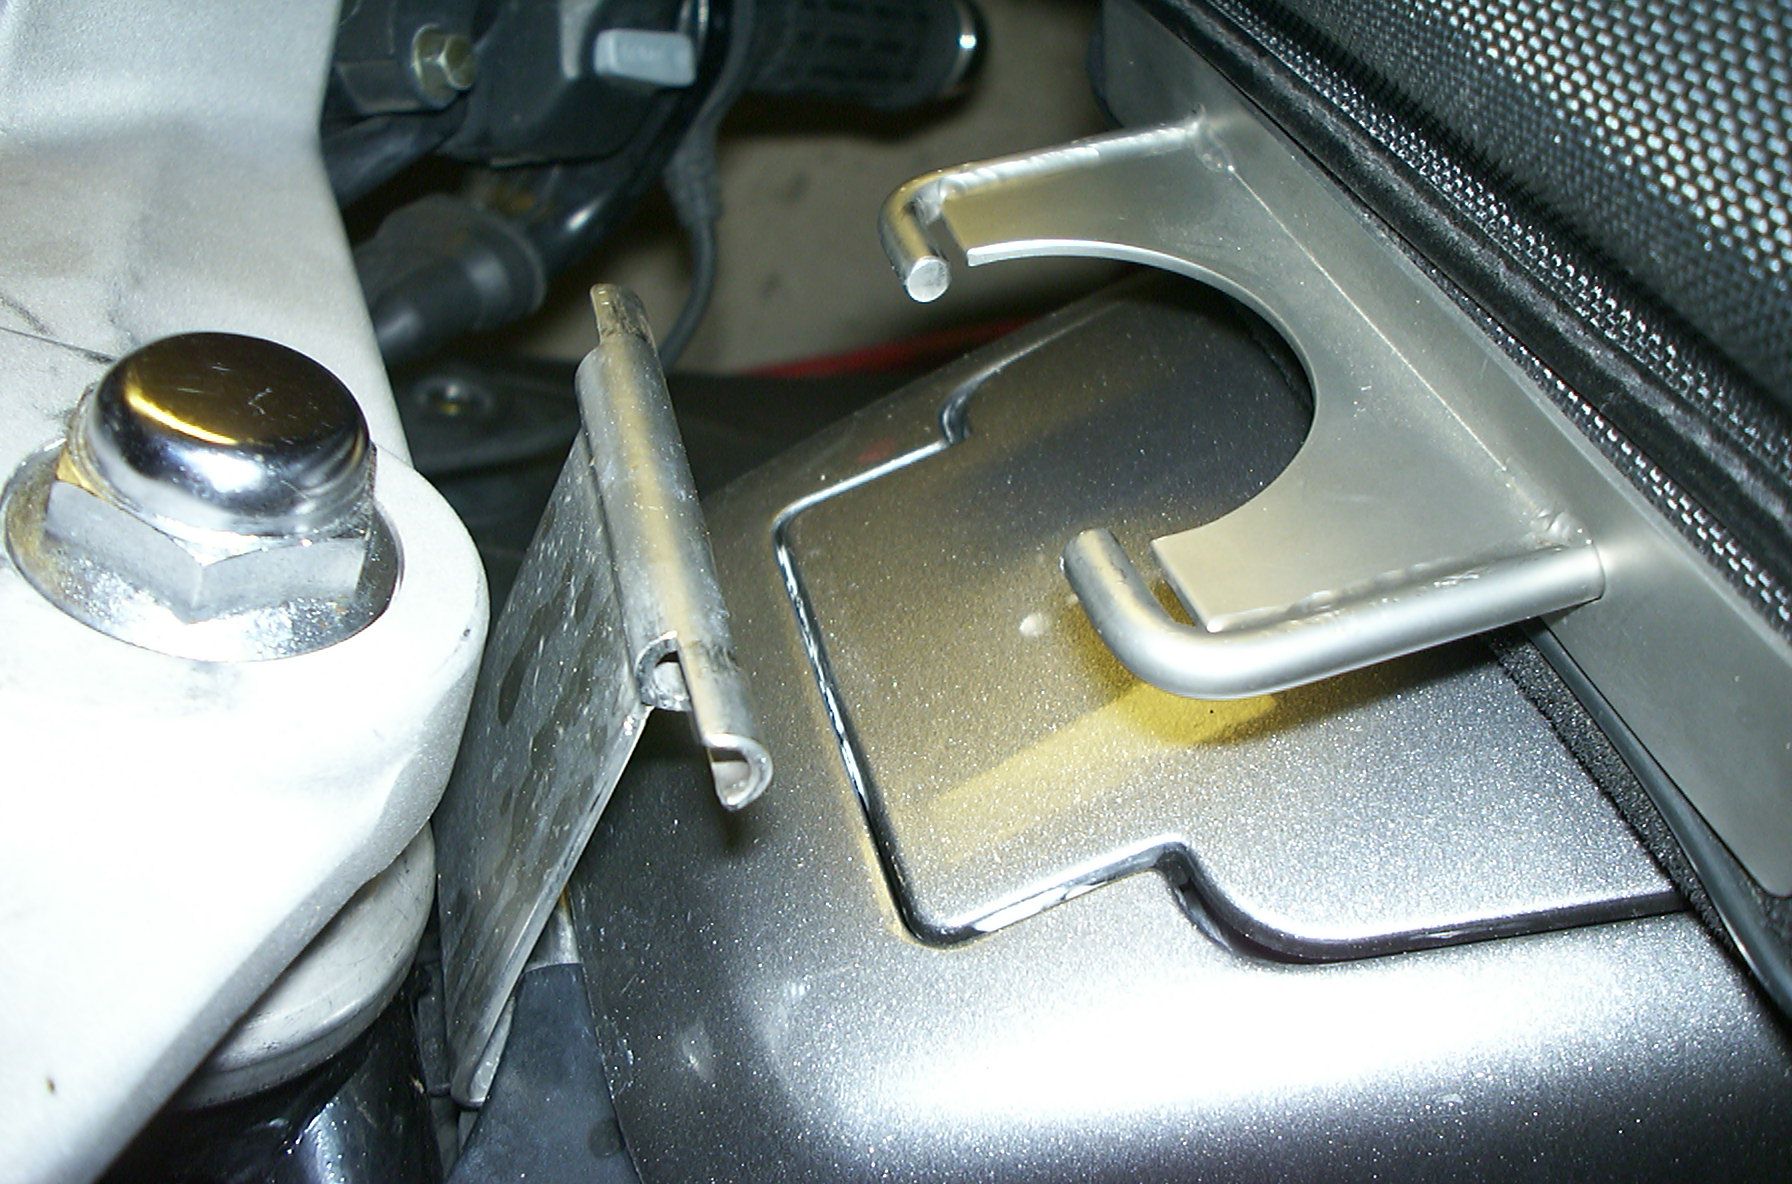
Tankbag holder has to the topic sent Andreas P. the following contribution:
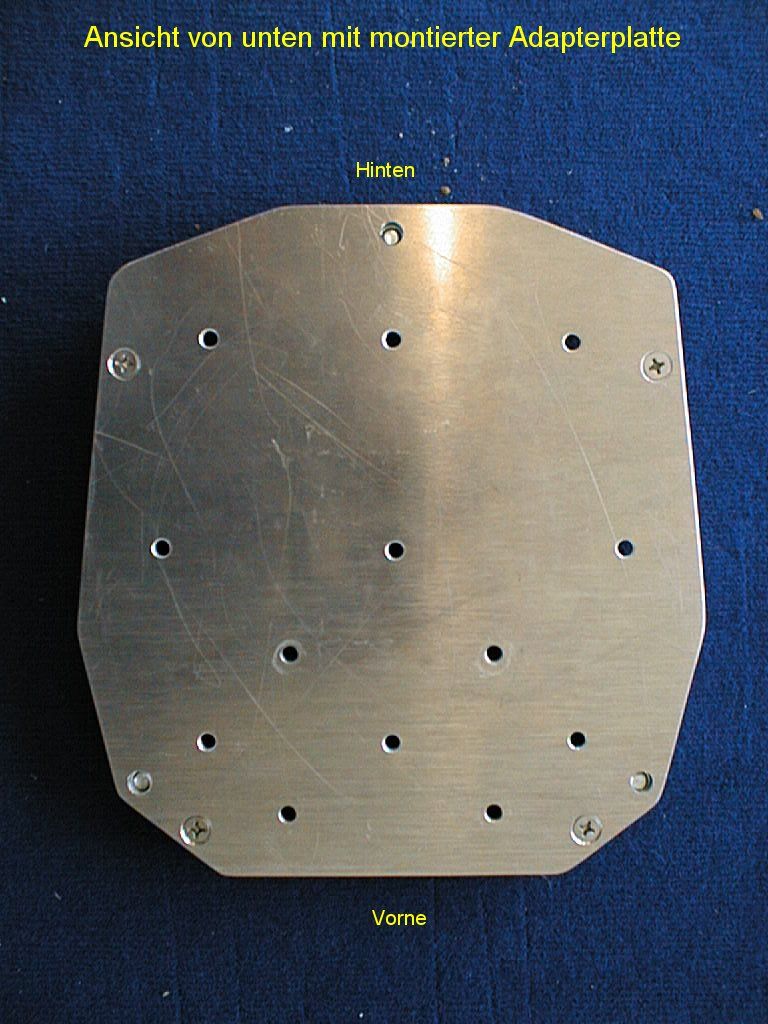
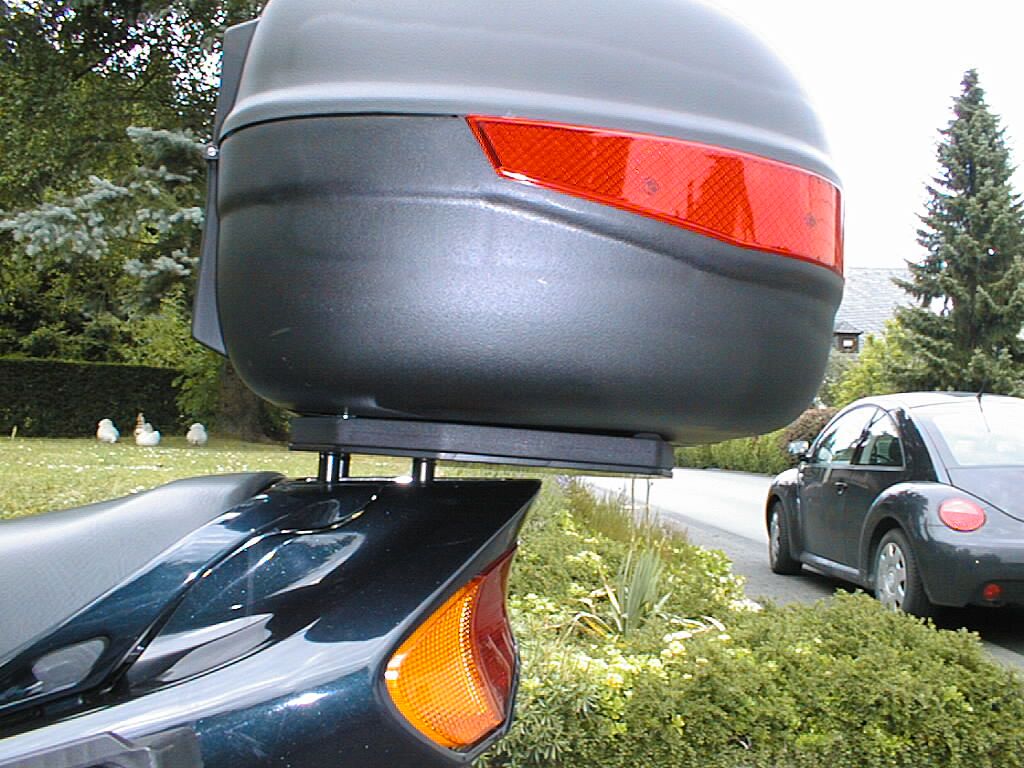
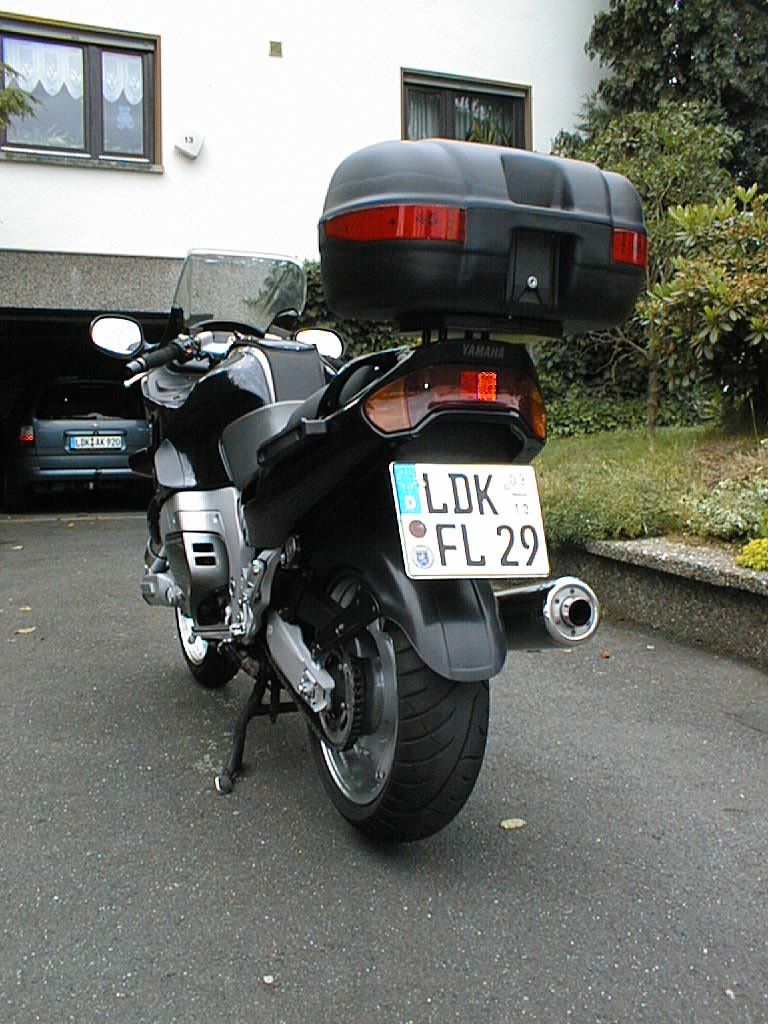
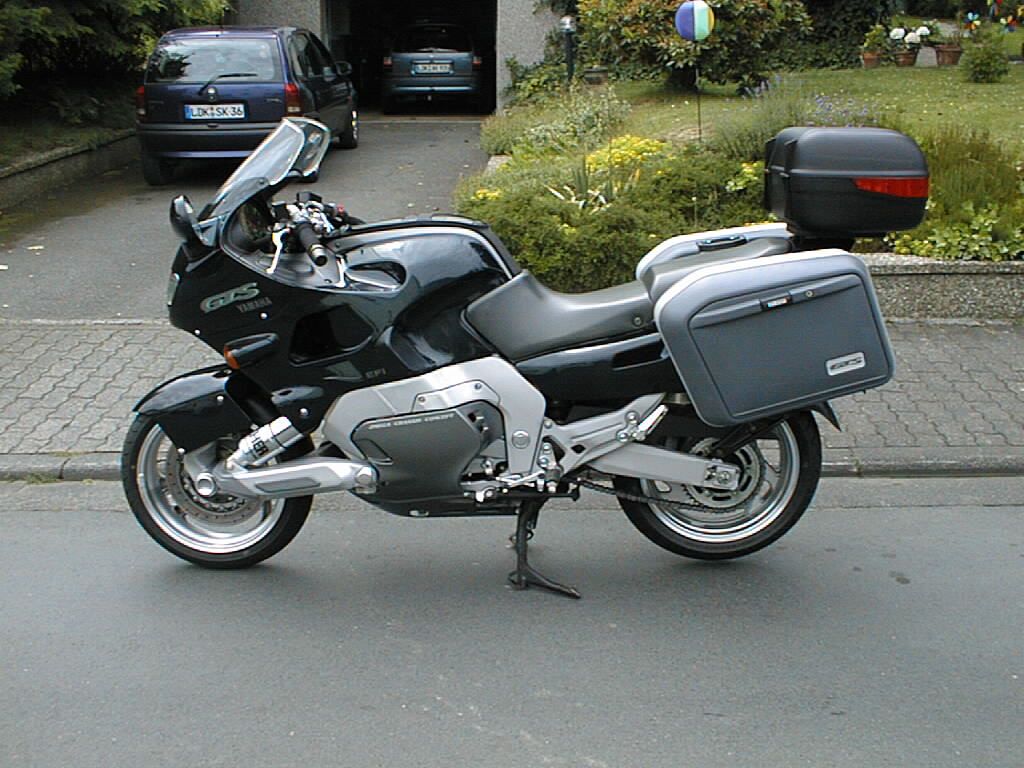
Arno K. has put himself in the things in the area of Topcase correctly as one can recognize by the following pictures easily:
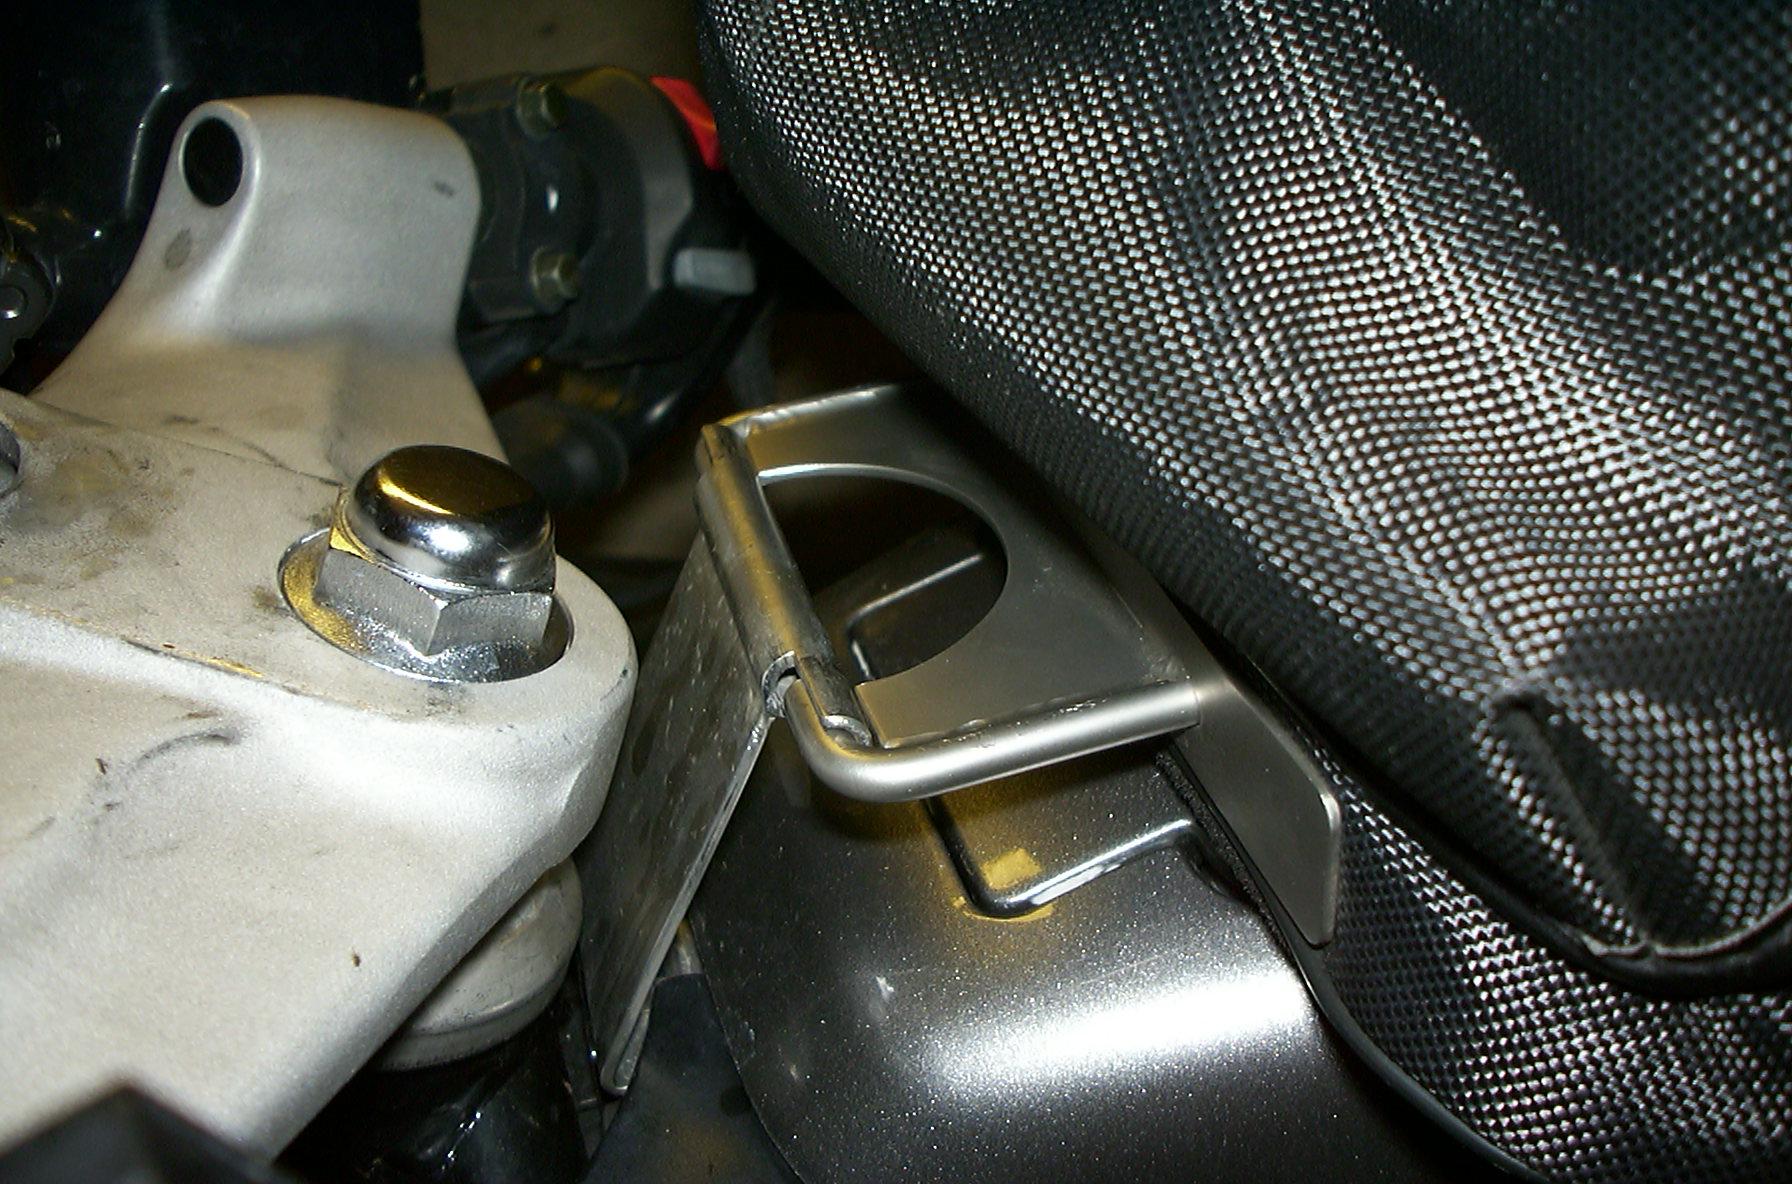
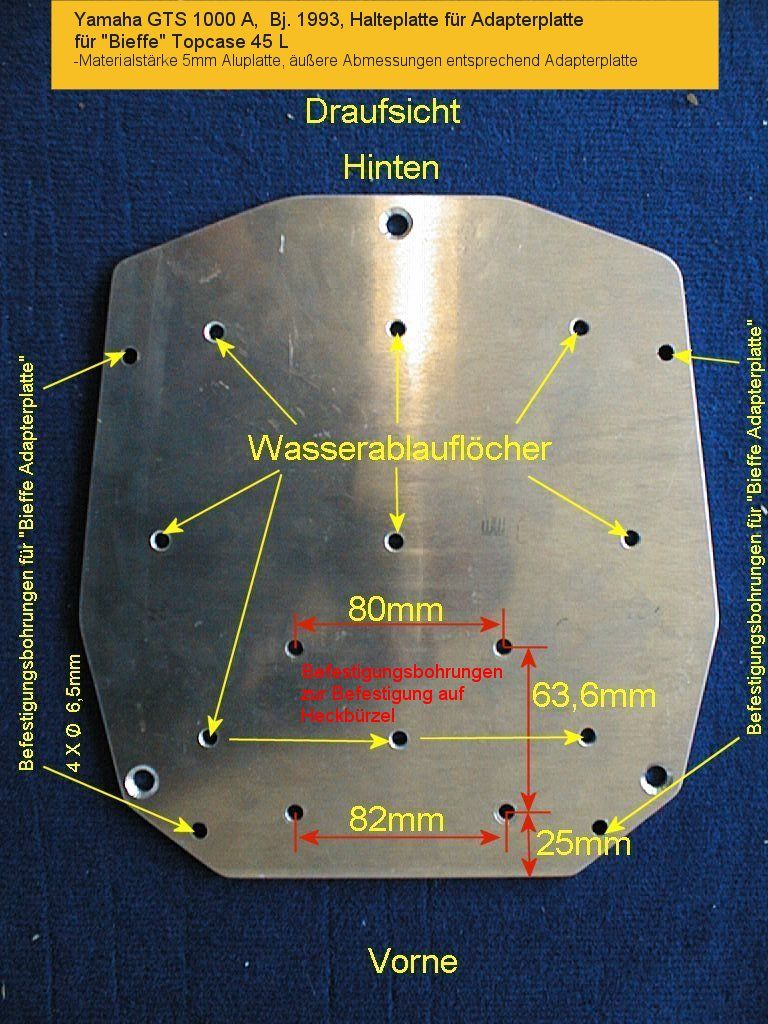
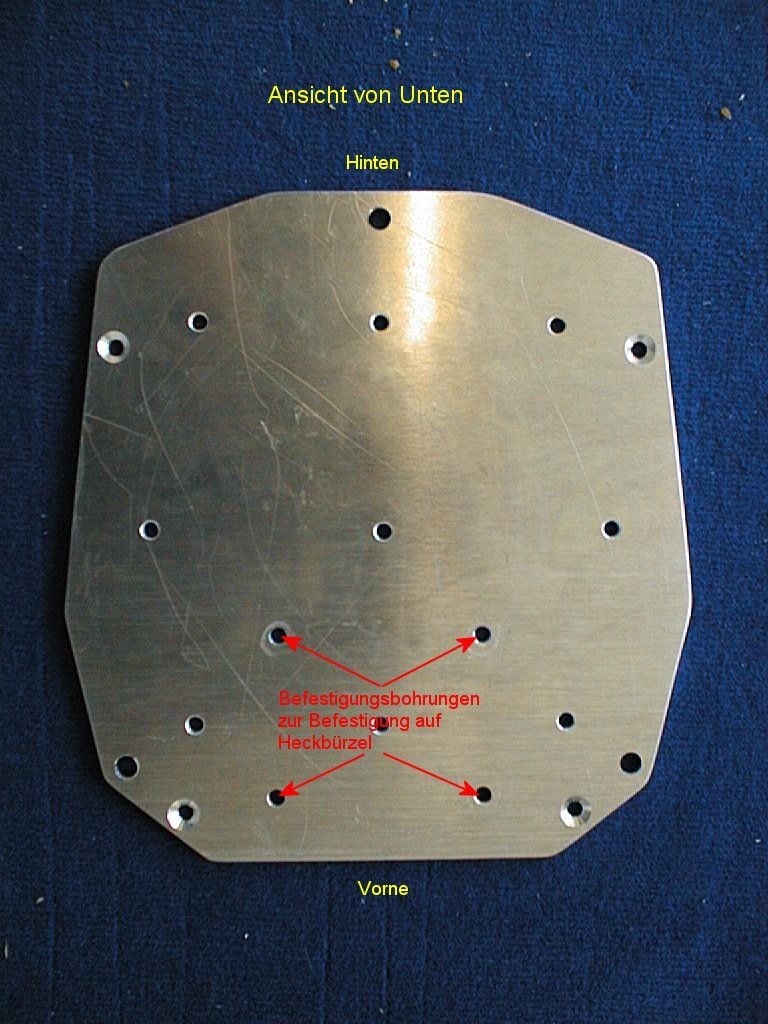
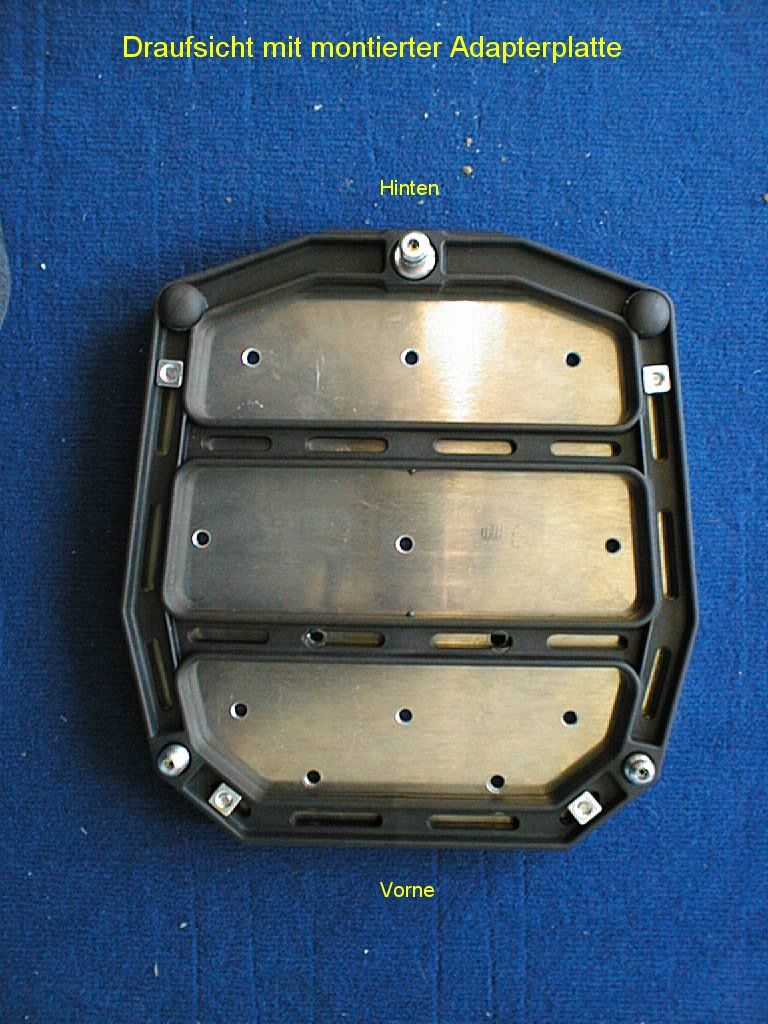
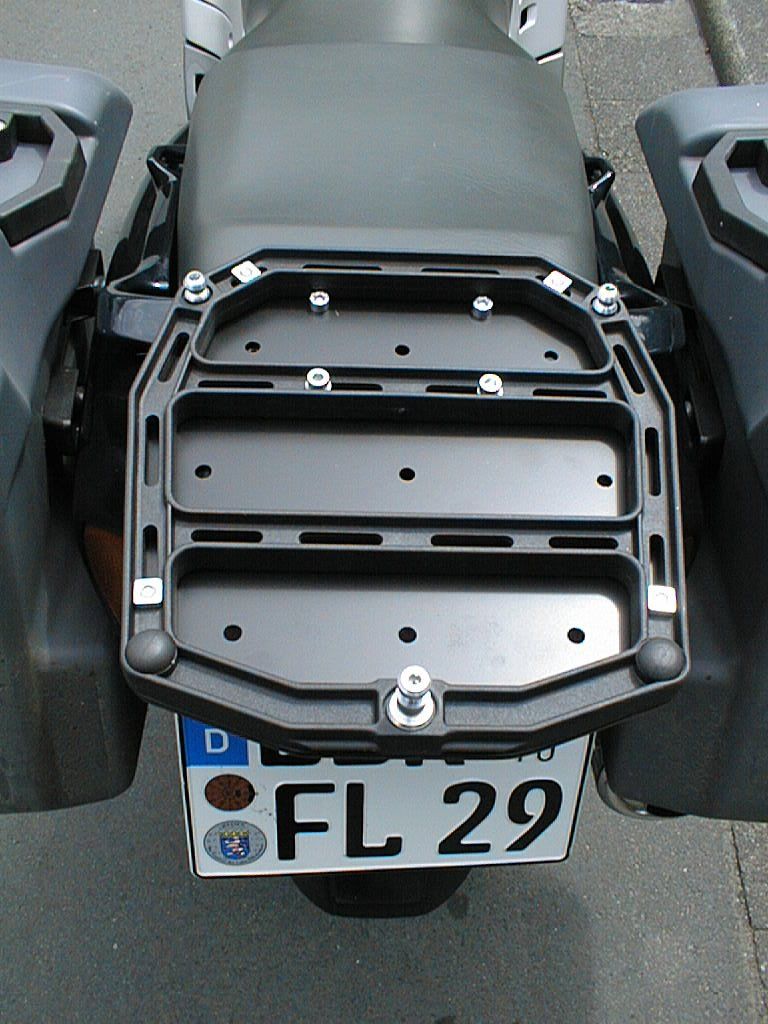
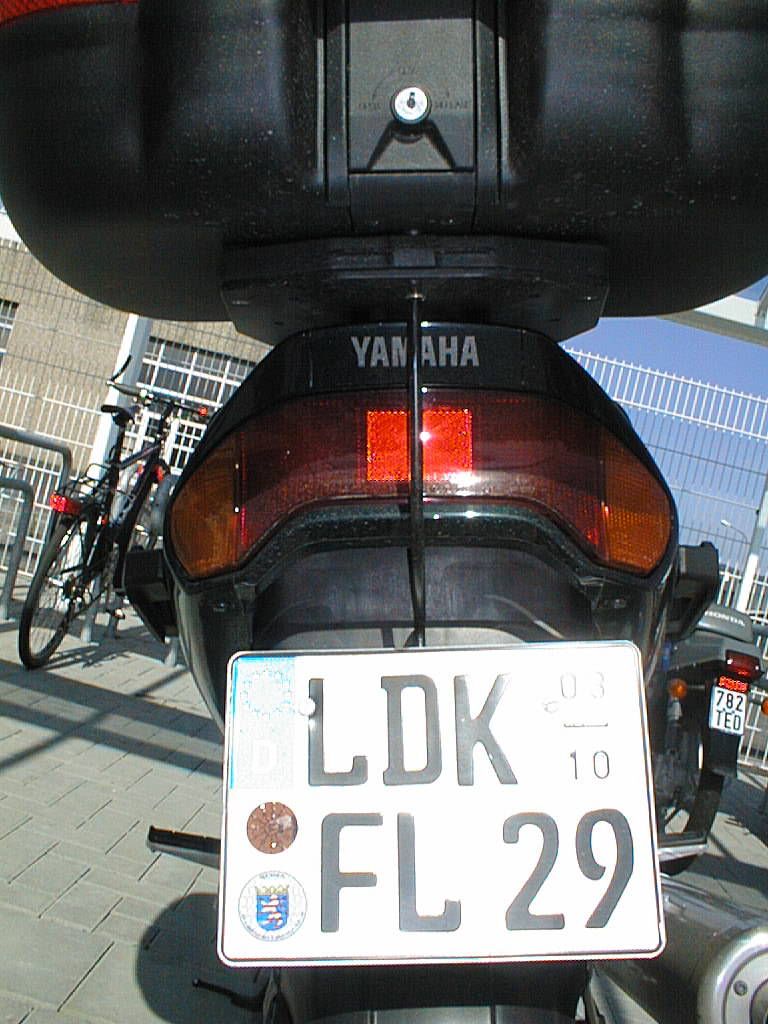
Form Topcase 1 - shows the required fastening drillings red highlightedly. The aluminium plate is 5 mm strong, the form is produced after the adapter plate of the respective Topcase type on hand. 4 fastening drillings are needed. All other drillings either are for the fastening of the adapter plate or serve as a water expiry. Merely the middle drilling behind is against vibrate perhaps urgently as an additional fastening. Used Topcase Bieffe 45 l. Form Topcase 2 - dto. from below. Form Topcase 3 - with an adapter plate put together. Form Topcase 4 - with an adapter plate view of below put together. Form Topcase 5 - Spacing bolt between Heckbürzel and plate, for a long time in front short behind. Required fastening screws of M 6 x 50 Inbus, perhaps shorten respect, screws mustn't push on electronics!! Form Topcase 6 - Topcase mounts. Form Topcase 7 - only Topcase alone. Form Topcase 8 - complete with side suitcases. Form Topcase 9 - top view mounts without suitcases. Form Topcase 10 - additional reinforcements prevent vibrations. These reinforcements are screwed together behind in the middle water expiry hole and support themselves over the number-plate holder. To this a rectangular plate which is provided with 2 drillings by which the fastening screws of the number-plate holder go through is welded on at the reinforcements.
I cannot say expenditure of work for a skilful craftsman approx. 3-4 hour with painting costs approx. 5 hour, the material lay in the hut apart from varnish where I create as scrap around.

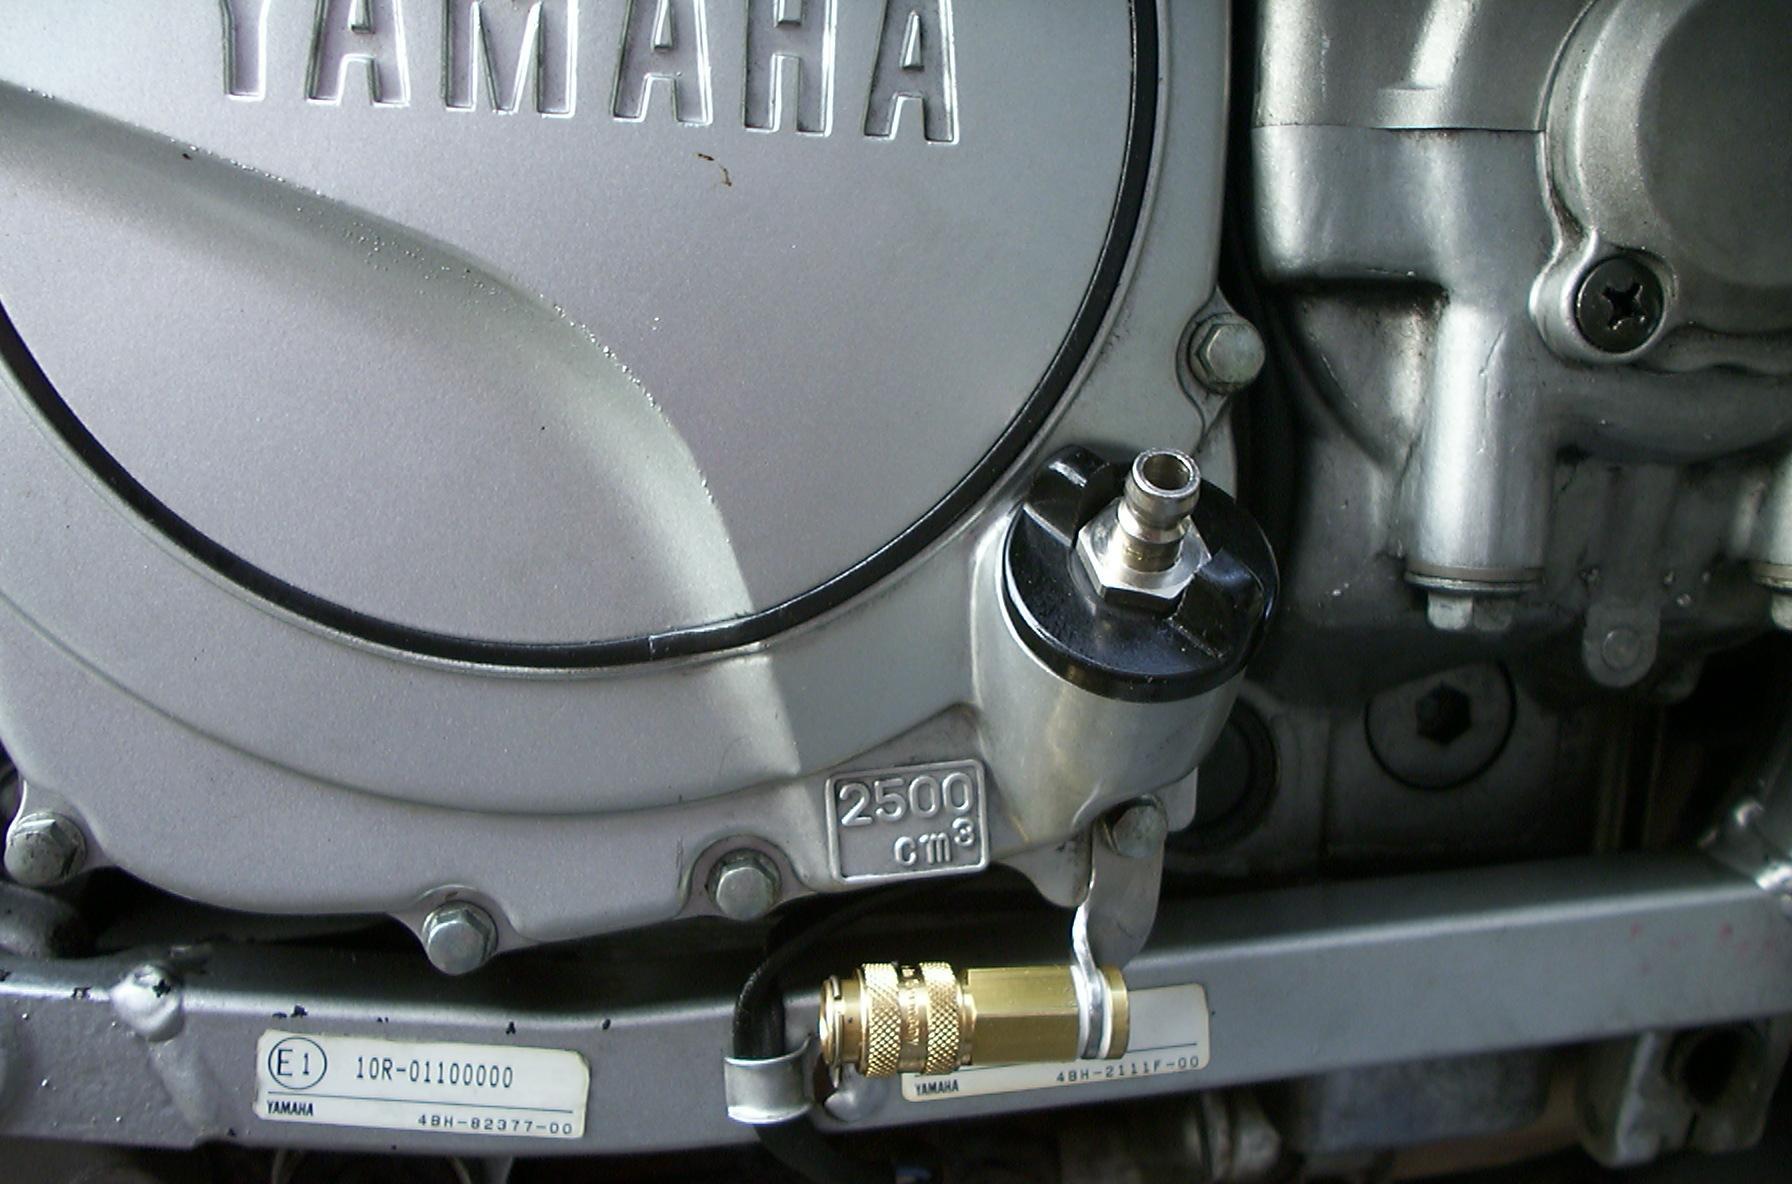
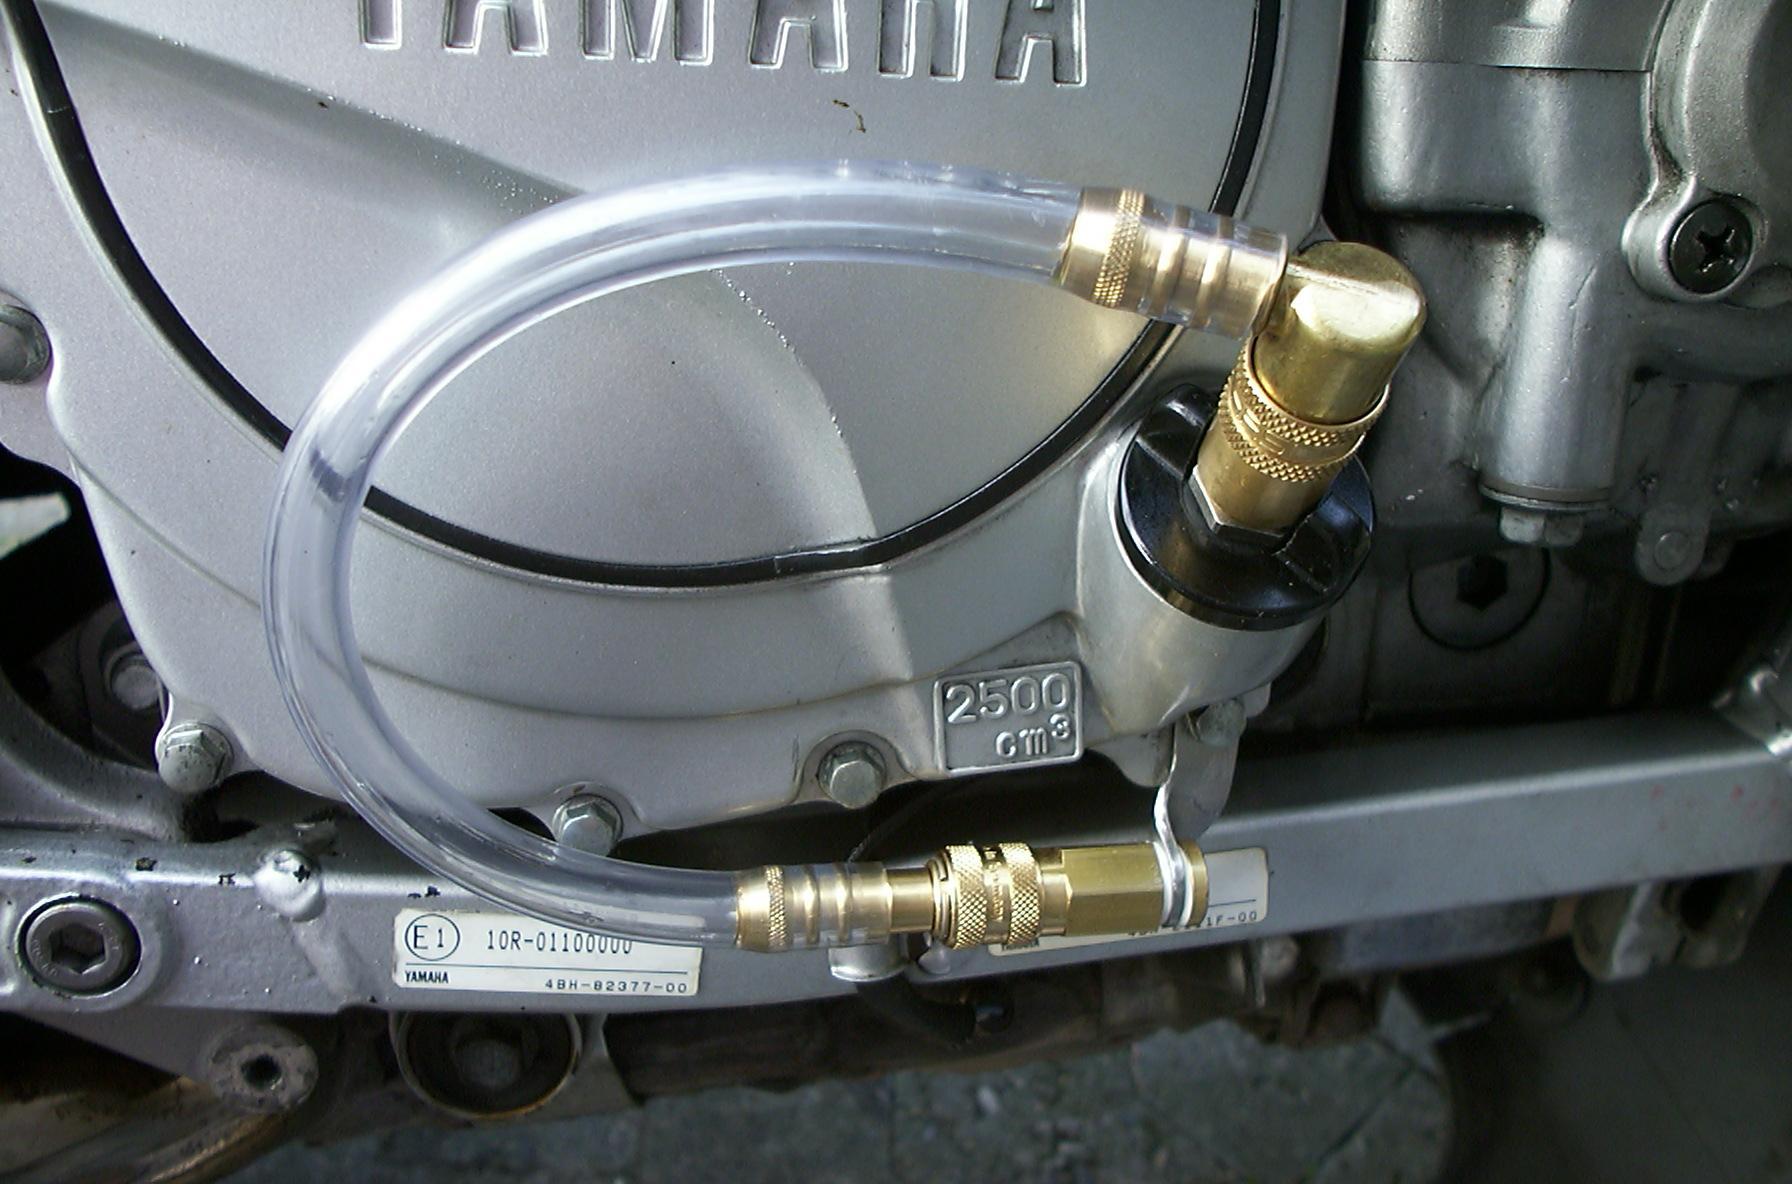
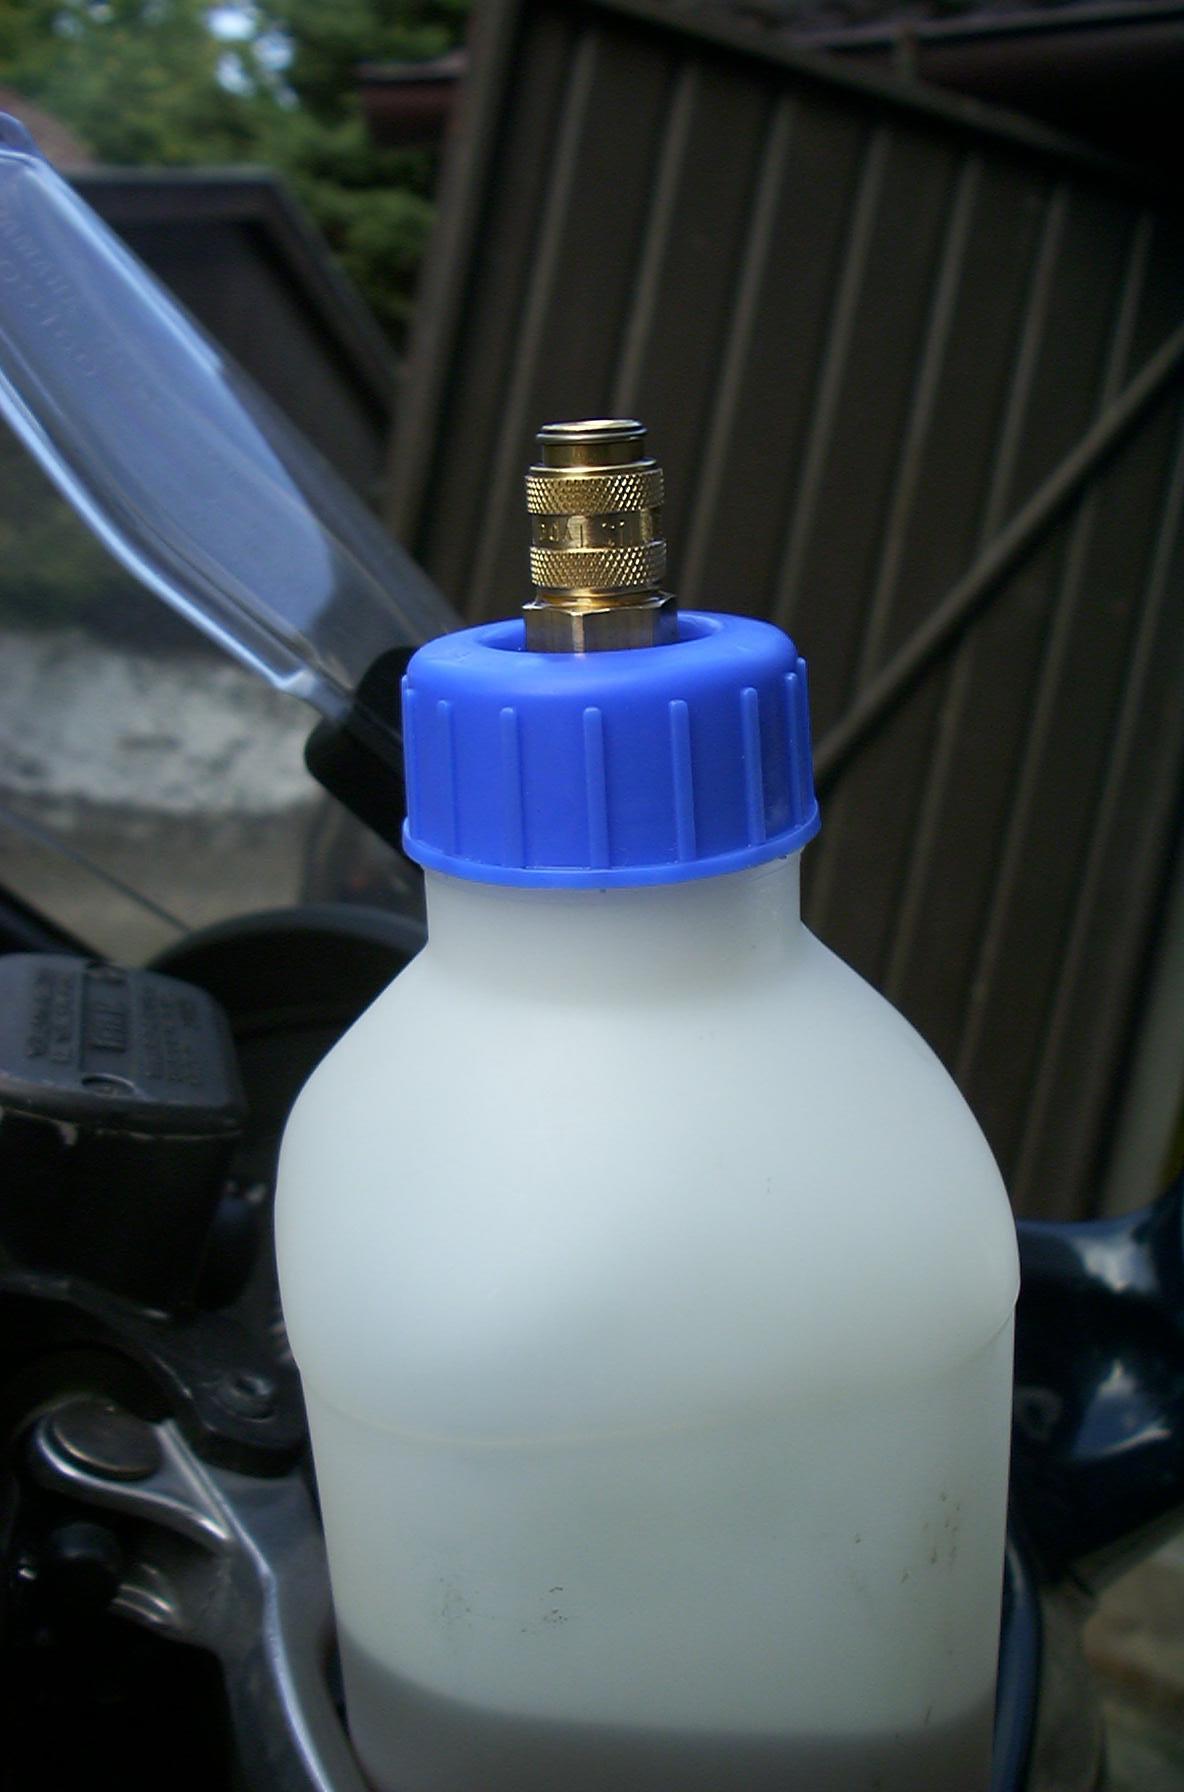
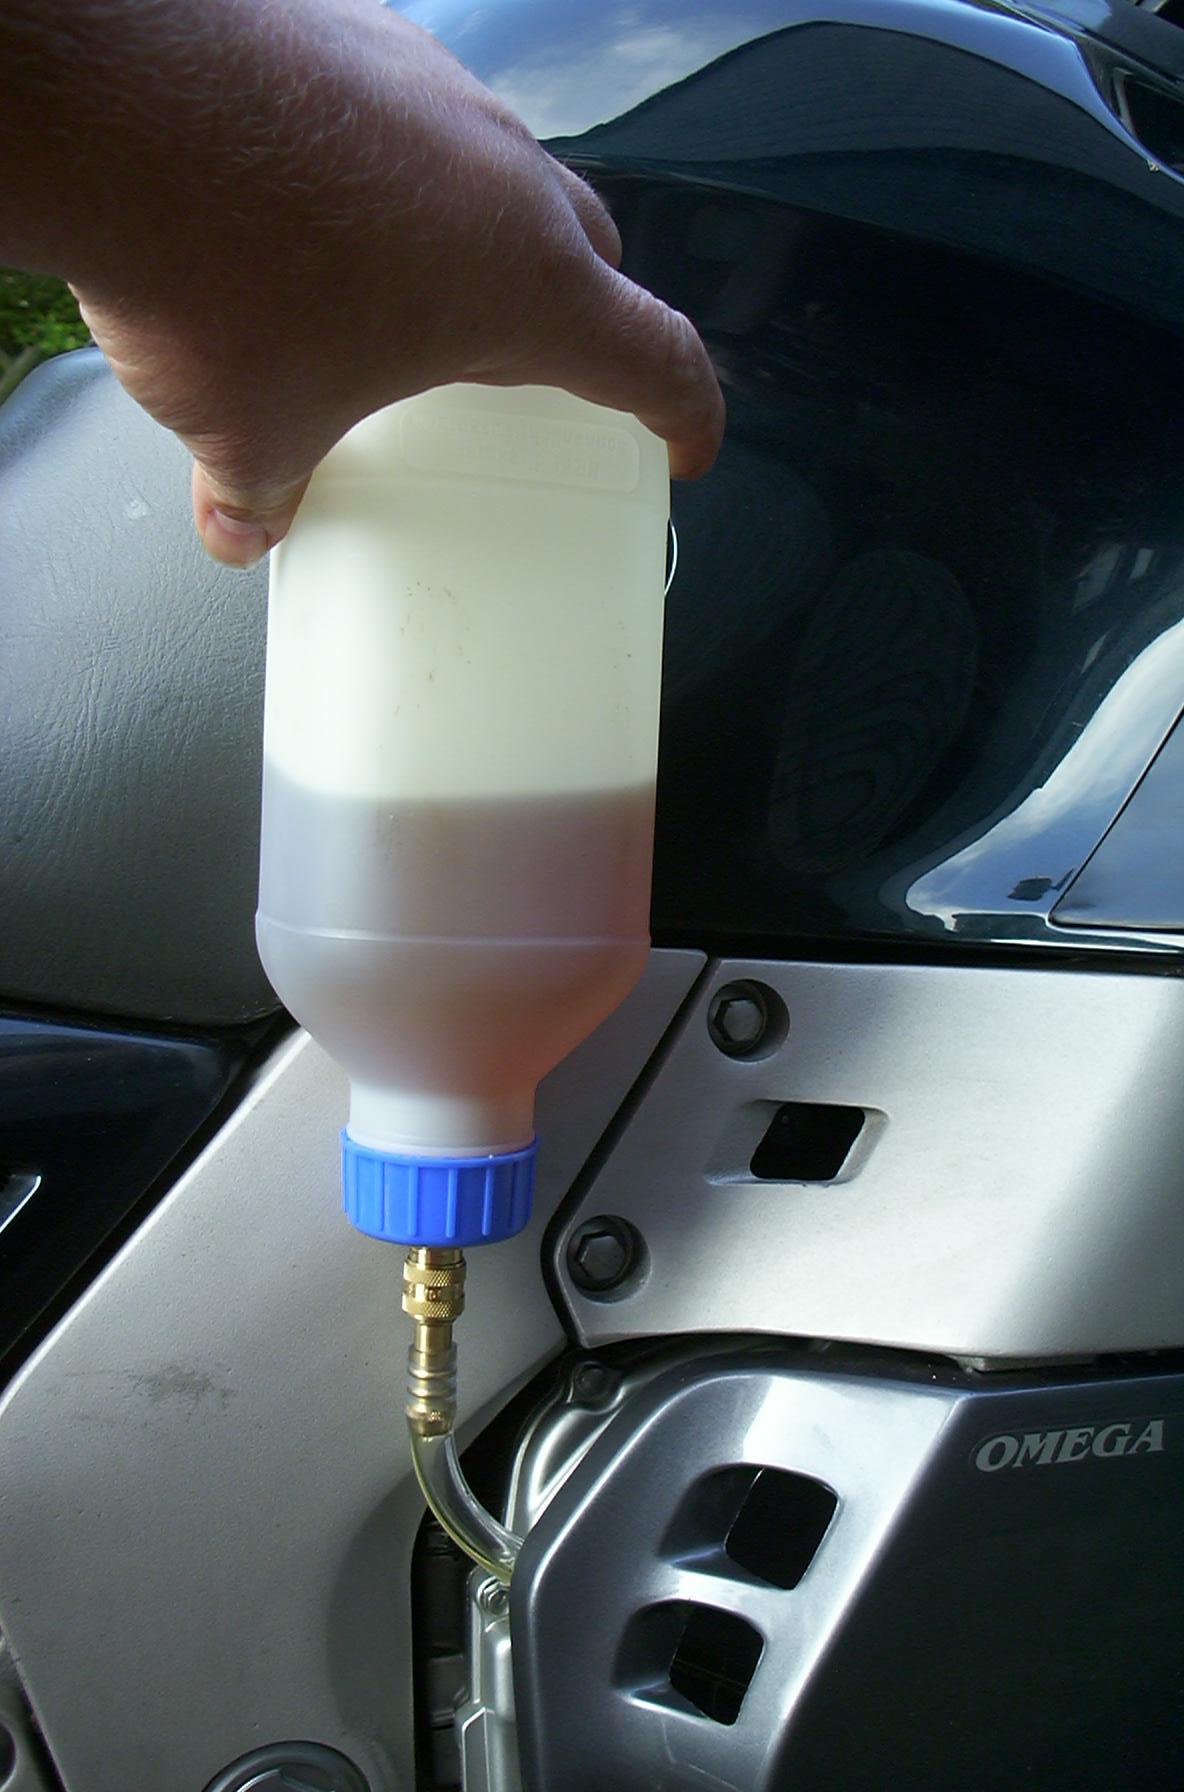
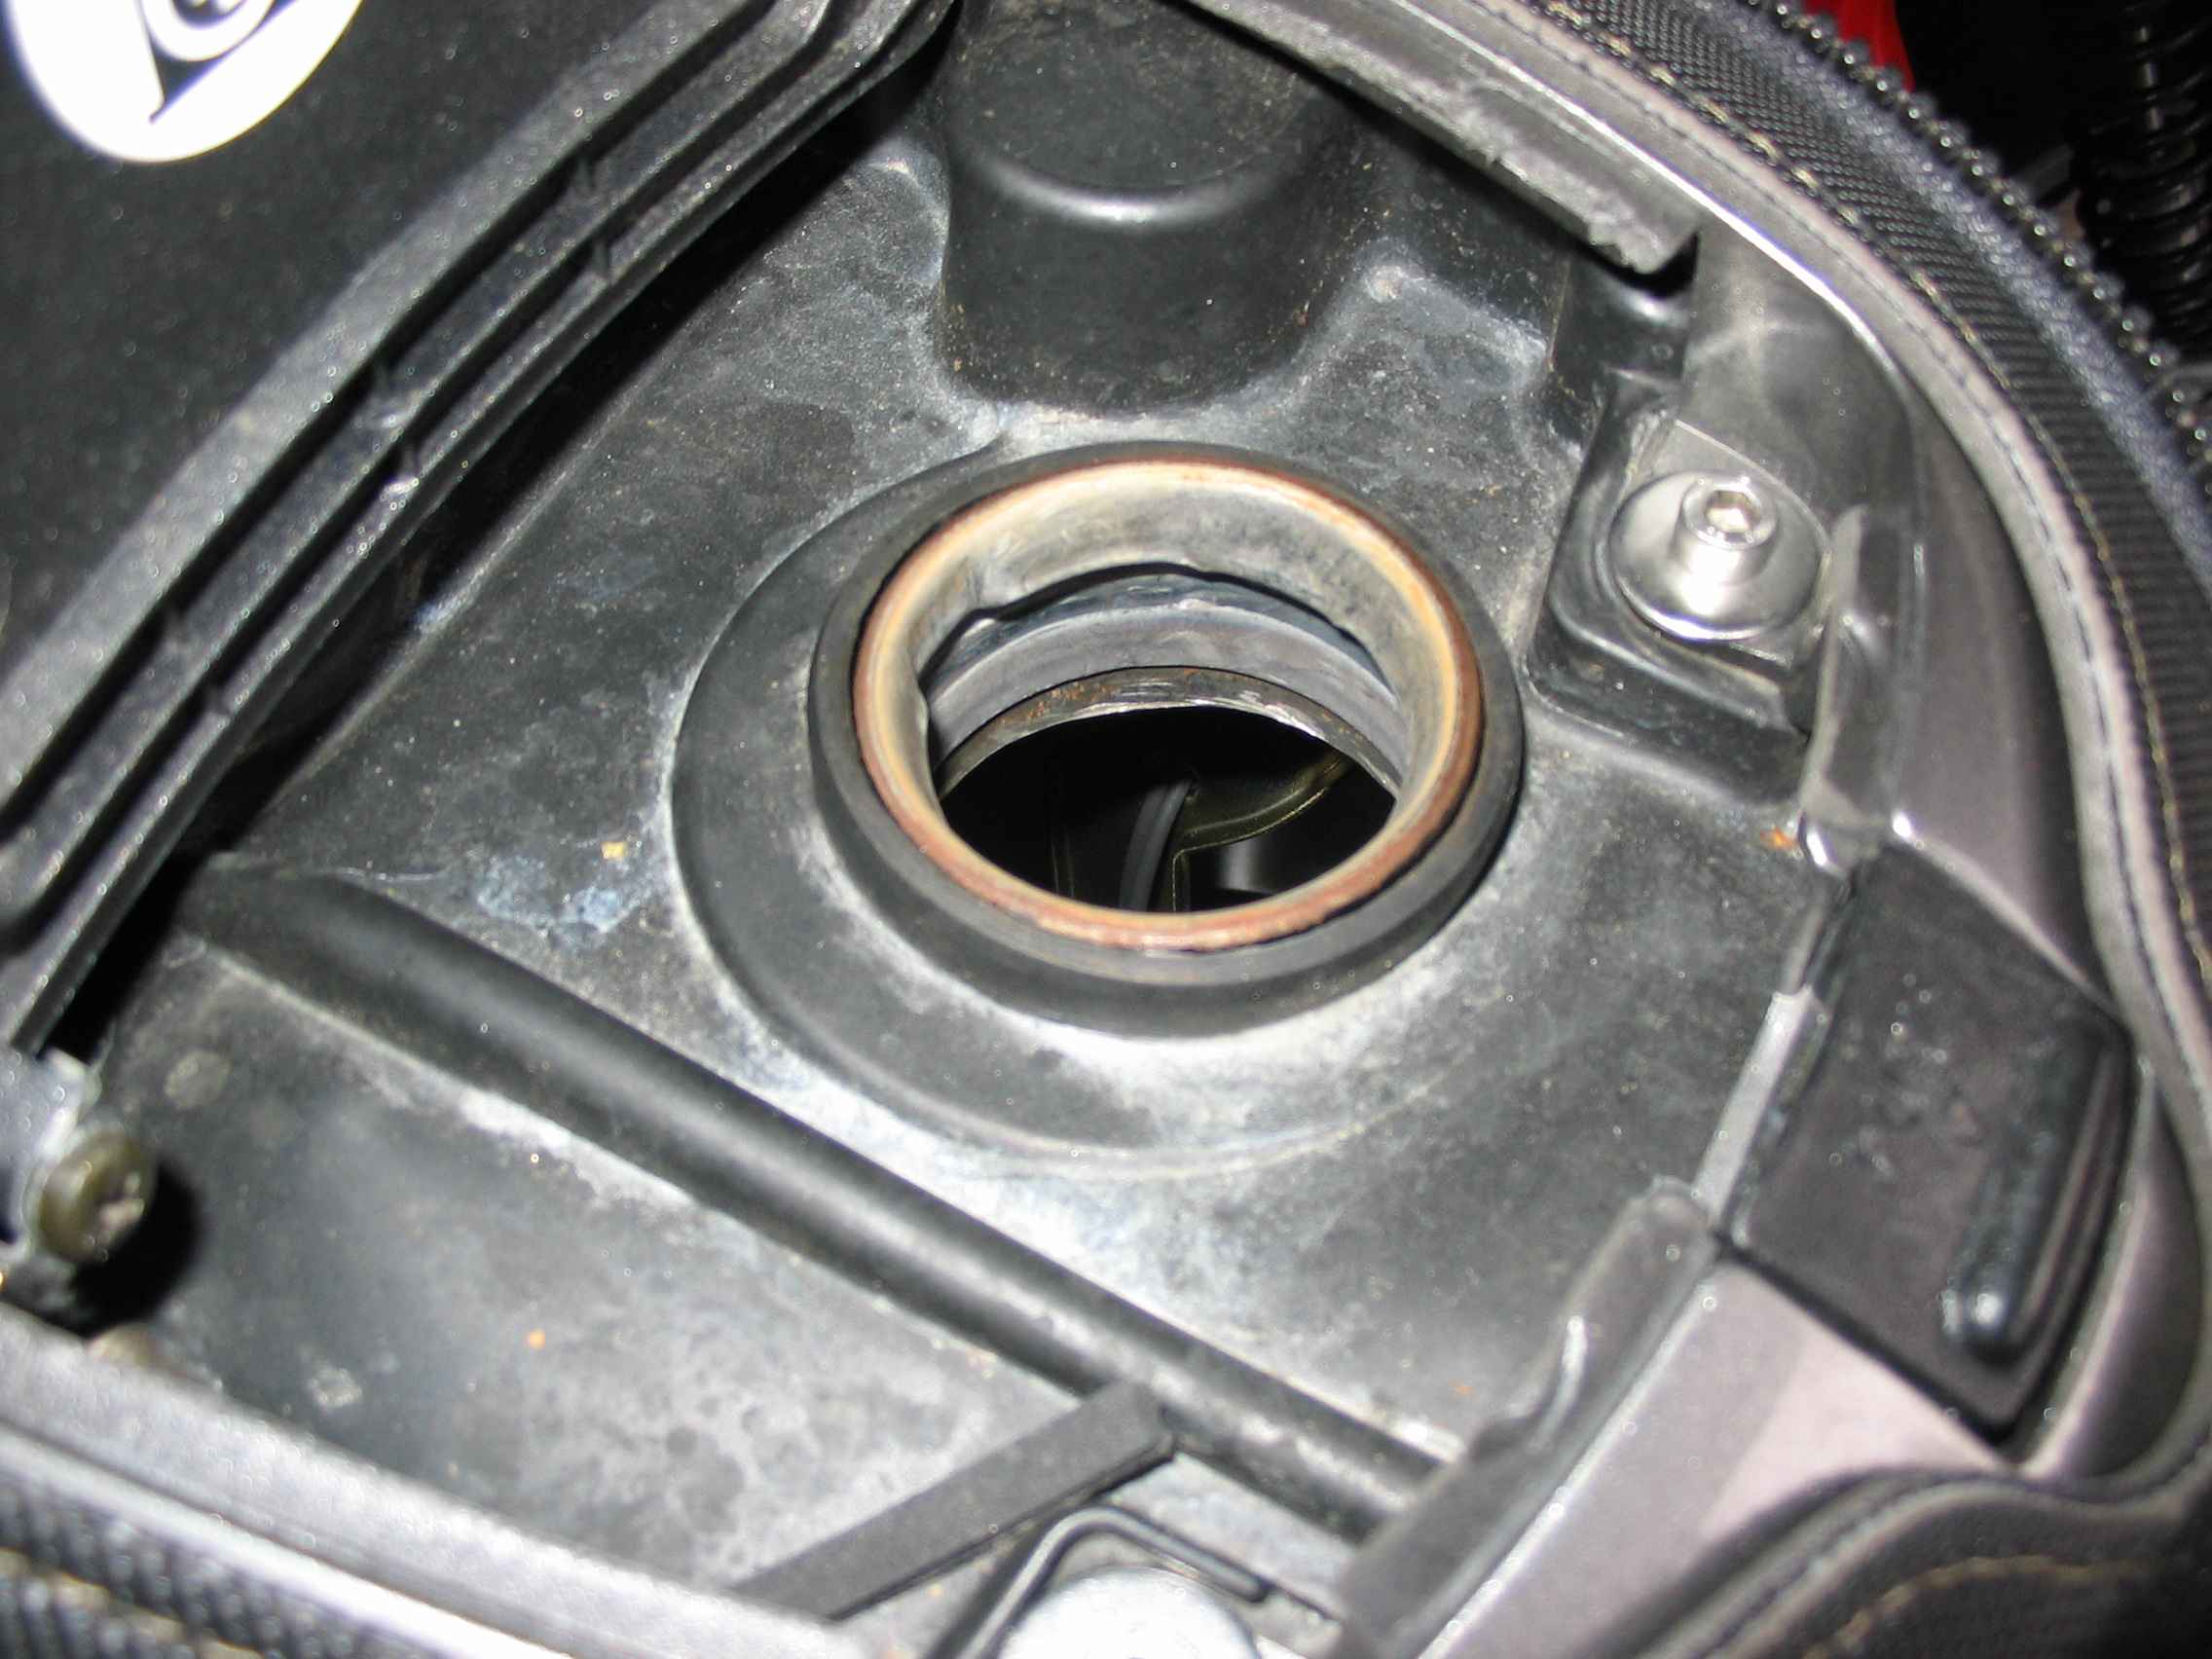
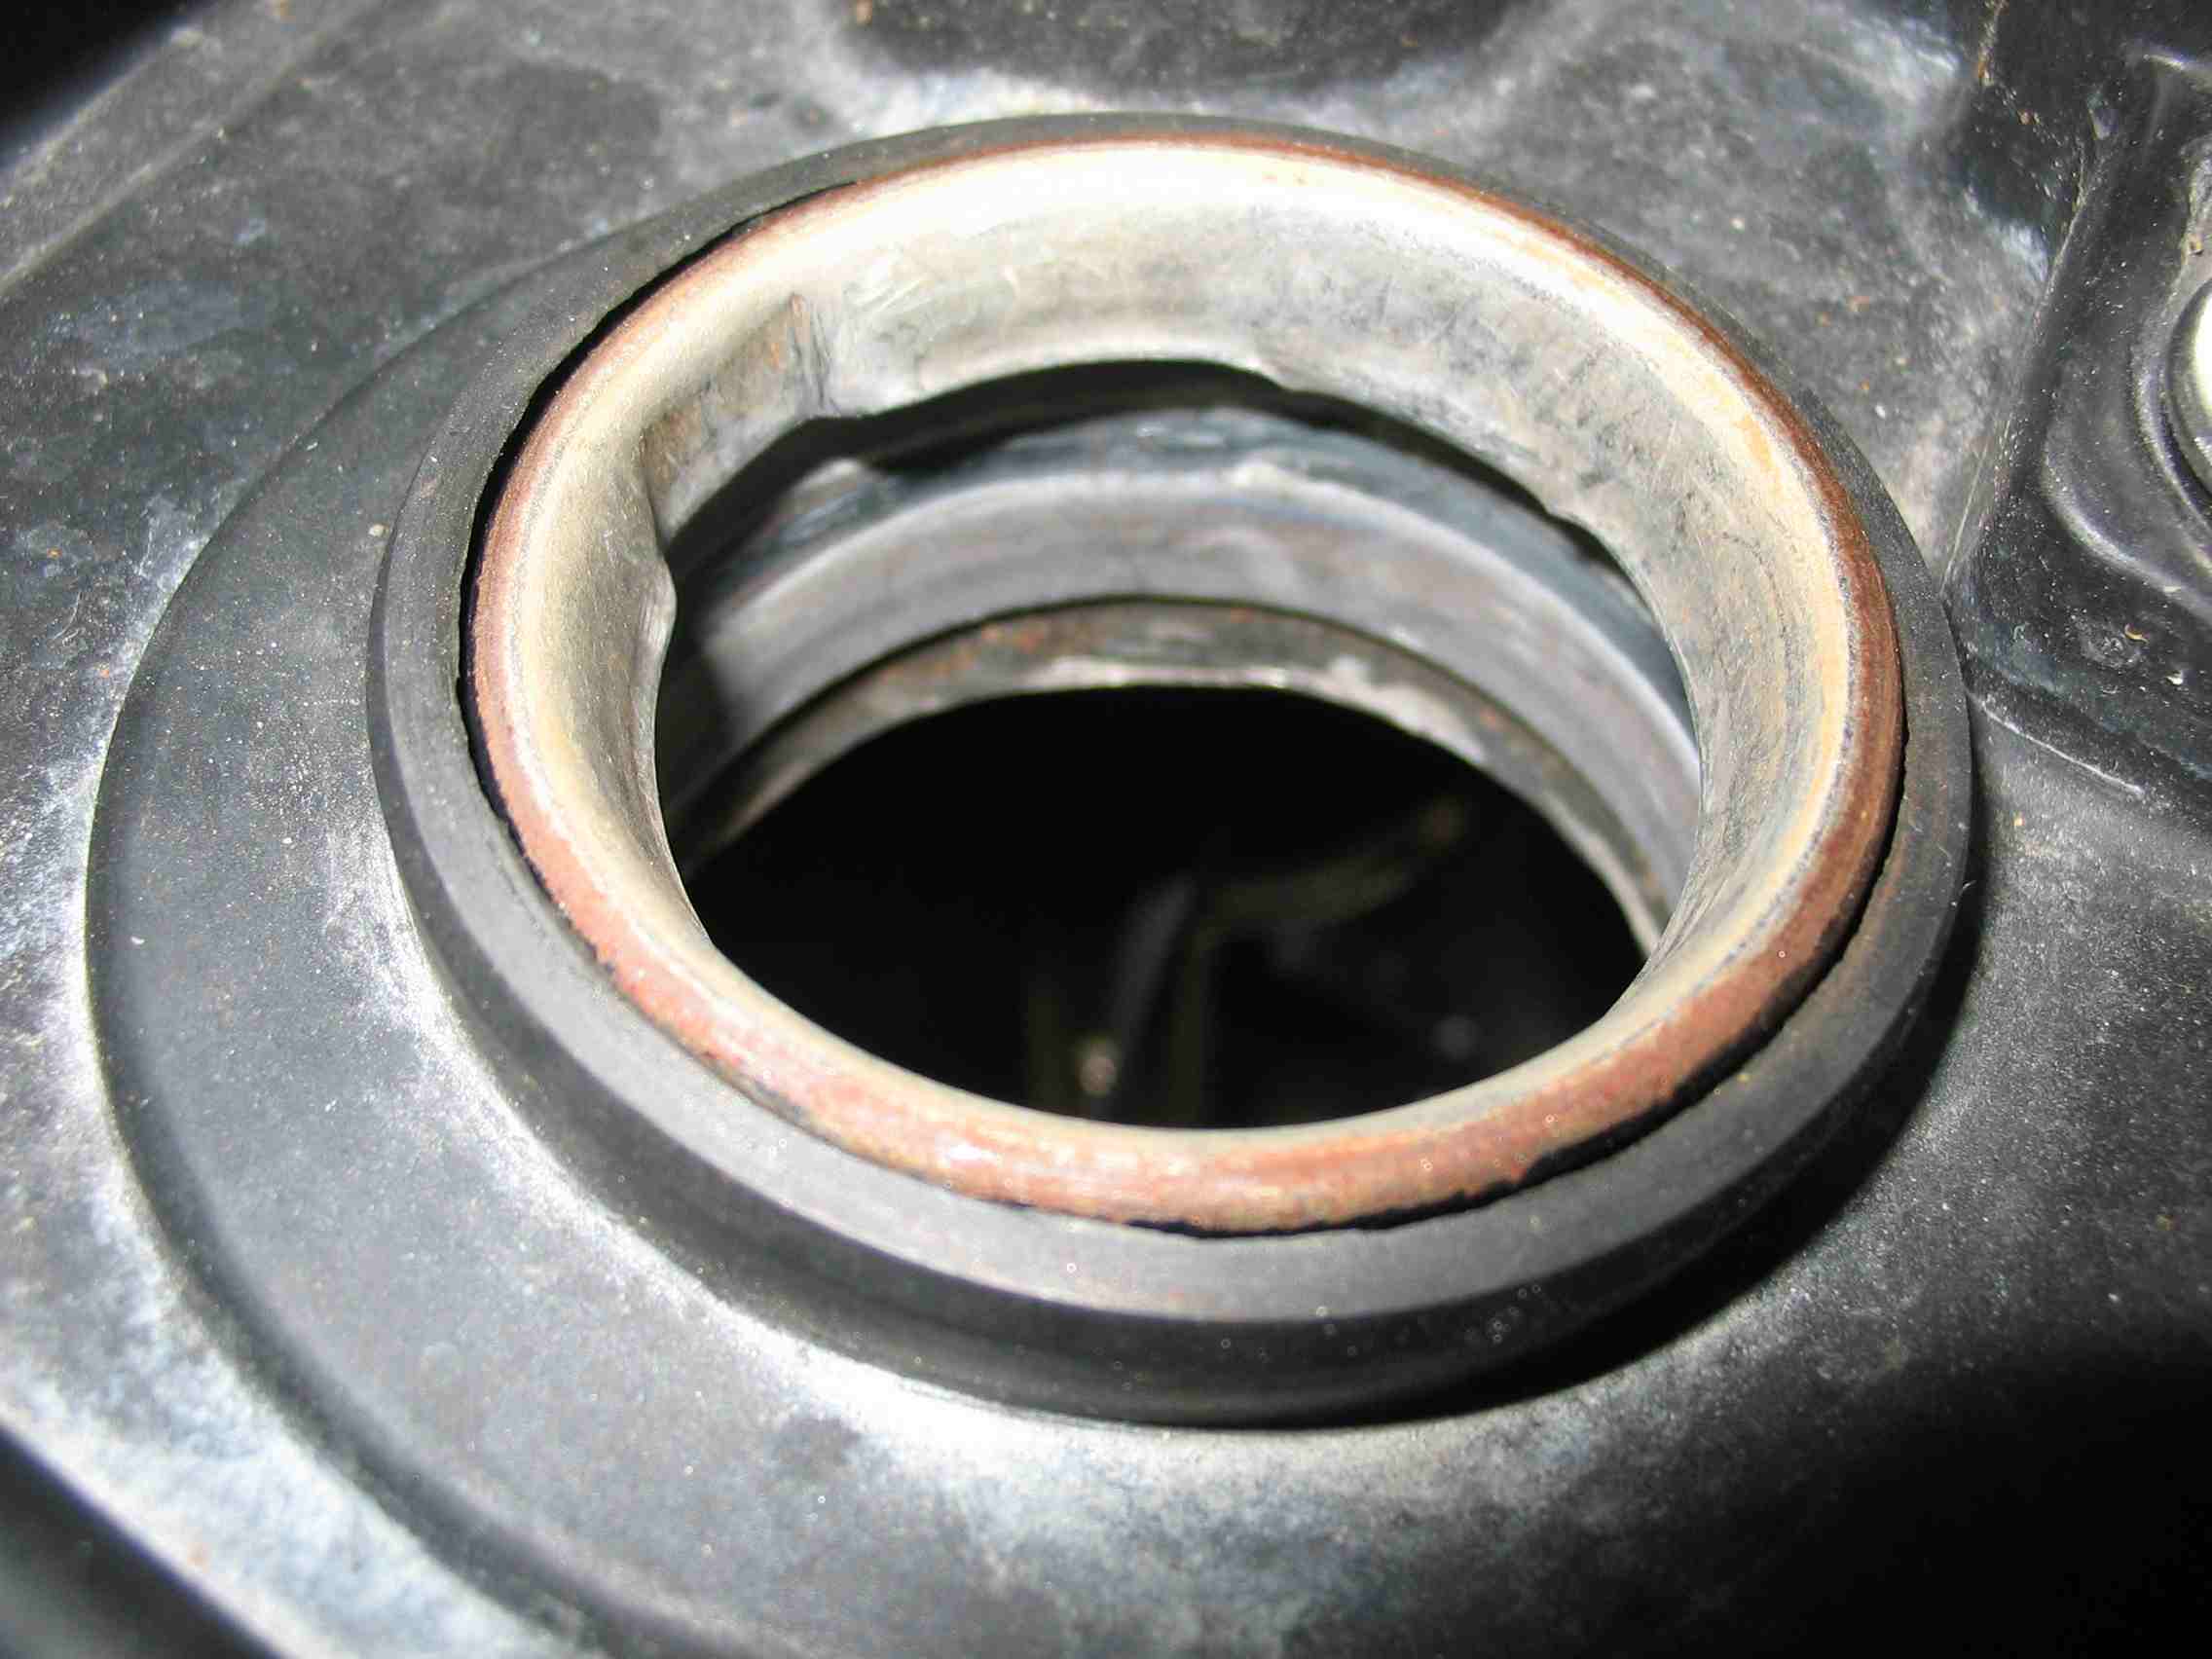
What has let occur good to Andreas Prehl to the tiresome topic of the Oil-Refill at the GTS 1000 correctly. See yourself:
Peter Mund has let the bench of its EFI rebuilt at Jungbluth. You see the result here.
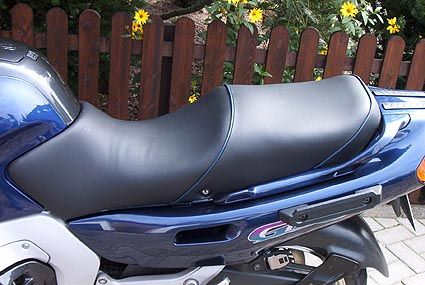

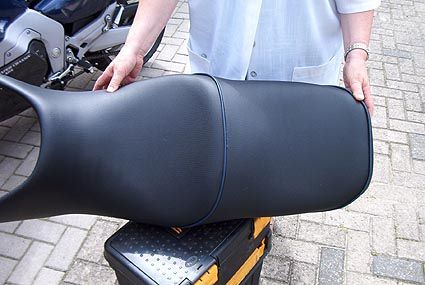

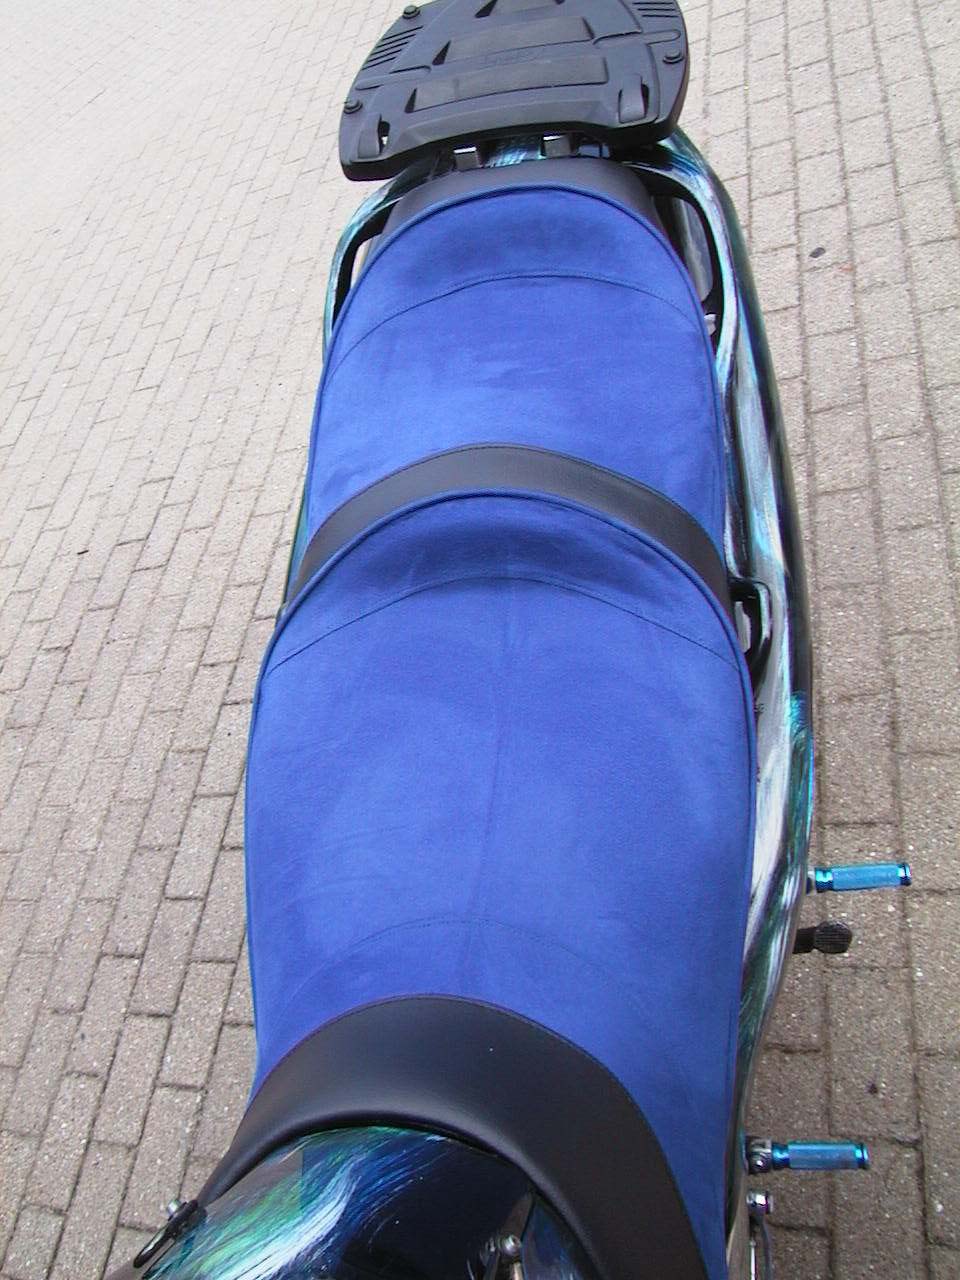
Martin Seifert let his stool alter in France. With a considerable result:
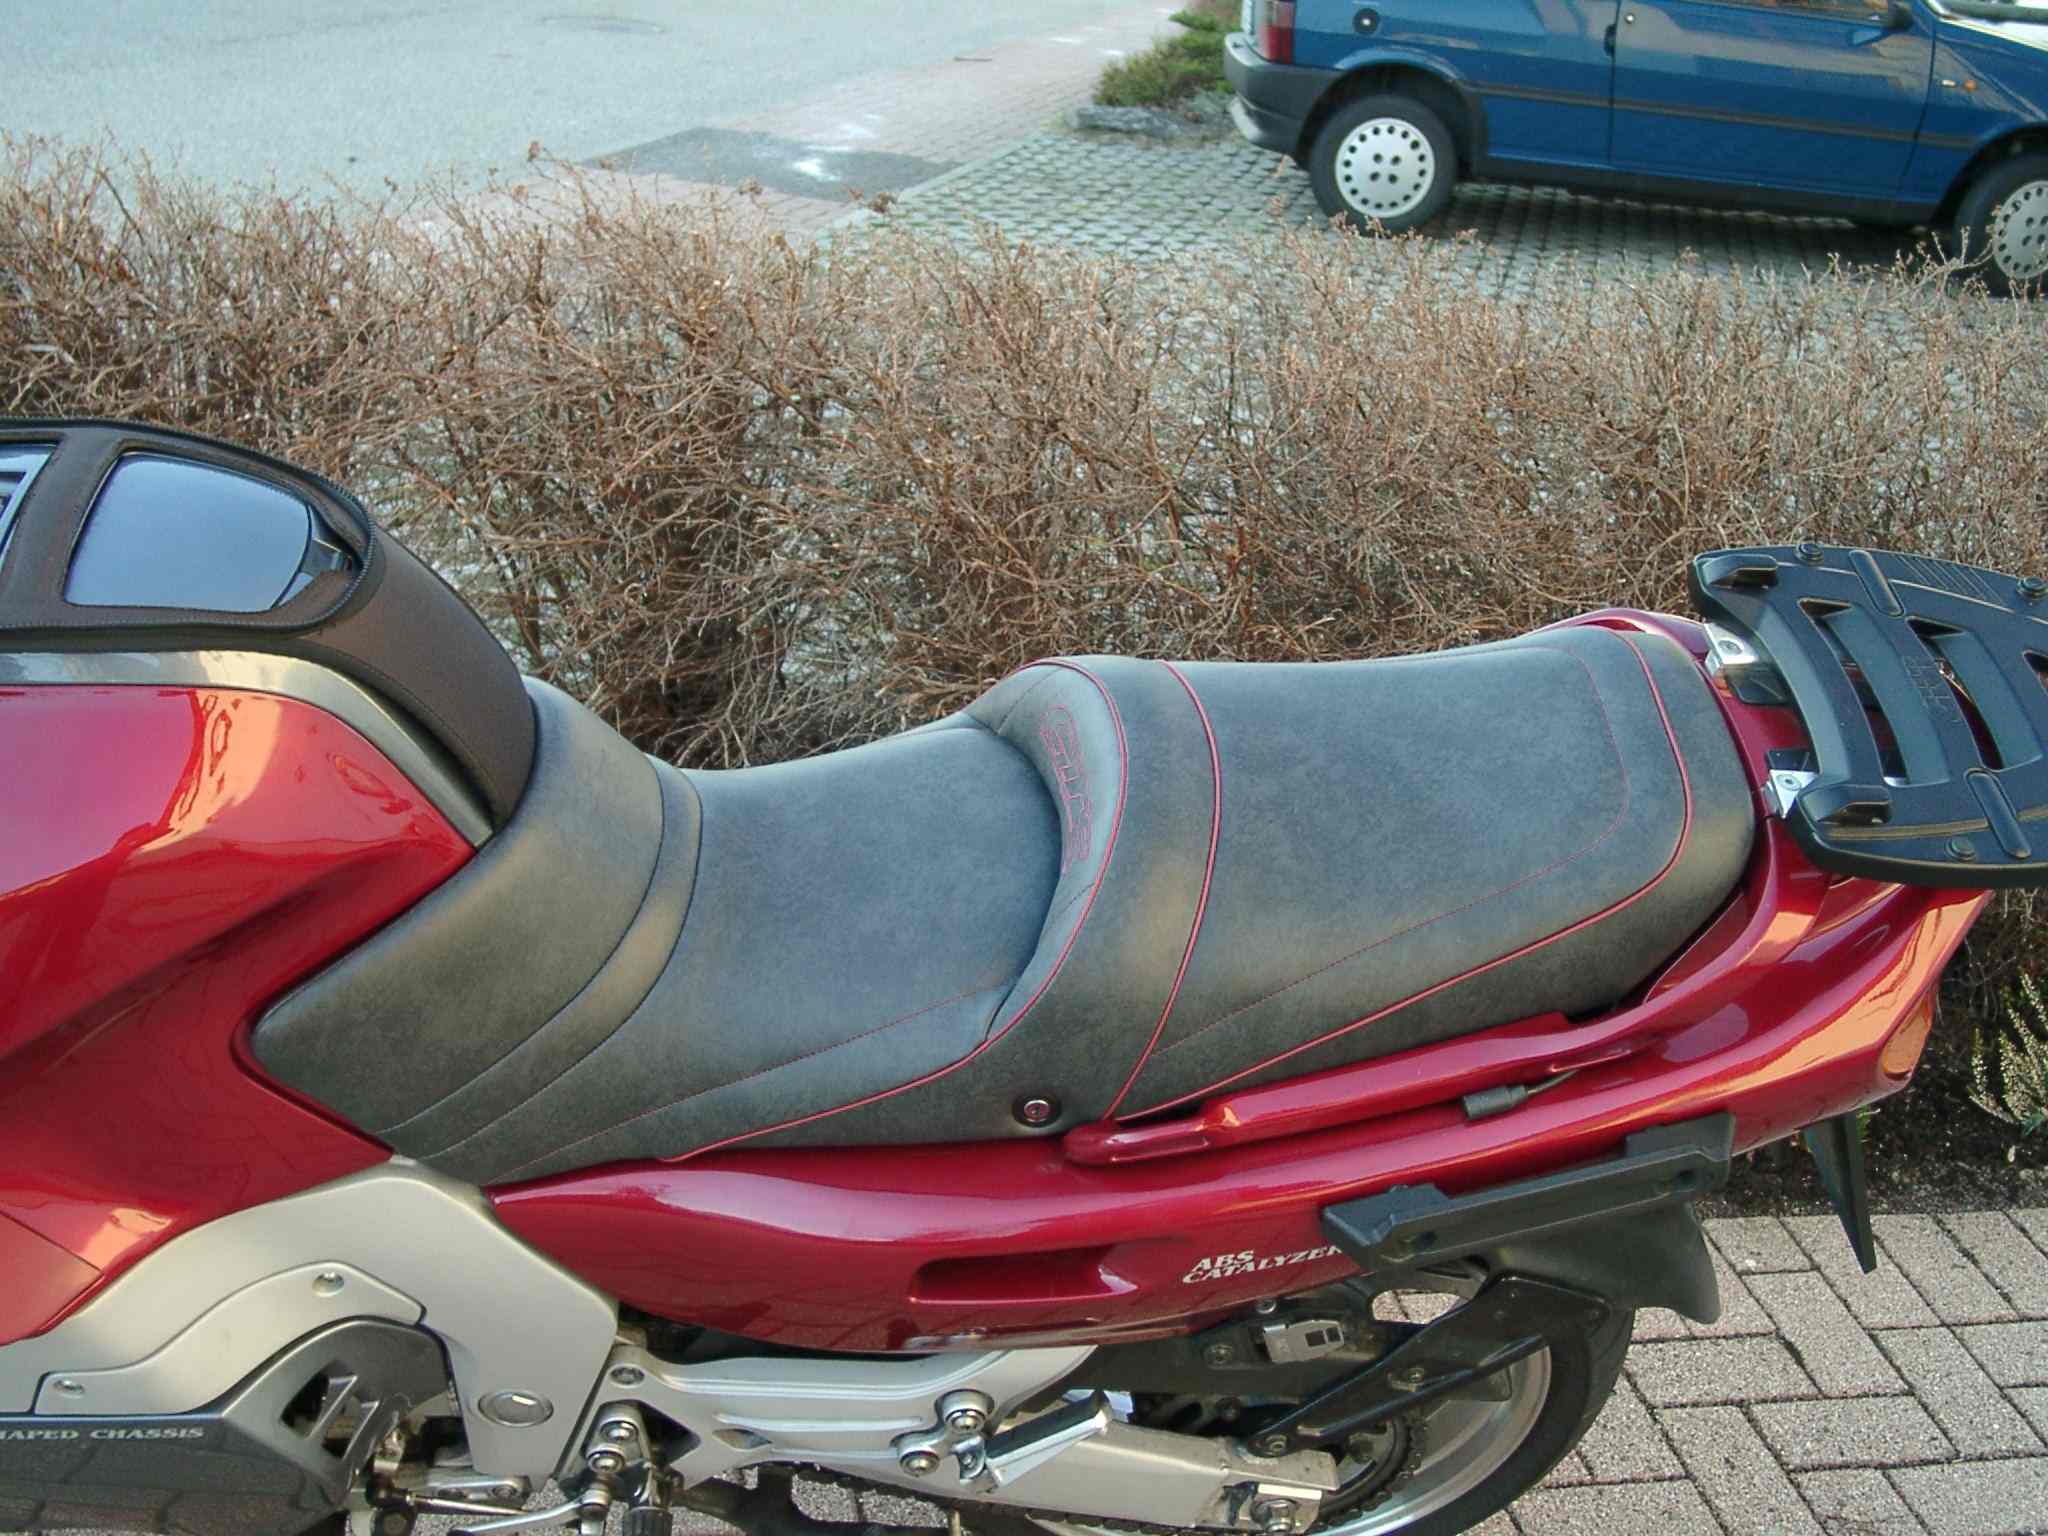
Hello Martin. Here the pictures of my new bench. I have recently had my bank changed for me at Topsaddlery. I must say I am overwhelmed by the result. Look under the following link: http://www.topsaddlery.com/de/sel_visu.php4?marque=8&type=261. There one can the colours and the type choose themselves for the upholstery. There is a list with dealers who represent Topsaddlery. I have paid 248. € for my bench, incl. the shipment to France and back. The new bench has received GTS stroke in the suitable colour to the motorcycle, one. My EFI is by the way red and I have chosen the leather and the Keder suitably with the dealer who has all leather colour samples. The whole has this lasted for dispatch just, incl. 2 weeks. Greetings Martin Seifert.
This excellent copy of a bench comes from Harm Reesing. It is an altered original bench:
![]()
You will contact the Saddler? Mailto: sattler@gts1000.net .You immediately receive answer.
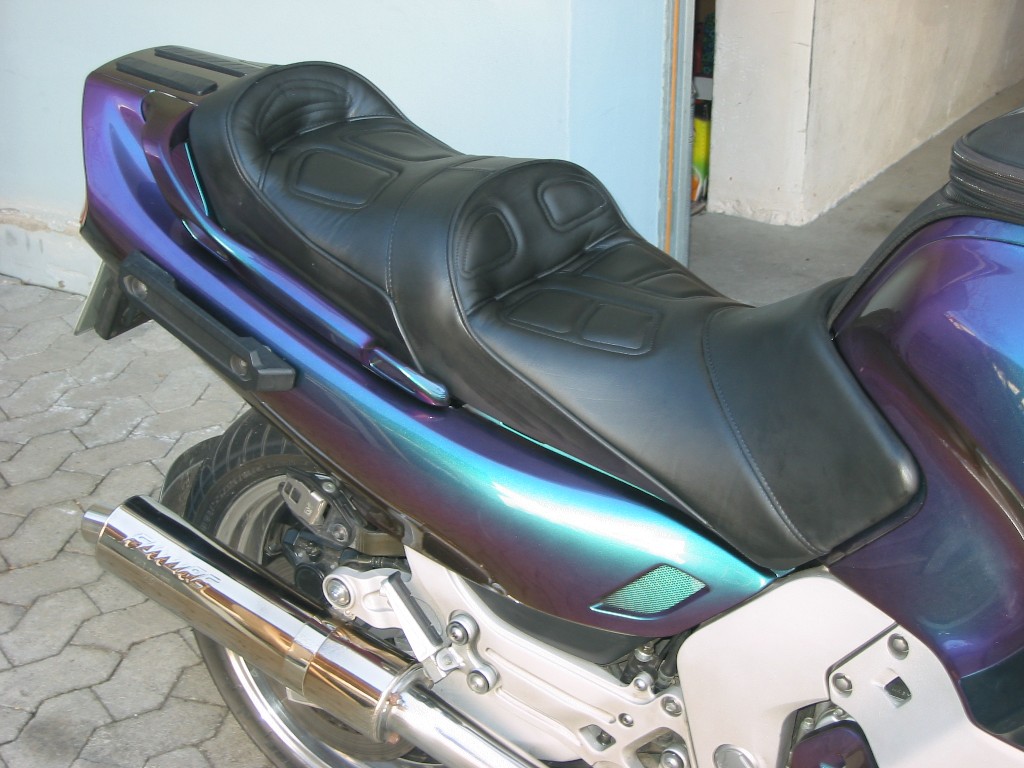
We have had our Corbin sofa renovated:
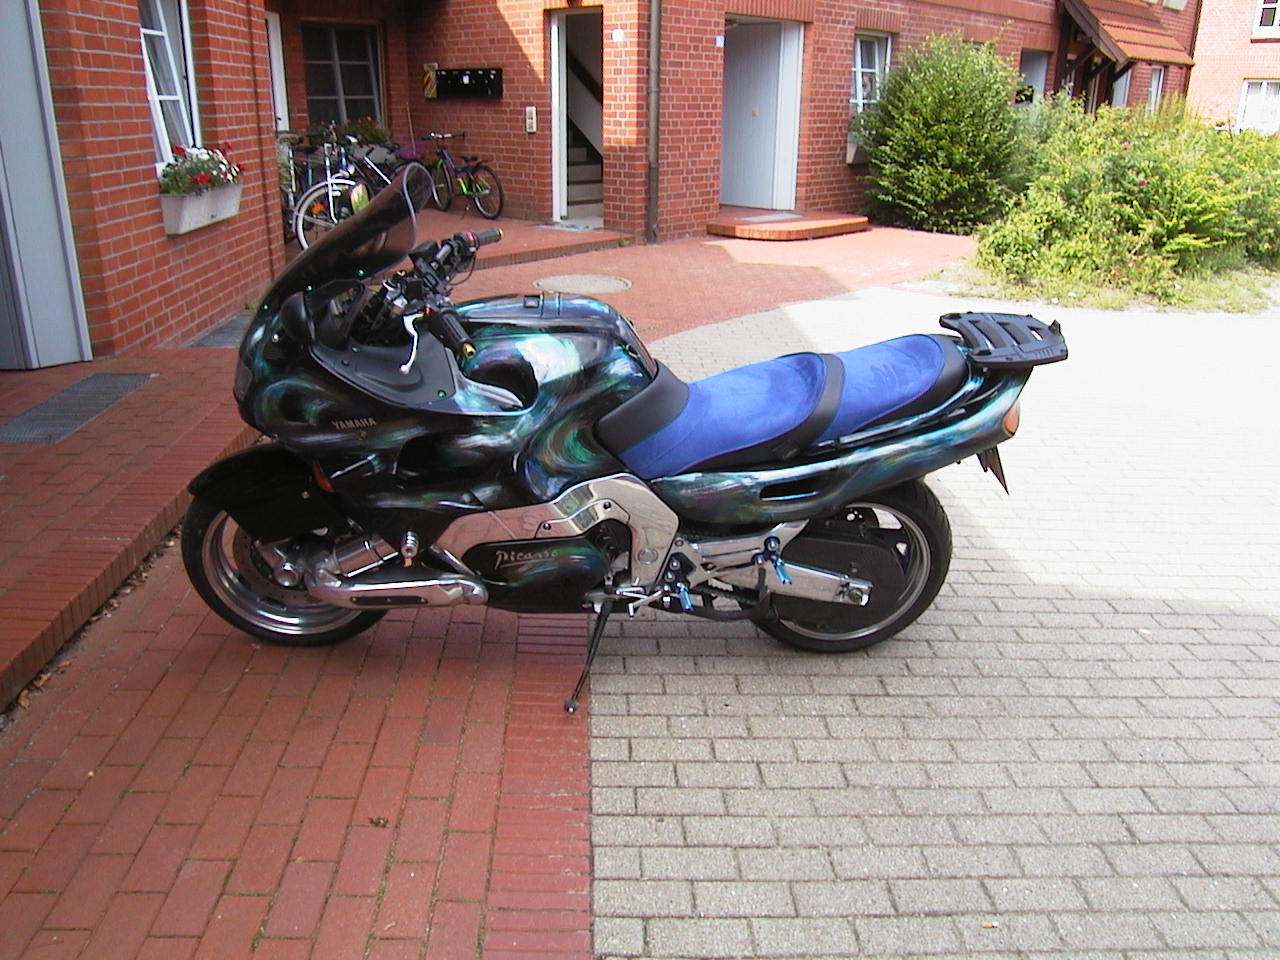
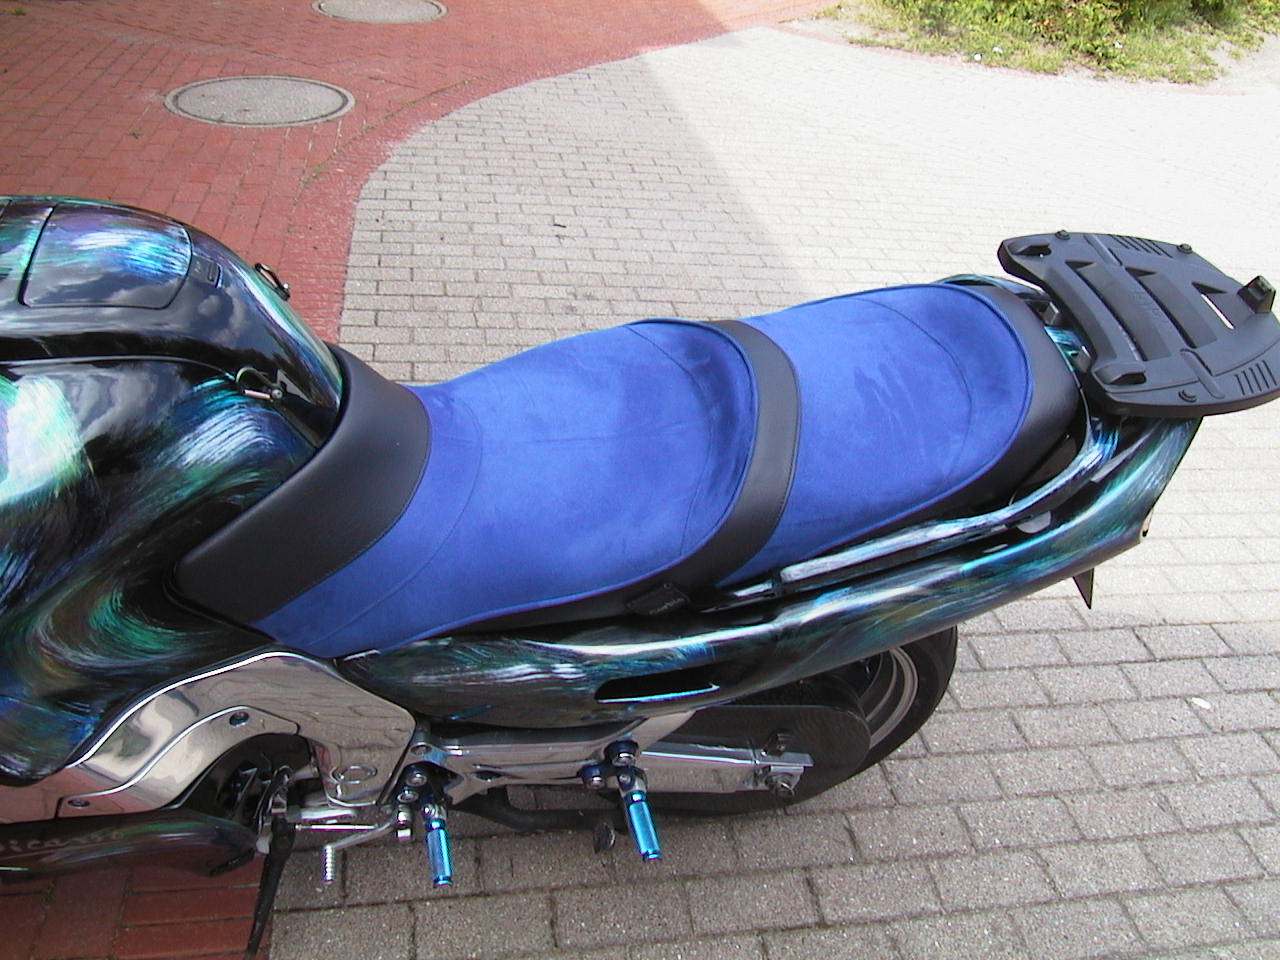
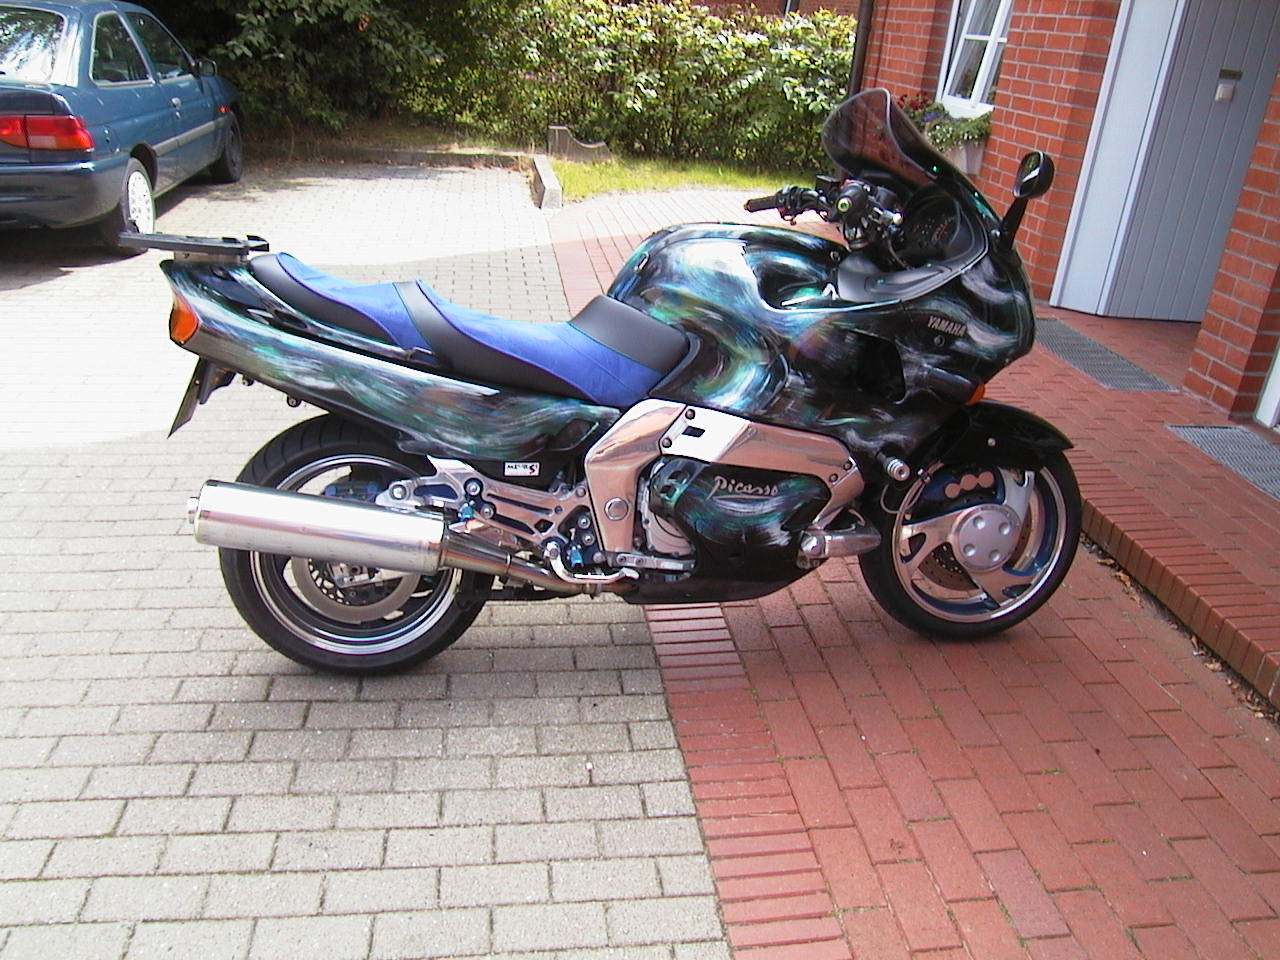
Since everybody who has his bench clothed newly has worked with leather somehow, we have gone another way once. Our Corbin sofa needed it really urgently and the design of the Picasso is anyway already unusual there, why then at the bench stop that? No Sir. The black material is high-quality artificial leather and the seats are with a Microfaser similar, absolutely waterproof material obtained (no Alcantara). The material comes predominantly onto yachts to use and therefore is conceived for great loads and extreme weather influences. Of course a very big advantage is also the price for this really well done work: Less than € 200.
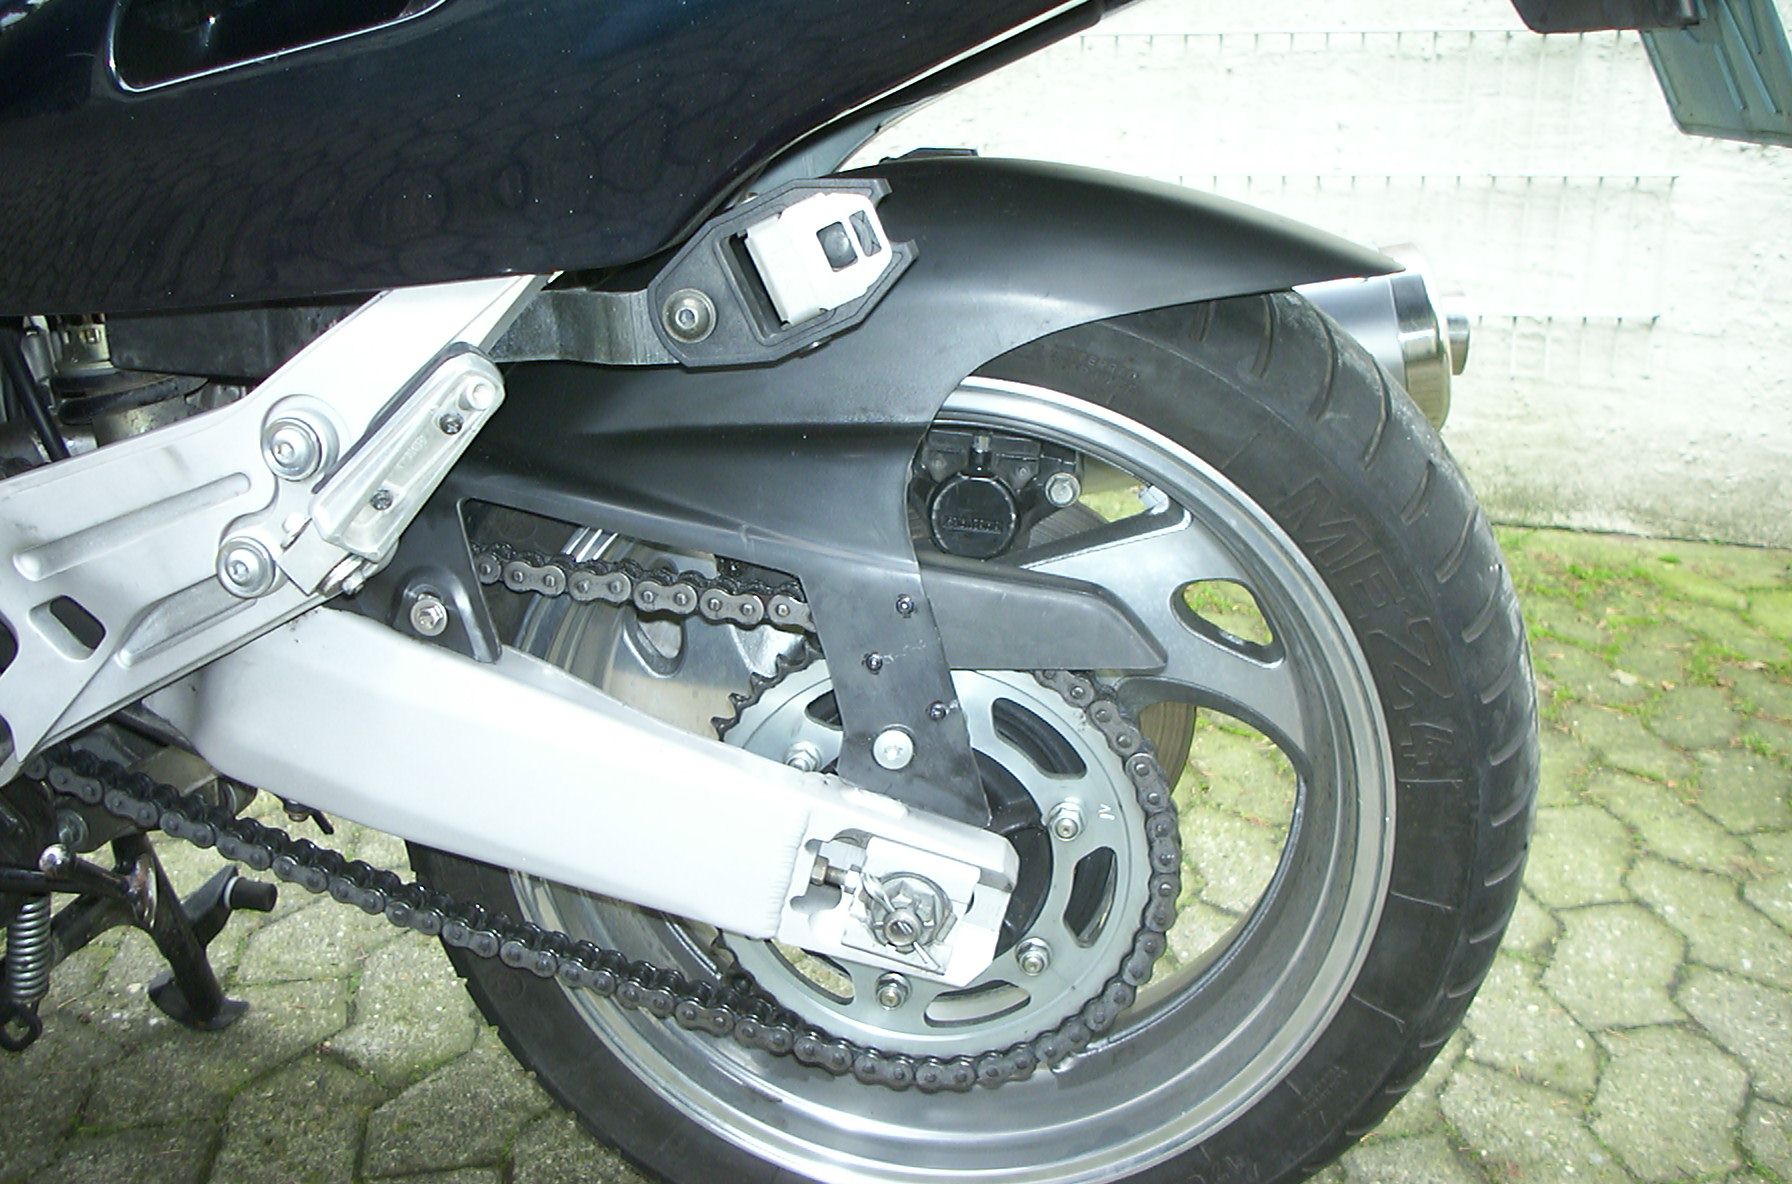
Our "Mr. Screwer" Andreas Prehl has hit out again. Have a look at his new rear wheel cover ...

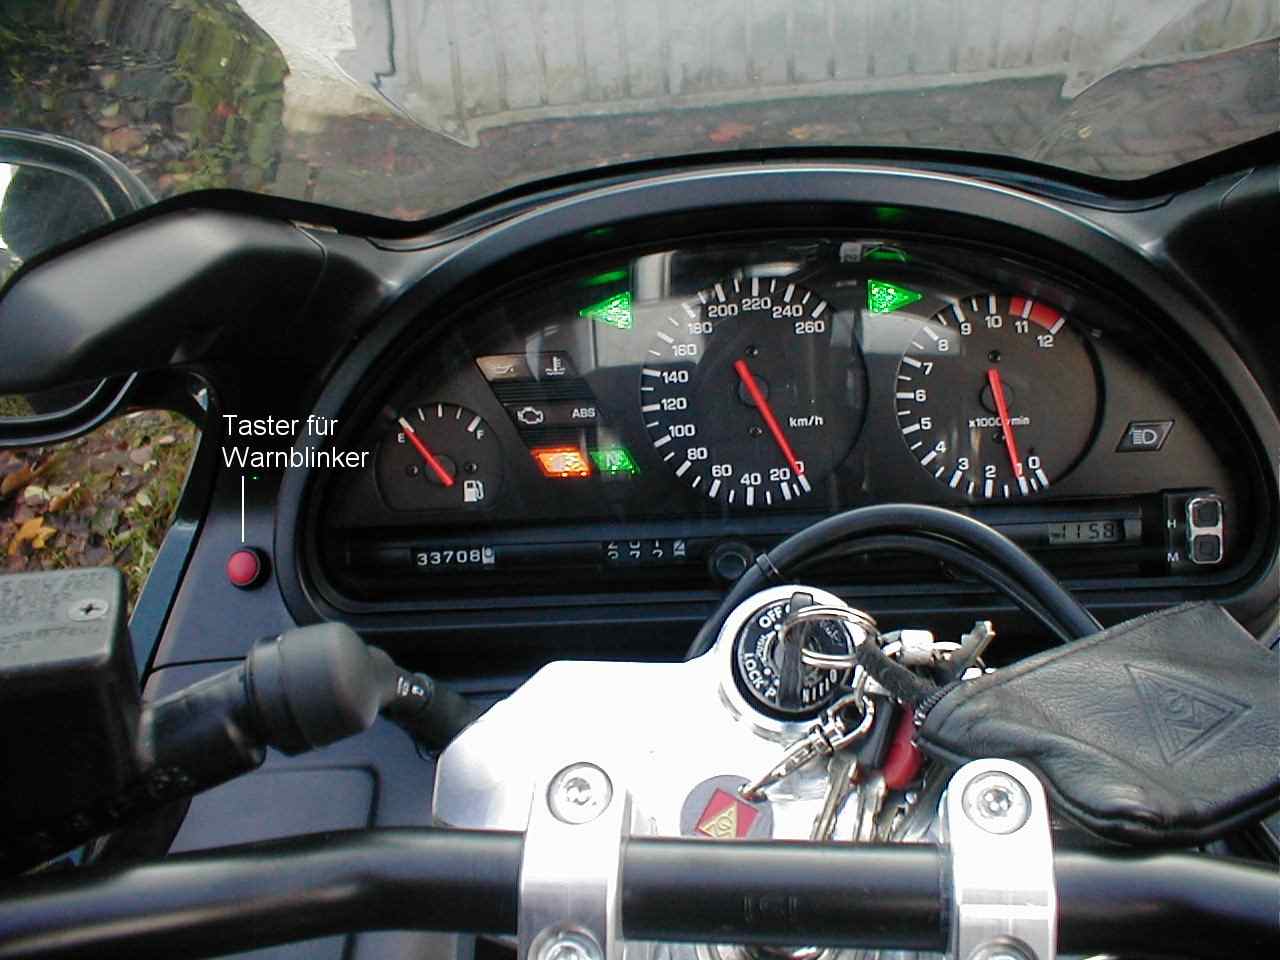
Warning indicators are always a topic. Arno Kretzer has himself built one together with his neighbour.
Hello Martin, what else can a man do in this weather conditions? I have always been interested in flashing warning lights. The plants available from the accessories trade had a decisive disadvantage at my GTS caught to make these plants independent to themselves as of approx. 5000 turns. This then sees making out most respectfully, if one shoots around the corners, place well, too but this is a little annoyingly then taken in the reason anyway. The electromagnetic disturbances of the EFI are well flashing warning lights reason for it become independent this one. So I and my neighbour have for Volkmar, his sign GPZ 1100 driver, made an own one for us. The first attempt was also not quite happy but the second test was a complete success. It is this plant to obtain (looks in on Volkmar's home page) www.volkmarheinz.de either from me or from Volkmar. The heating handle control shown there comes as near. Enclosed still a couple of pictures of the flashing warning lights. Cost such approx. € 50 plus € 8 transportation costs. Greetings Arno.


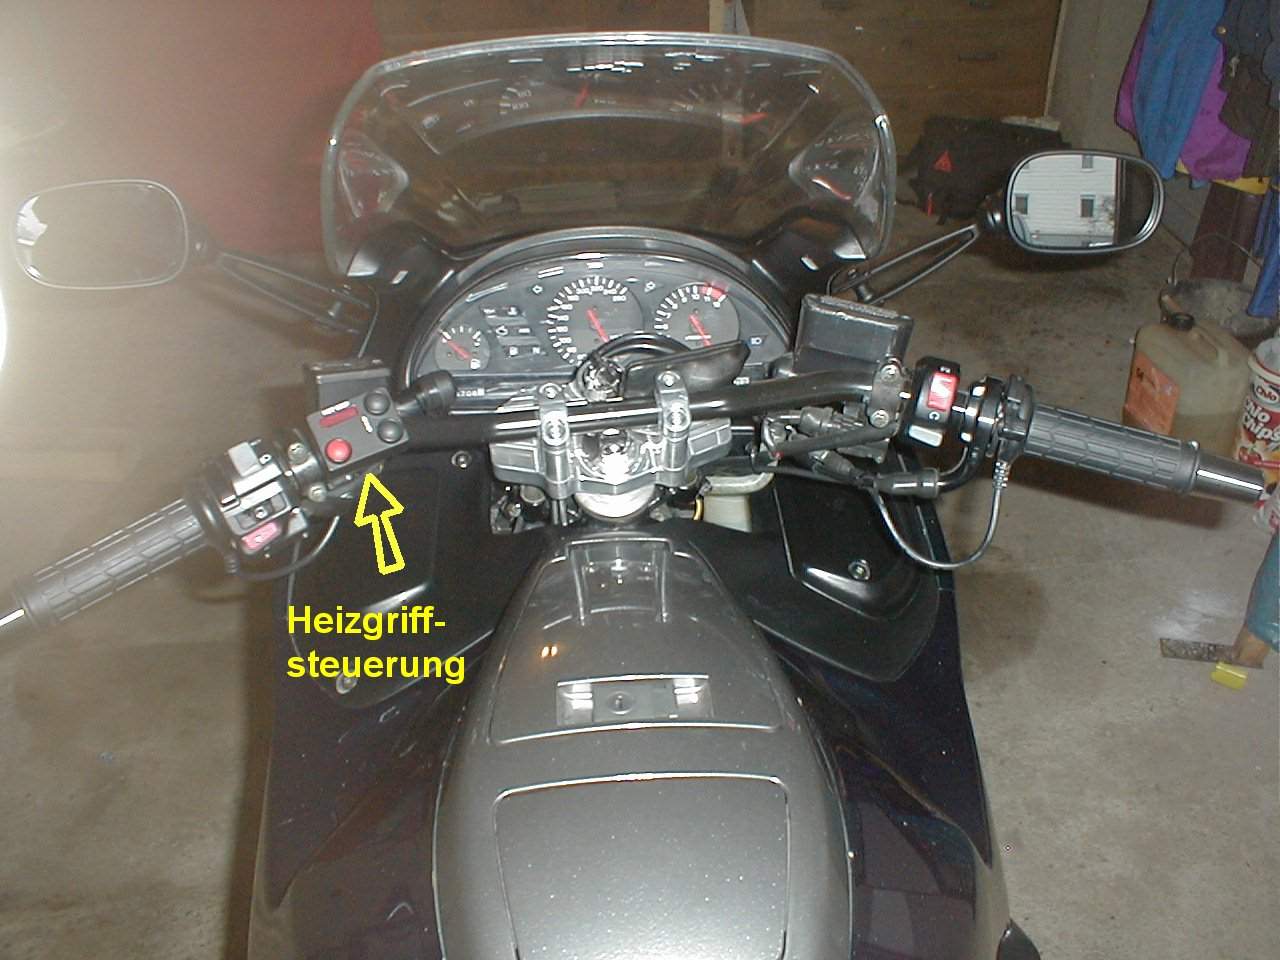
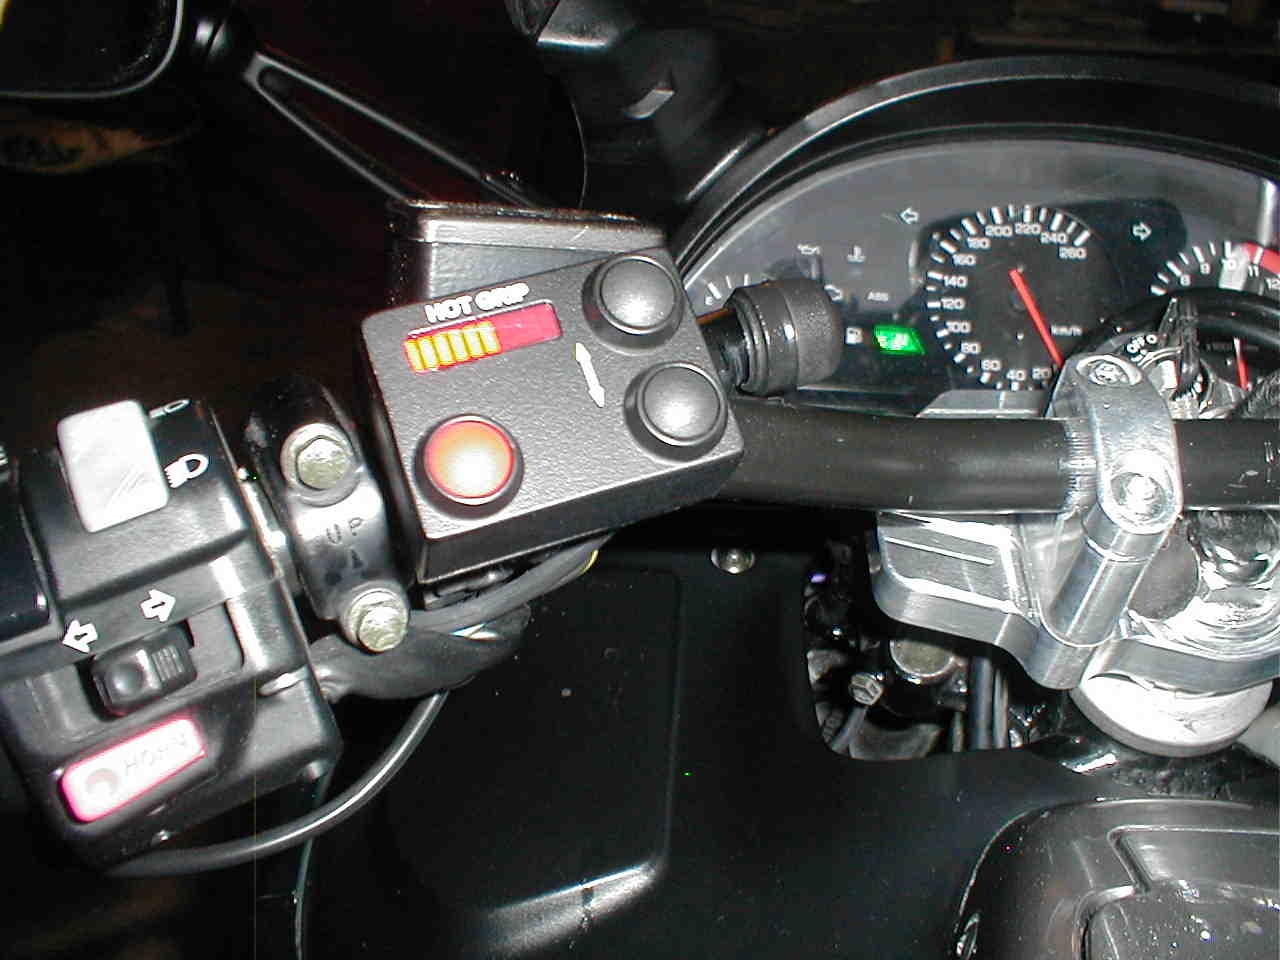
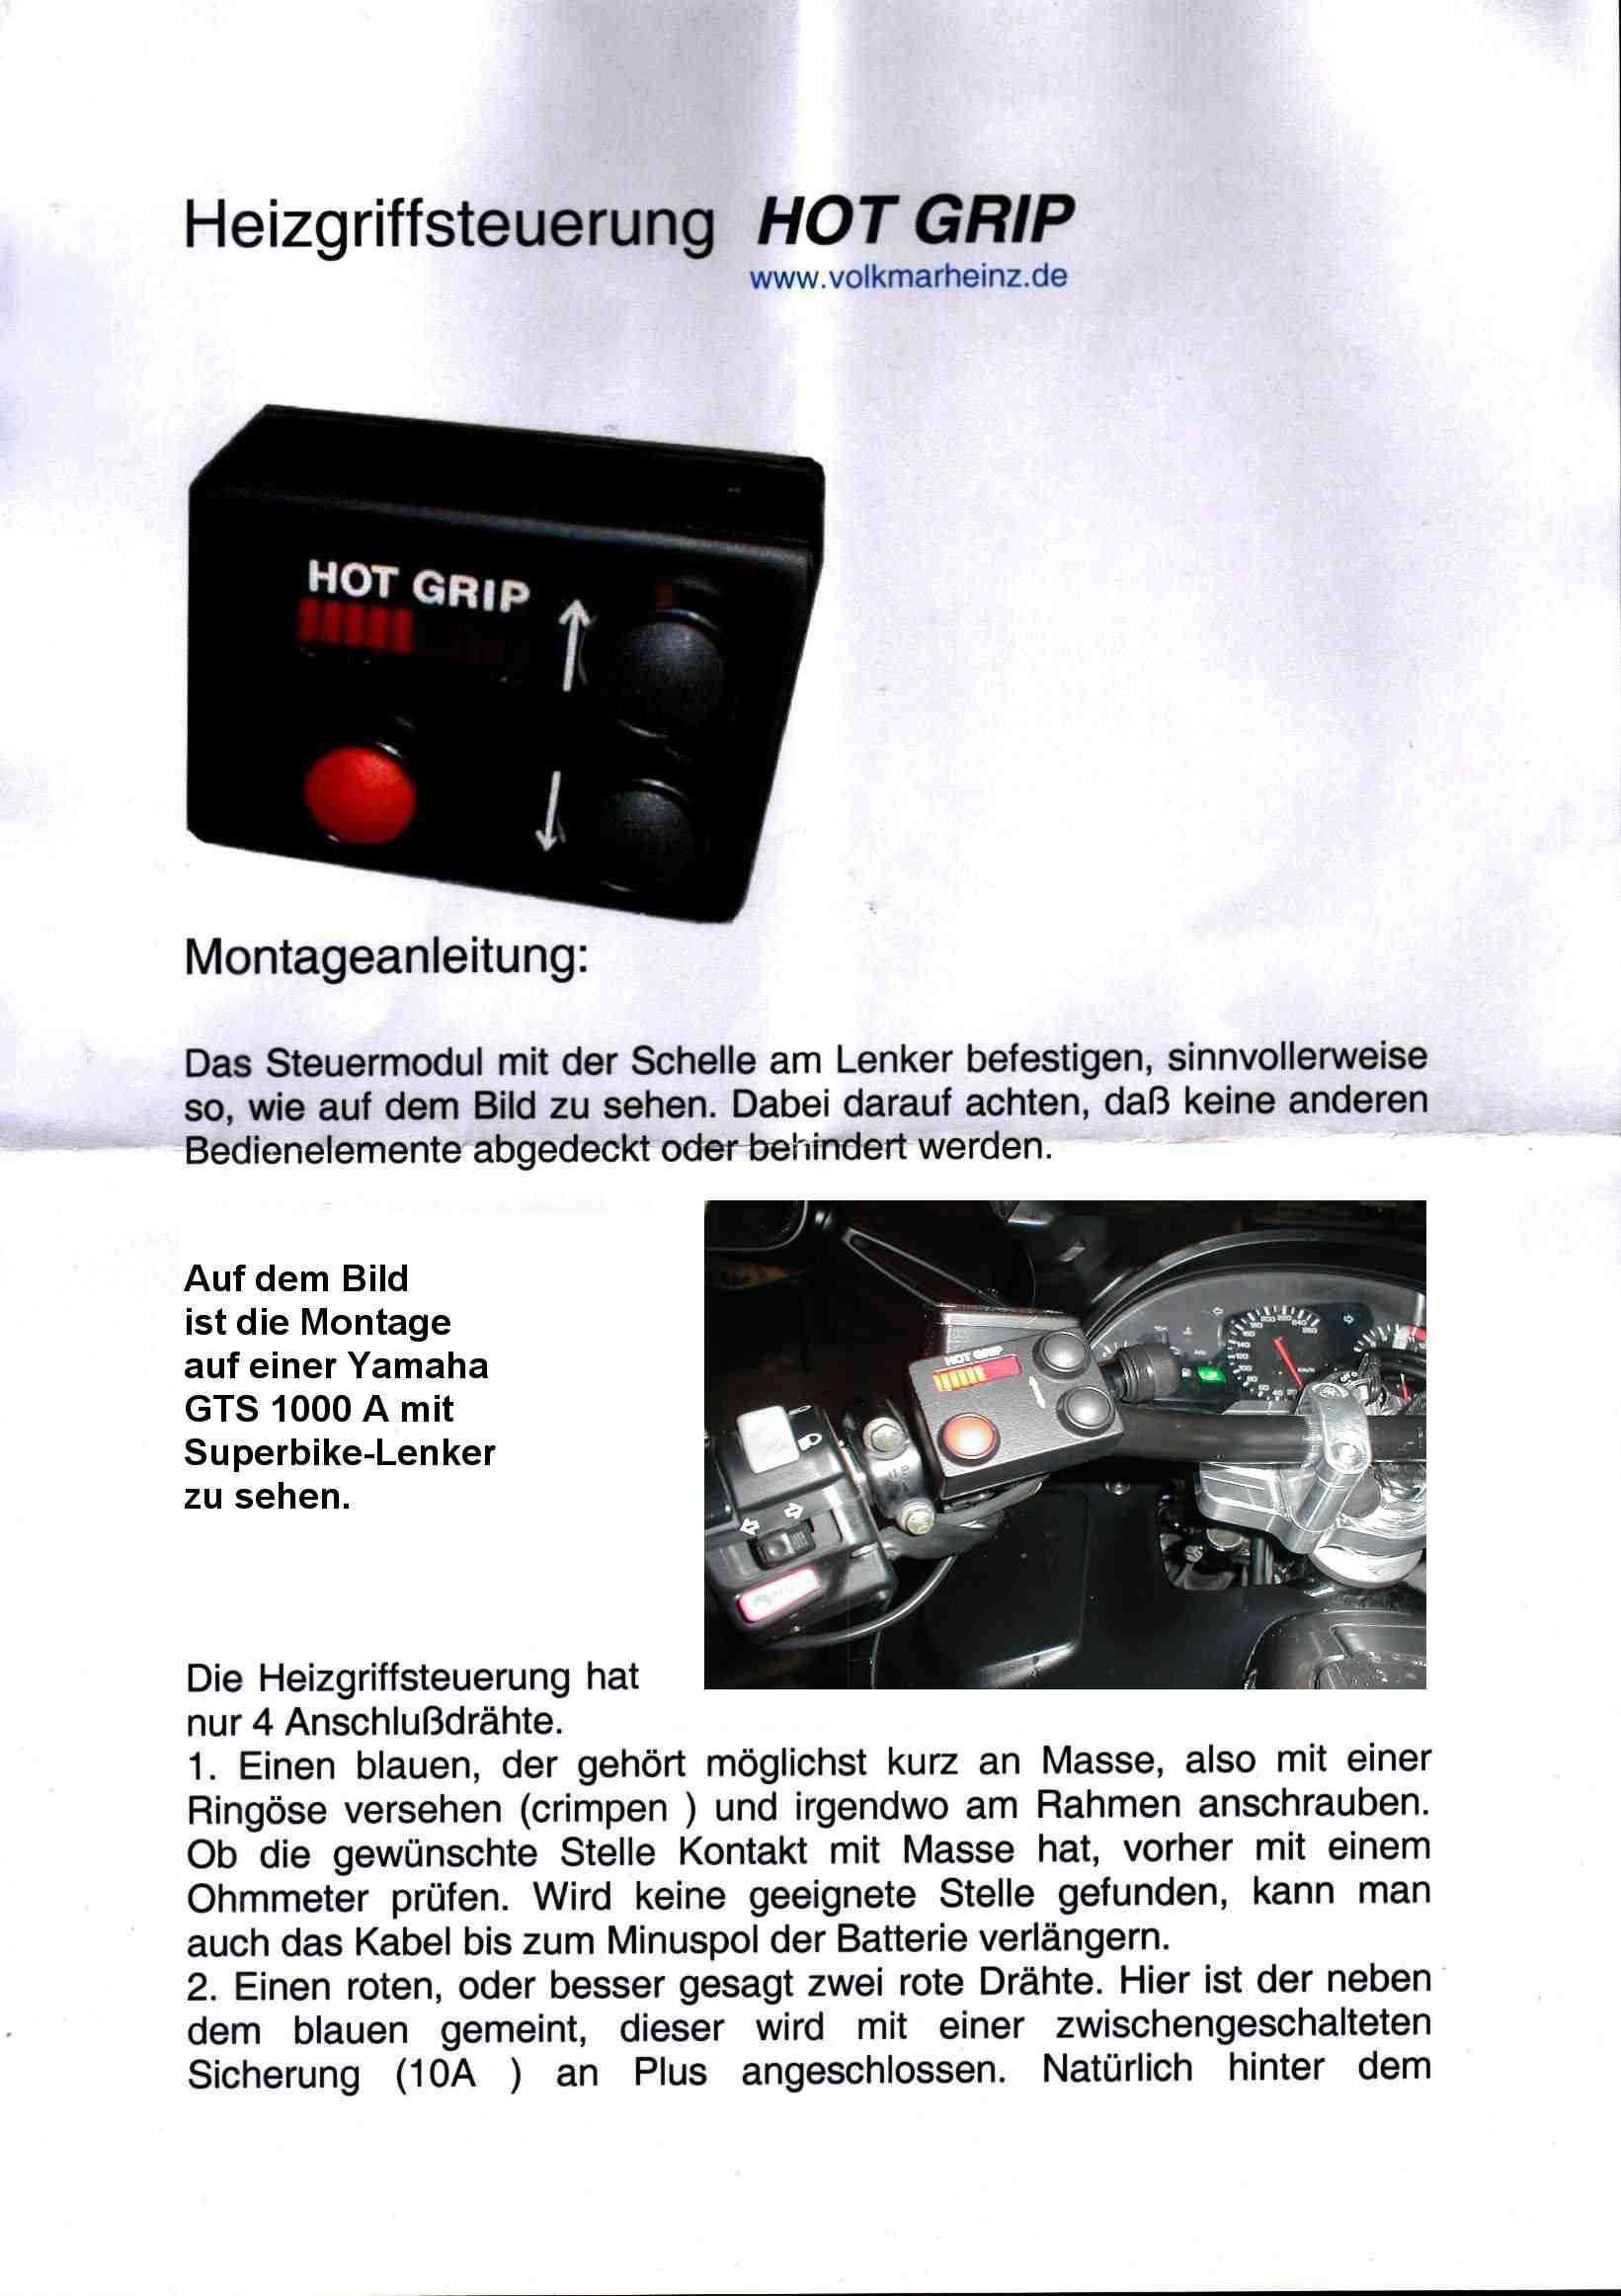
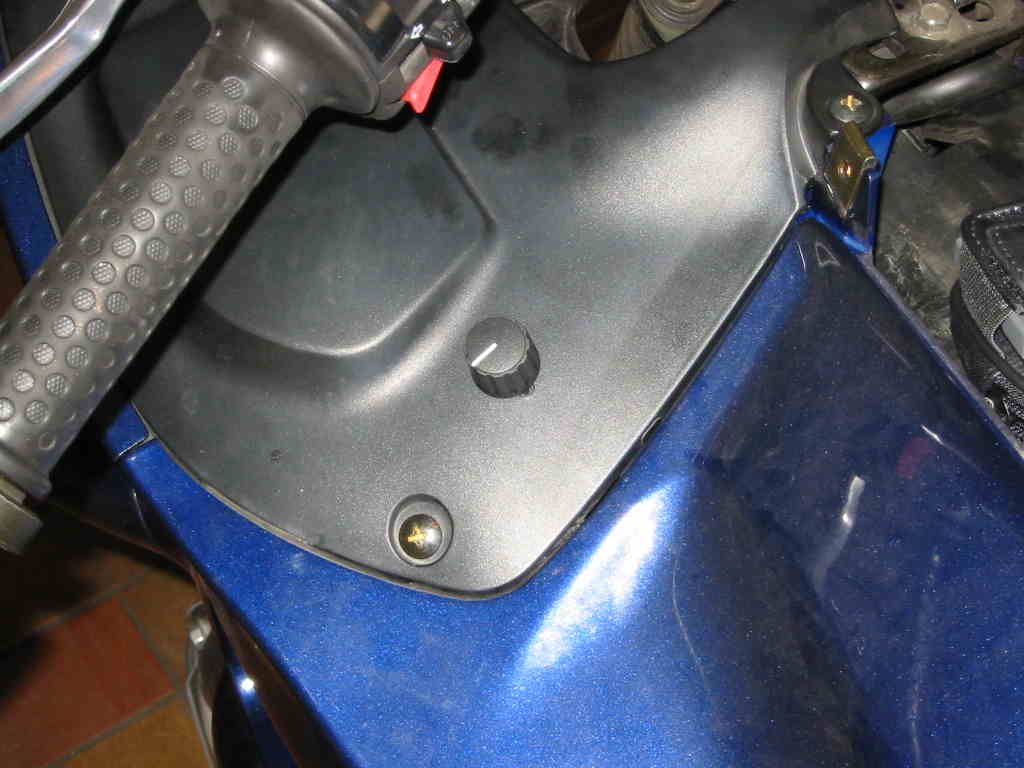
And here is the heating handle control announced by Arno ...
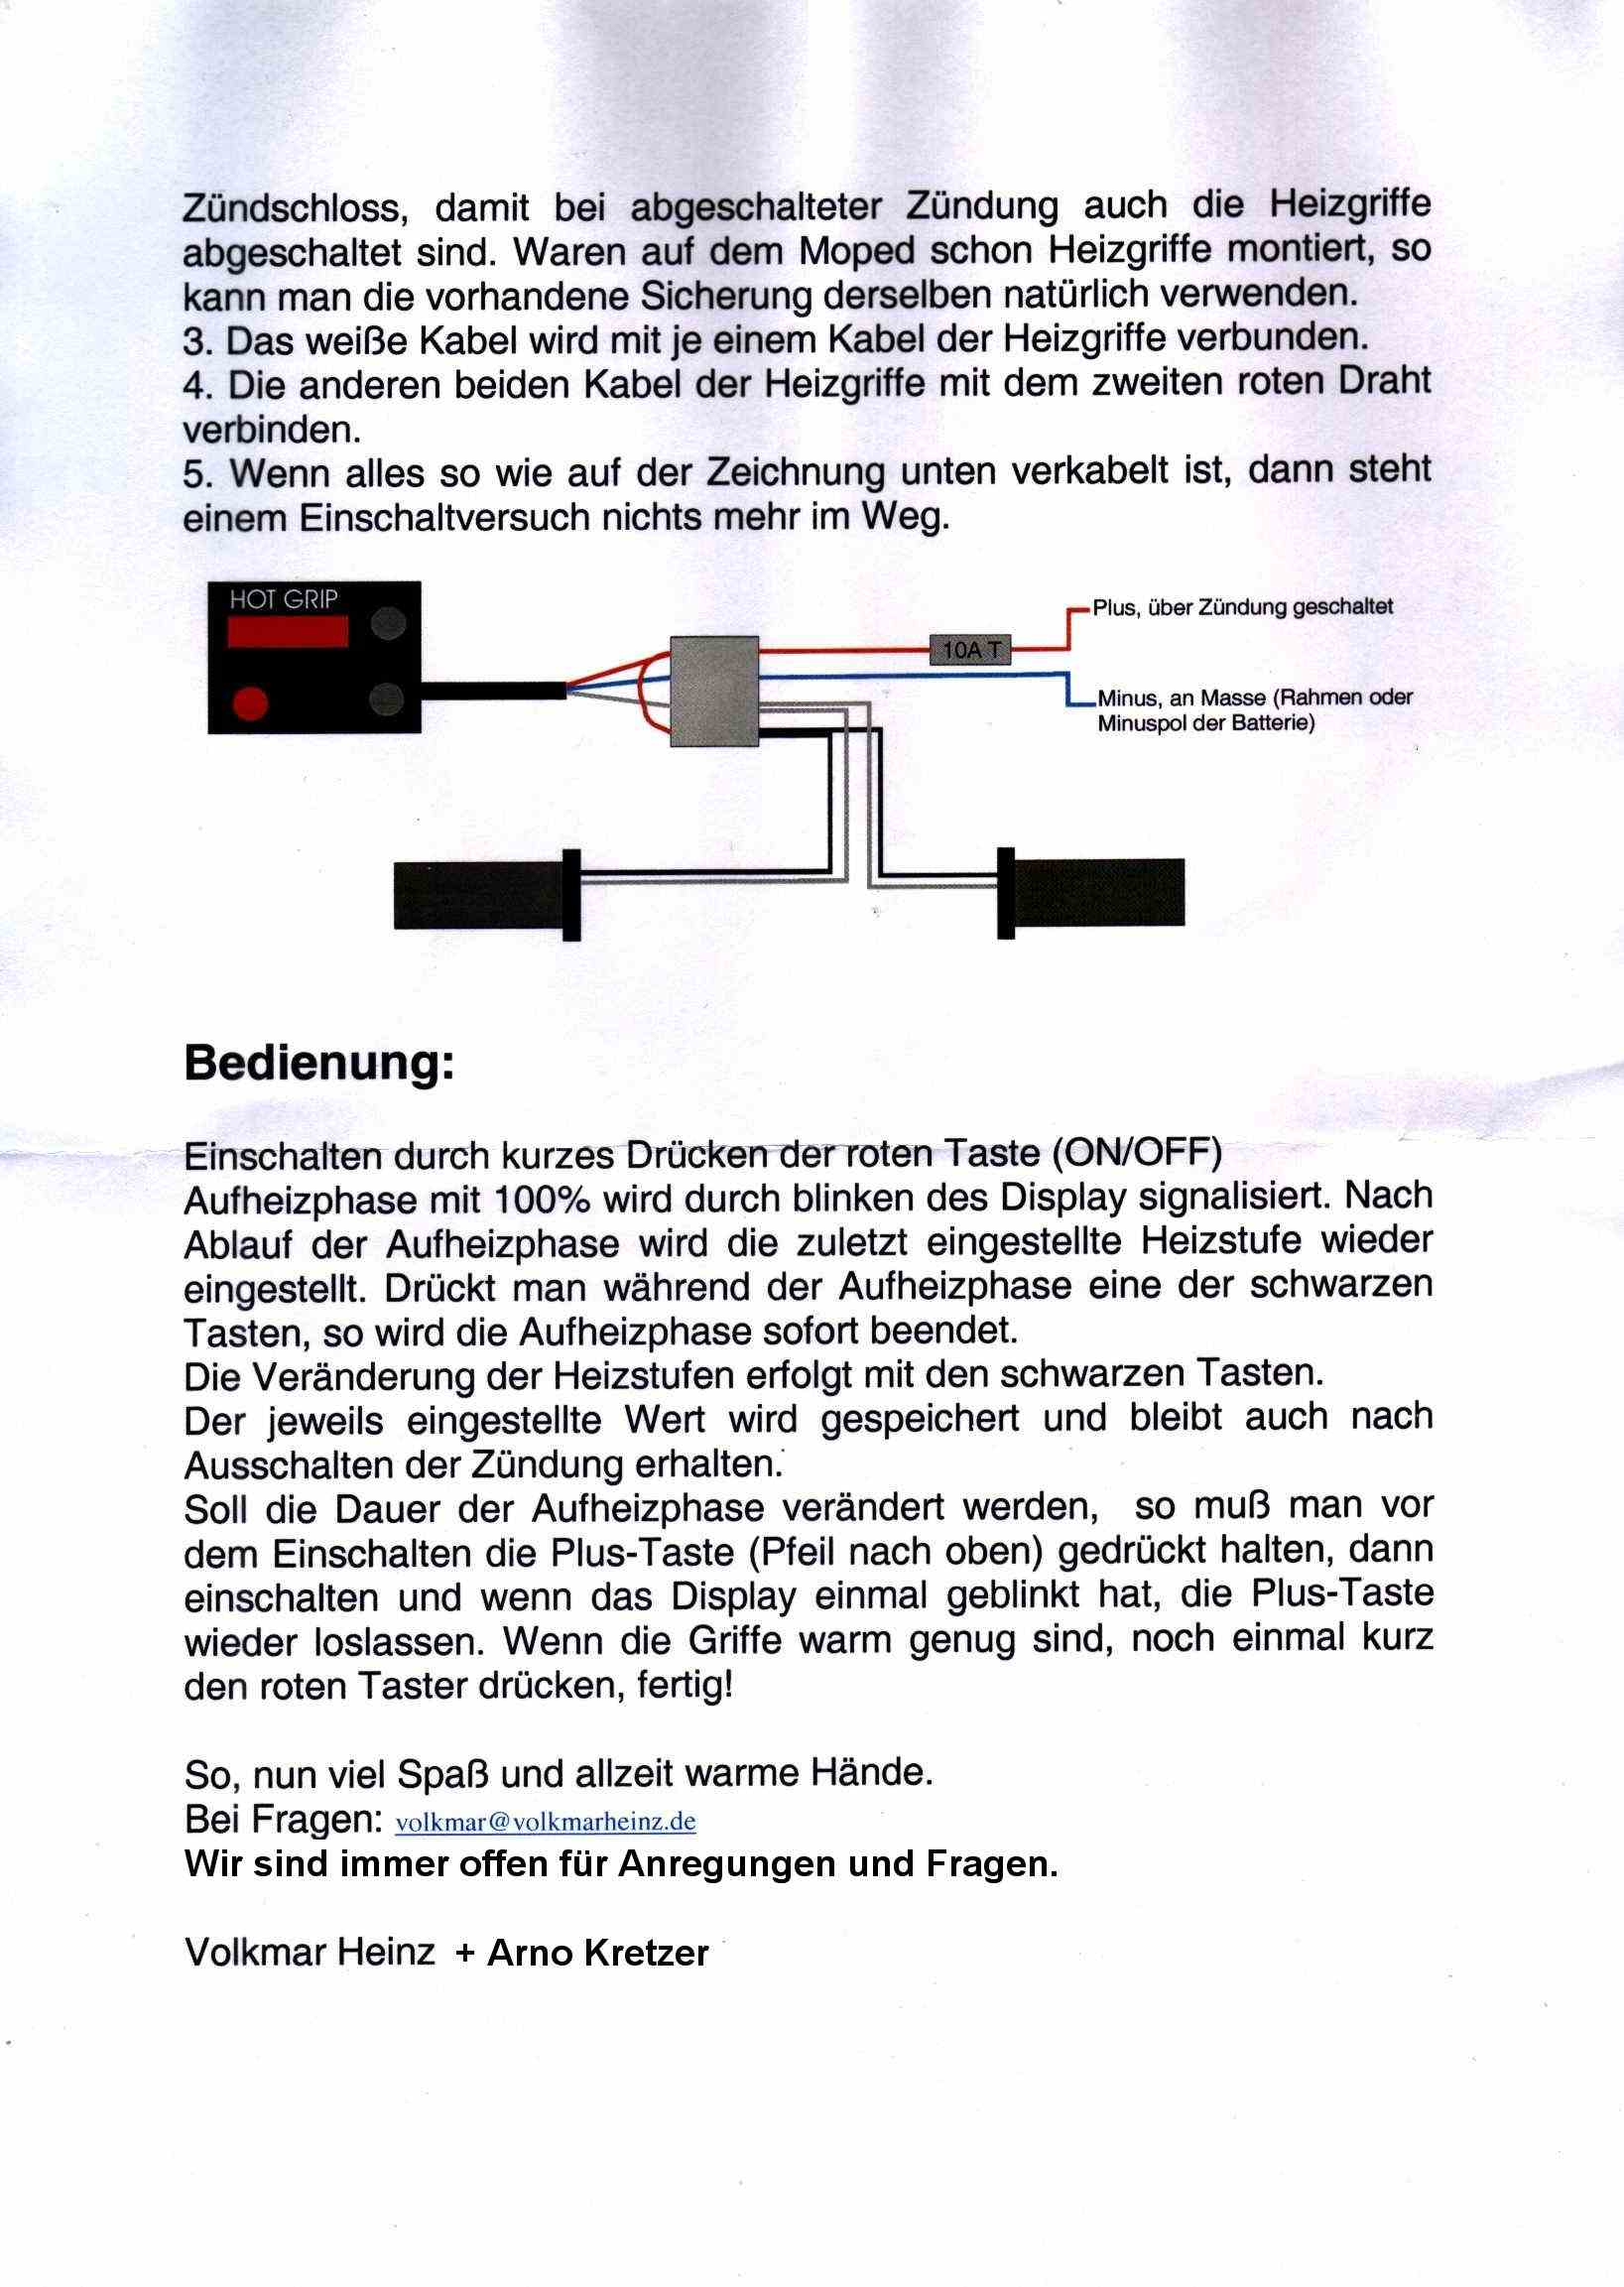
Hello GTS municipality, hello Martin, the winter is long and coldly since otherwise one has to do nothing, my neighbour and I have further screwed around at our bikes. Reason of the cold it was obvious to install heating handles. The silly switches, On/offstage, hot+means were us too rough. Volkmar has developed a direct heating handle control, after that this one also remembers adjusted like it before was. This control is fitted at a Kawa GPZ 1100+at my GTS 1000 now. Enclosed the operating instructions and pictures. You can if refer interest insists either over me or over Volkmar, www.volkmarheinz.de do them.
Always warm hands. See you in August. Greeting Arno.
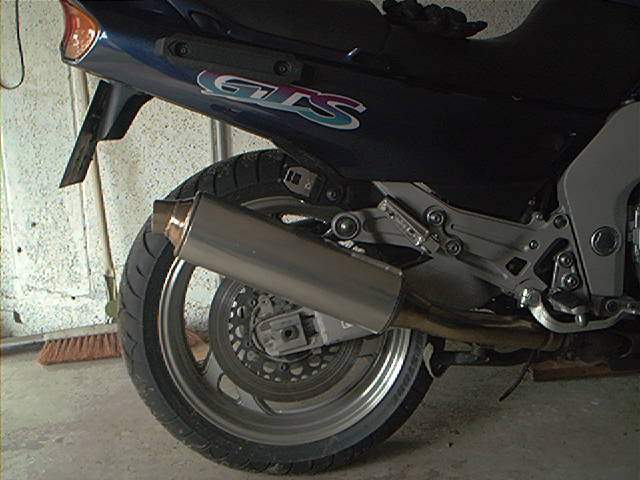
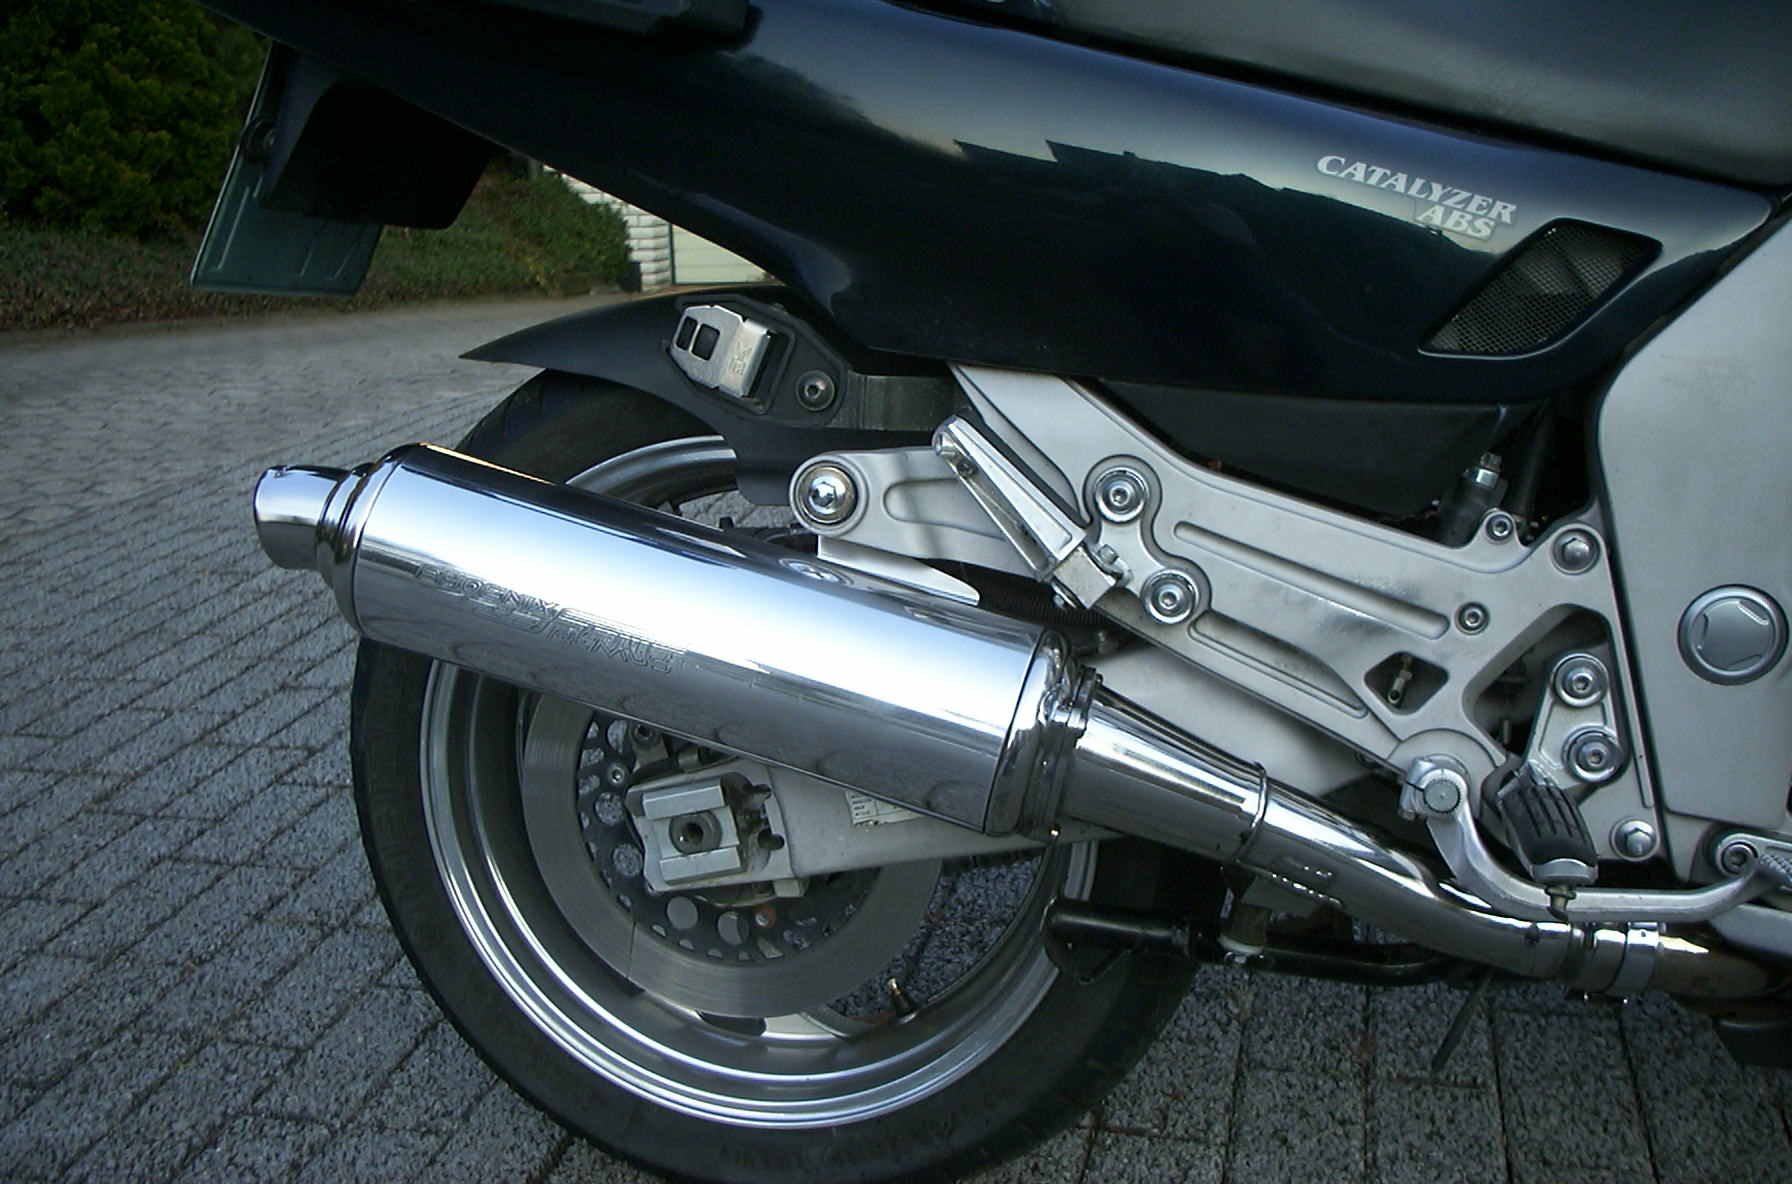
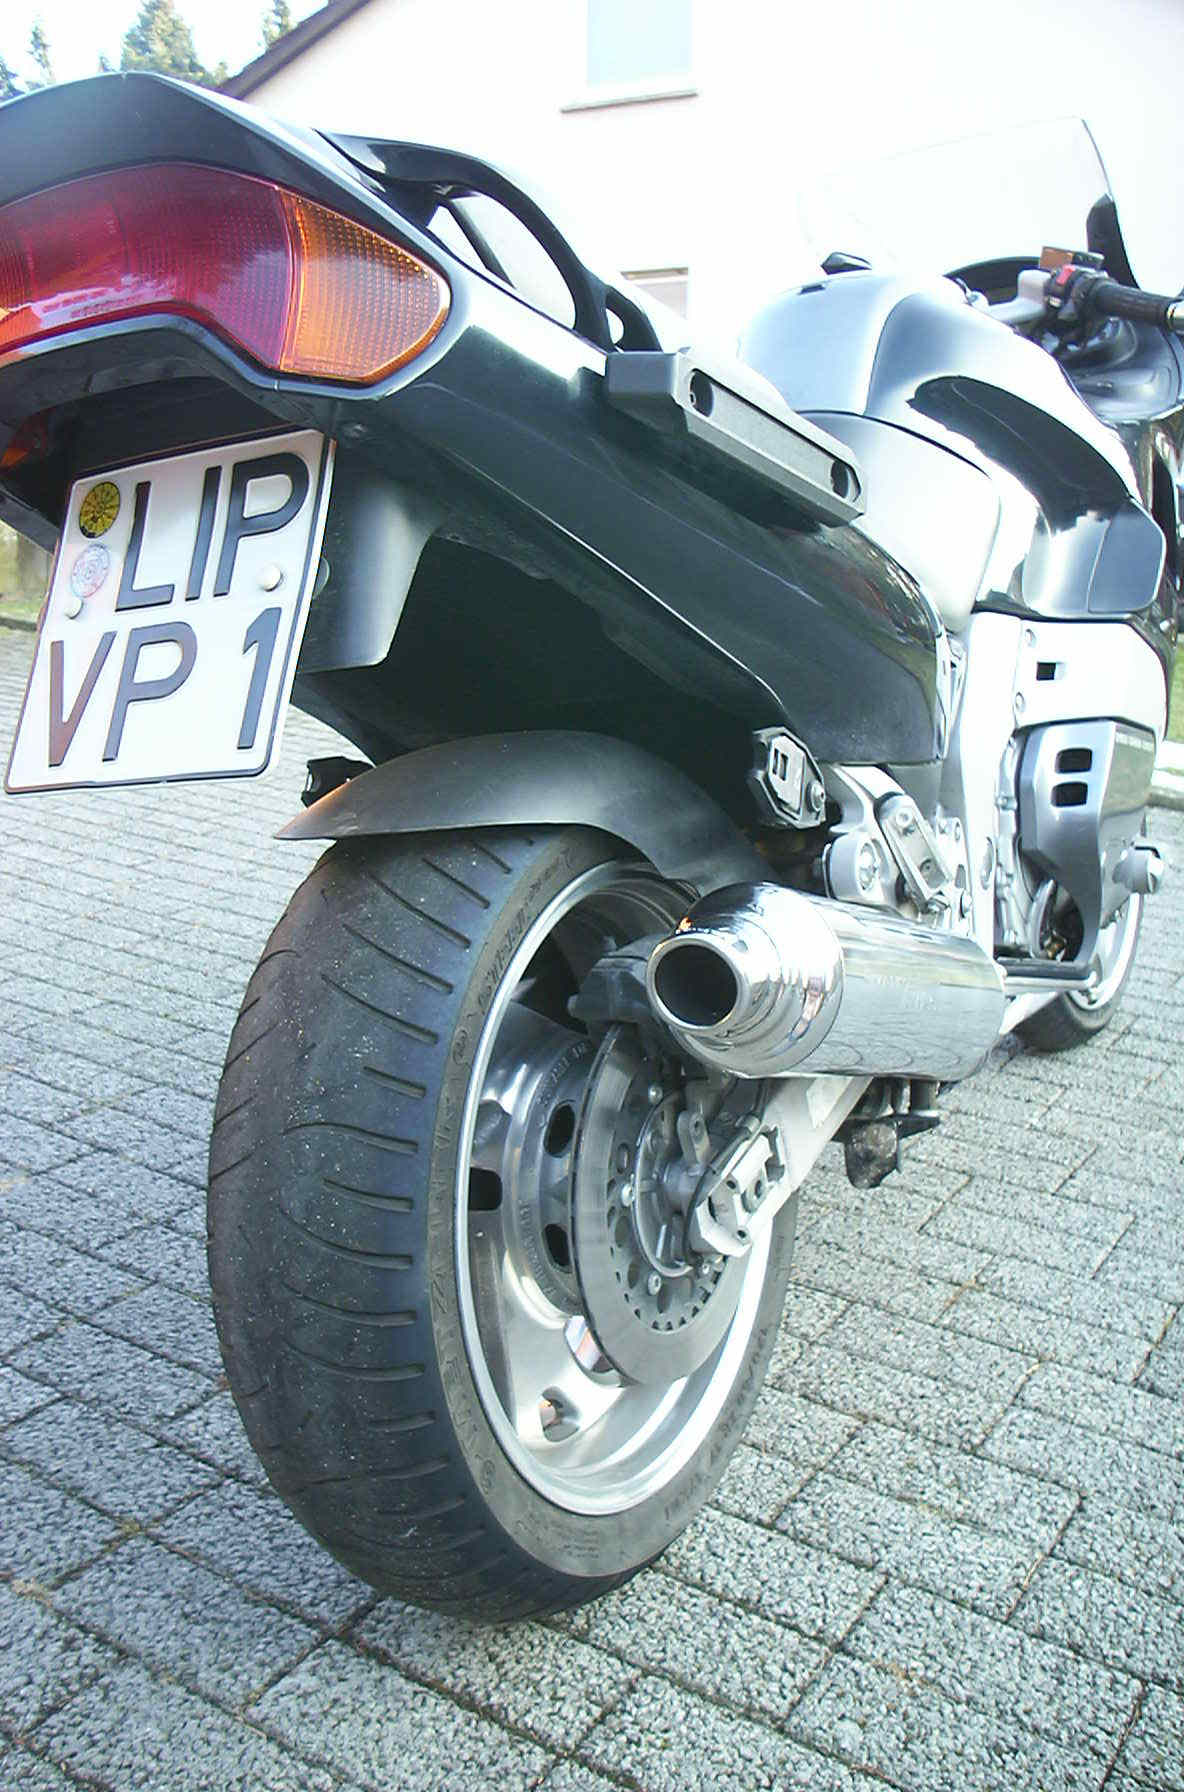
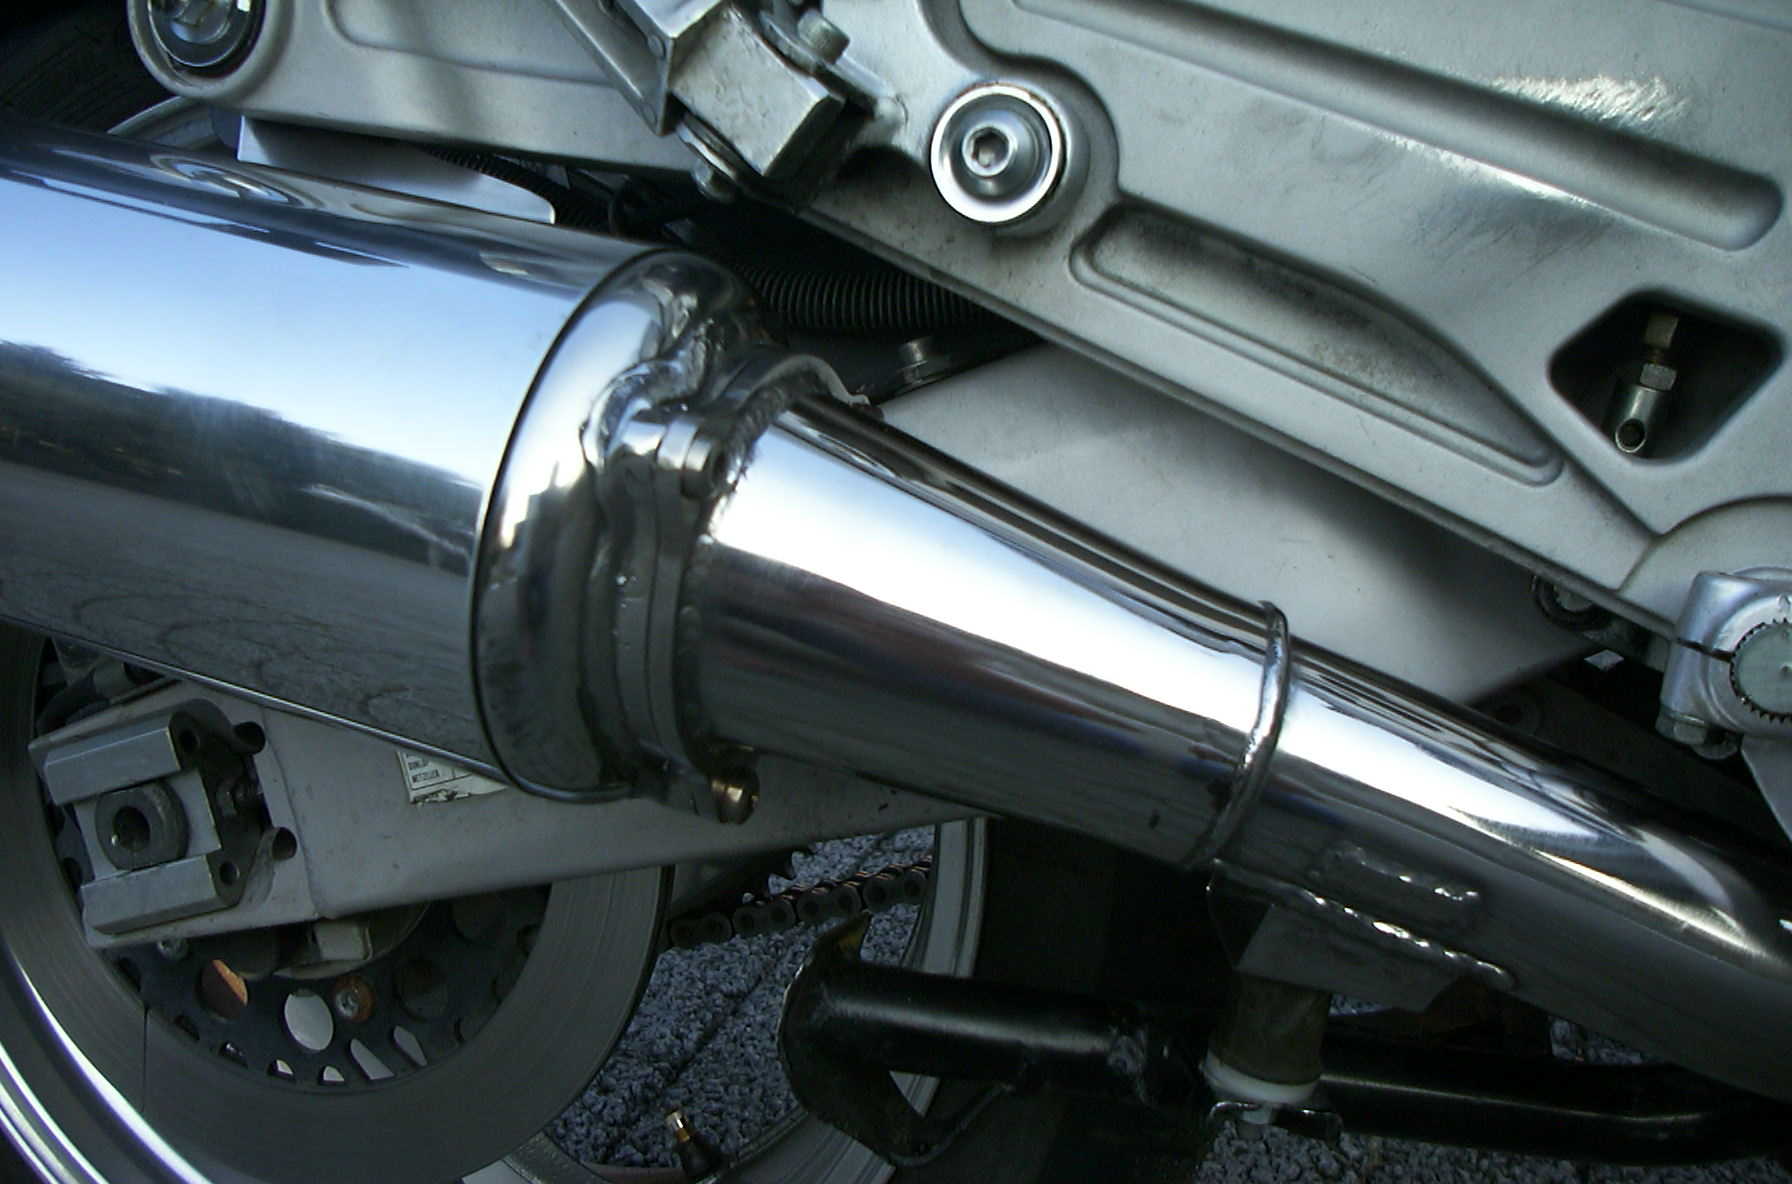
The next trick of our "Mr. Screw" Andreas Prehl: GTS 1000 with a REMUS Exhaust.
I would like to get rid of only a couple of photos of my new exhaust:
Back silencer: Remus (CBR 900), adapter to Kat: GTS 1000 reengineered, Sound: pithy, not too loud,
MOT: (Note of the webmaster: Andreas, I have left the comment out). Best Regards, Andreas from Lemgo
Heinz from Aurich sent this, it´s also an interesting way: The reduction on 34 hp with MOT blessing.

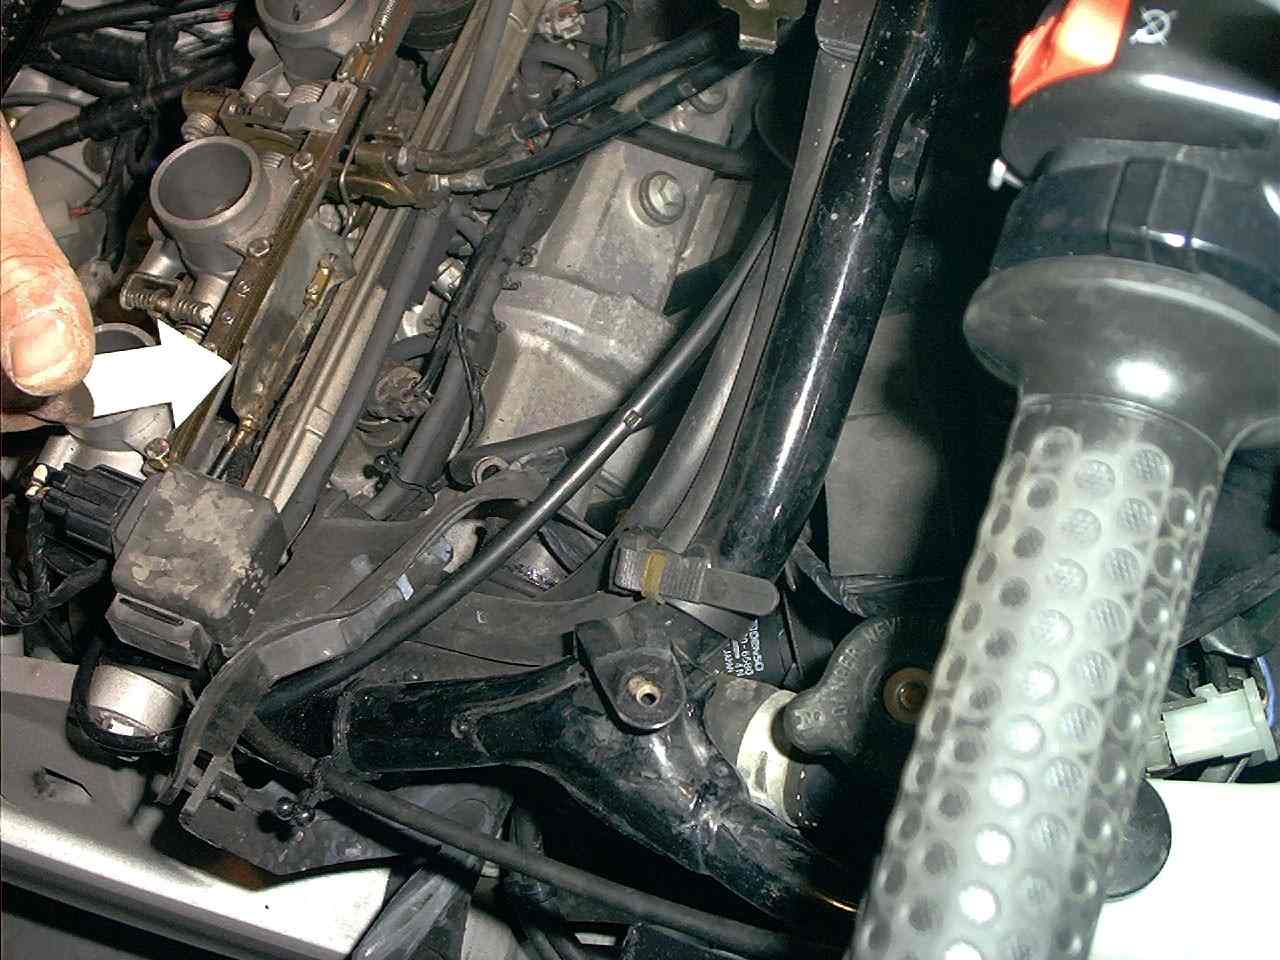

Form 1 Form 2 Form 3 Form 4 Form 5
And here the description of Heinz:
Form 1: The metal provides that you can not completely turn the gas handle, the stop shall beat at stretched bowden cable against the metal (she still has 98 hp). Form 2 and 3: Here the leadership for the bowden cable which draws the metal. (still 98 hp). Form 4 shows the bowden cable drawn. The gas stop beats against the metal, the throttle valves are only a bit open through this. ( She has 34 hp now and under 6000U/min). Form 5 shows the metal and the attack once again, the throttle valves no longer completely open, the GTS is very slow. ( 160 km/h). Material: You need a thin metal in L form, 2.5 x2, 5 cm on the long sides and 1.5 x1, 5 cm on the narrow sides. A feather which pulls the metal back into the original state again, L=approx. 8 cm. A bowden cable and a lever arm (choke or bicycle wiring), a couple of screws and still a metal unites (trie out how big) around the bowden cable to fasten. Not forgot the thick Wire and the insides of an insulating screw joint, to connect wire and bowden cable.
A lot of fun with screwing so. Is not at all as heavy as it looks. Tear have typed in on the performance test and then to the MOT and on 34 hp. Then be in the vehicle registration certificate Ziff. 7( In Germany): "Leistungsred. durch Gasanschlag, Kennz. BOE 109 ohne Beschränk. od. Aufl.," . and may everybody, who can drive only to 34 hp finally drive a GTS. Greetings, Heinz from Aurich.
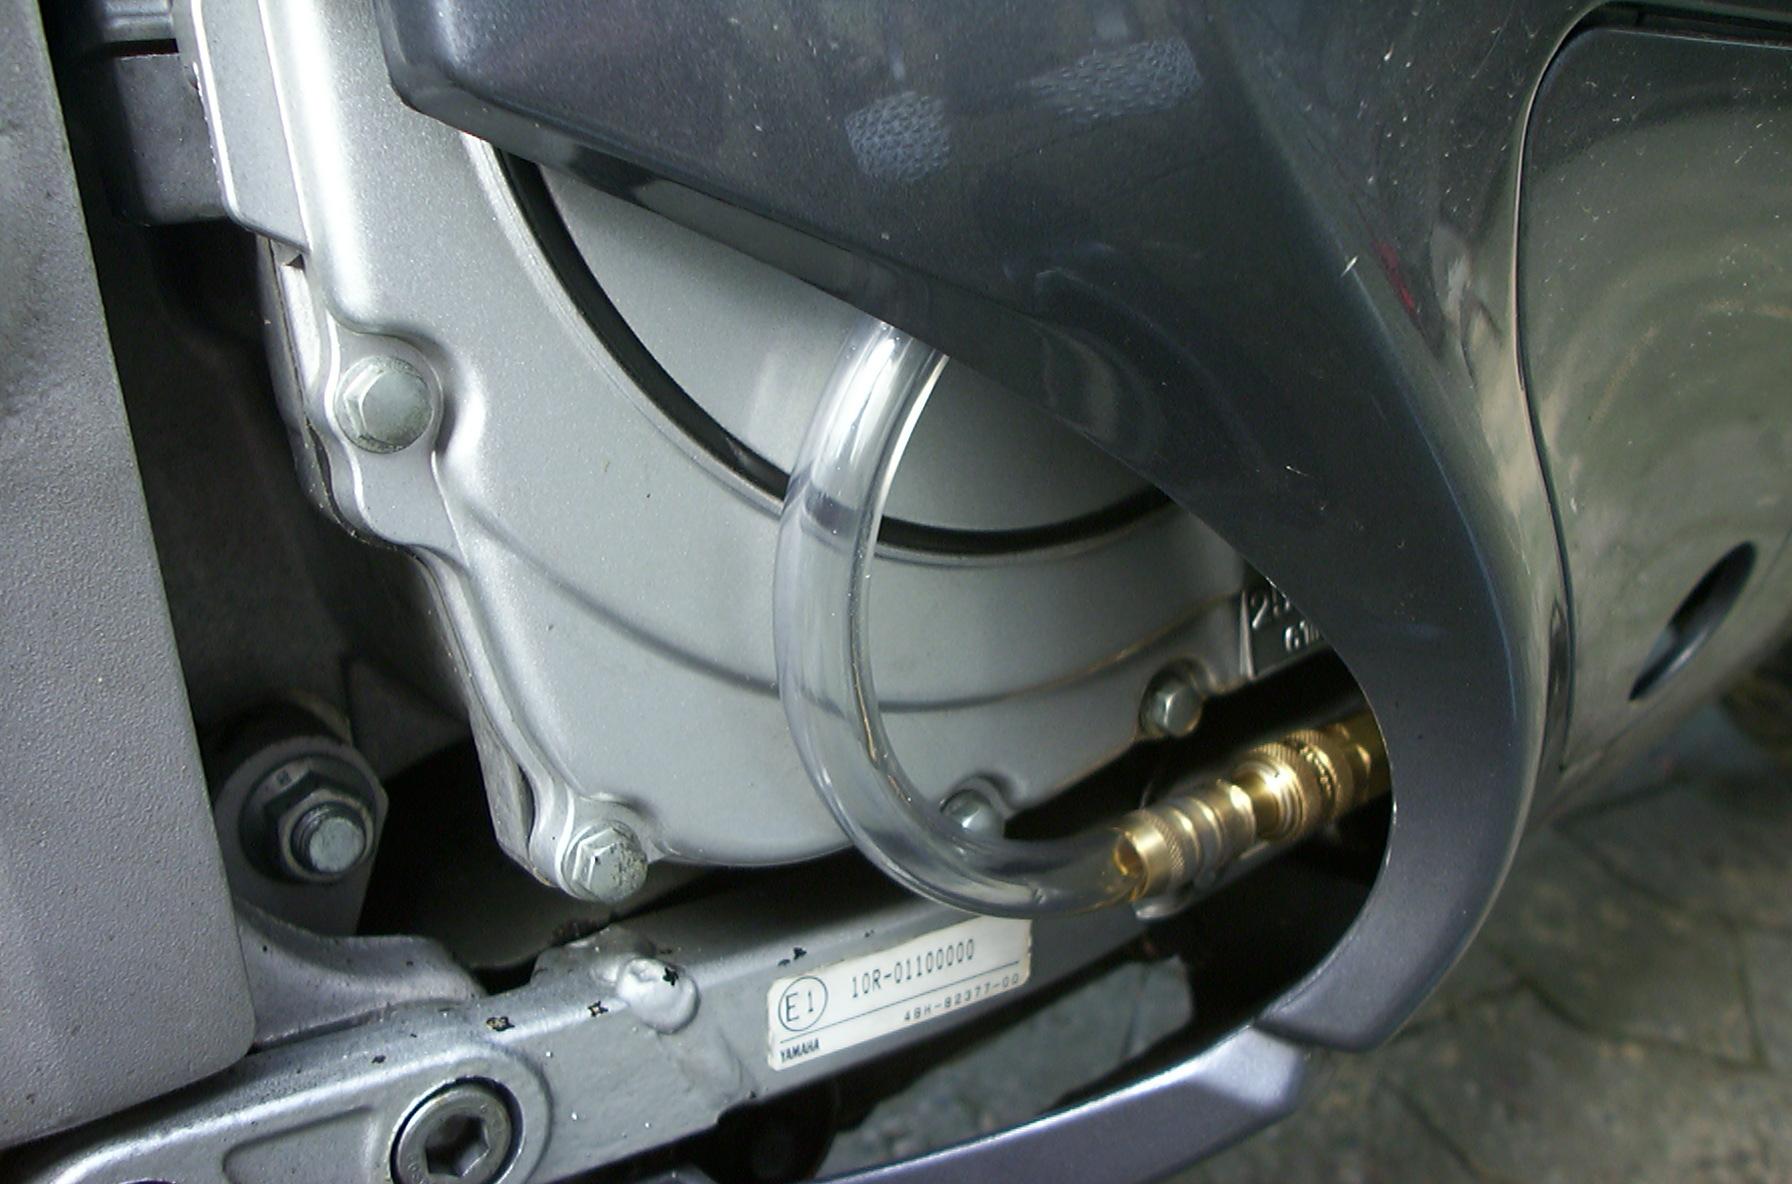
Stefan Mende has put the CLS 200 µ together at his GTS. Here the photos and a small description:


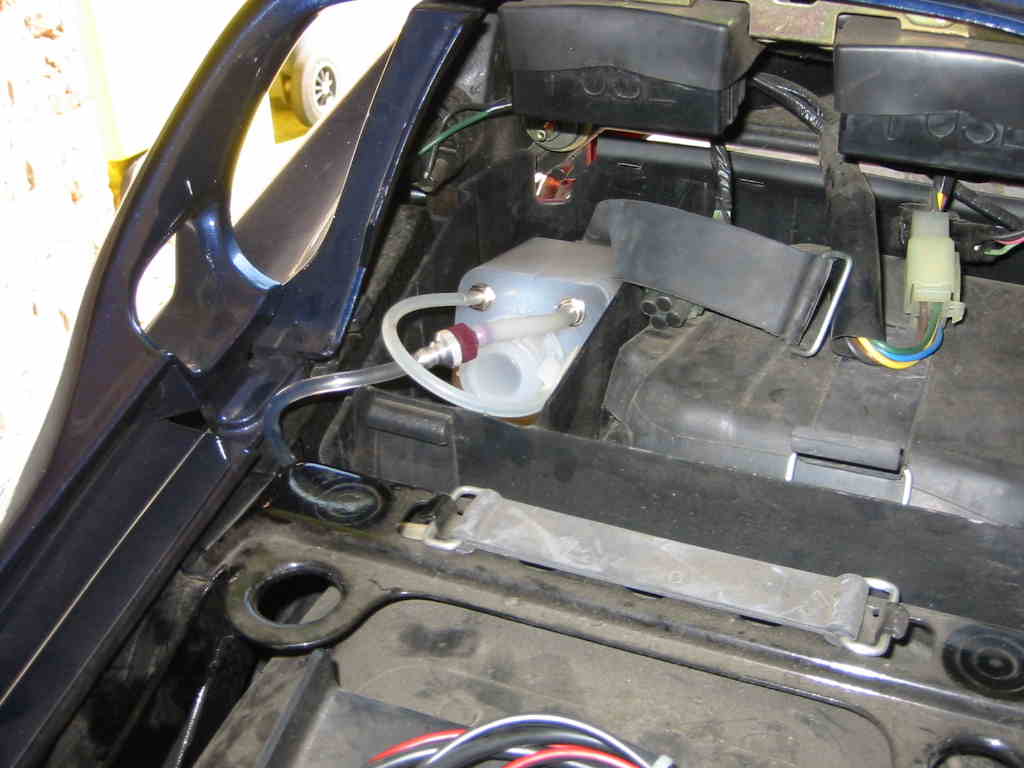
Electronics Final piece Regulator Tube Tank.
Hello. Perhaps I have something for the Selfmade-Side here: I have installed the CLS200 µ ans i am very content. The 250 ml tank has been installed to place of the toolkit, electronics lies under the bench where otherwise the manual finds board. Tip: The fuseholder should be taken apart and the protector removed to get to the battery around the power supply. One then gets around with a little patience at the plastic framework of the rear wheel cover. Best wishes. Stefan Mende
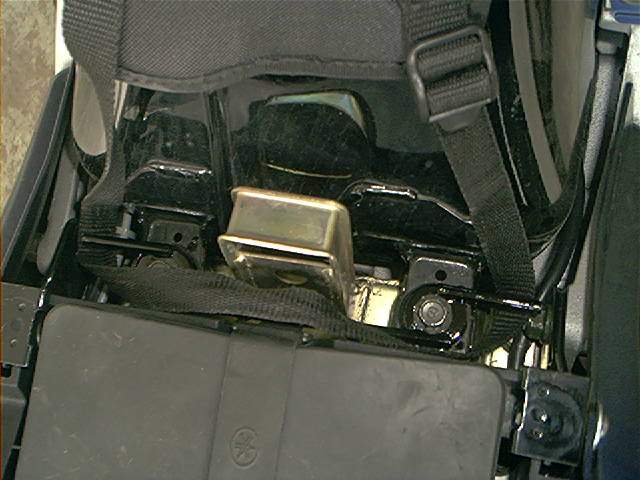
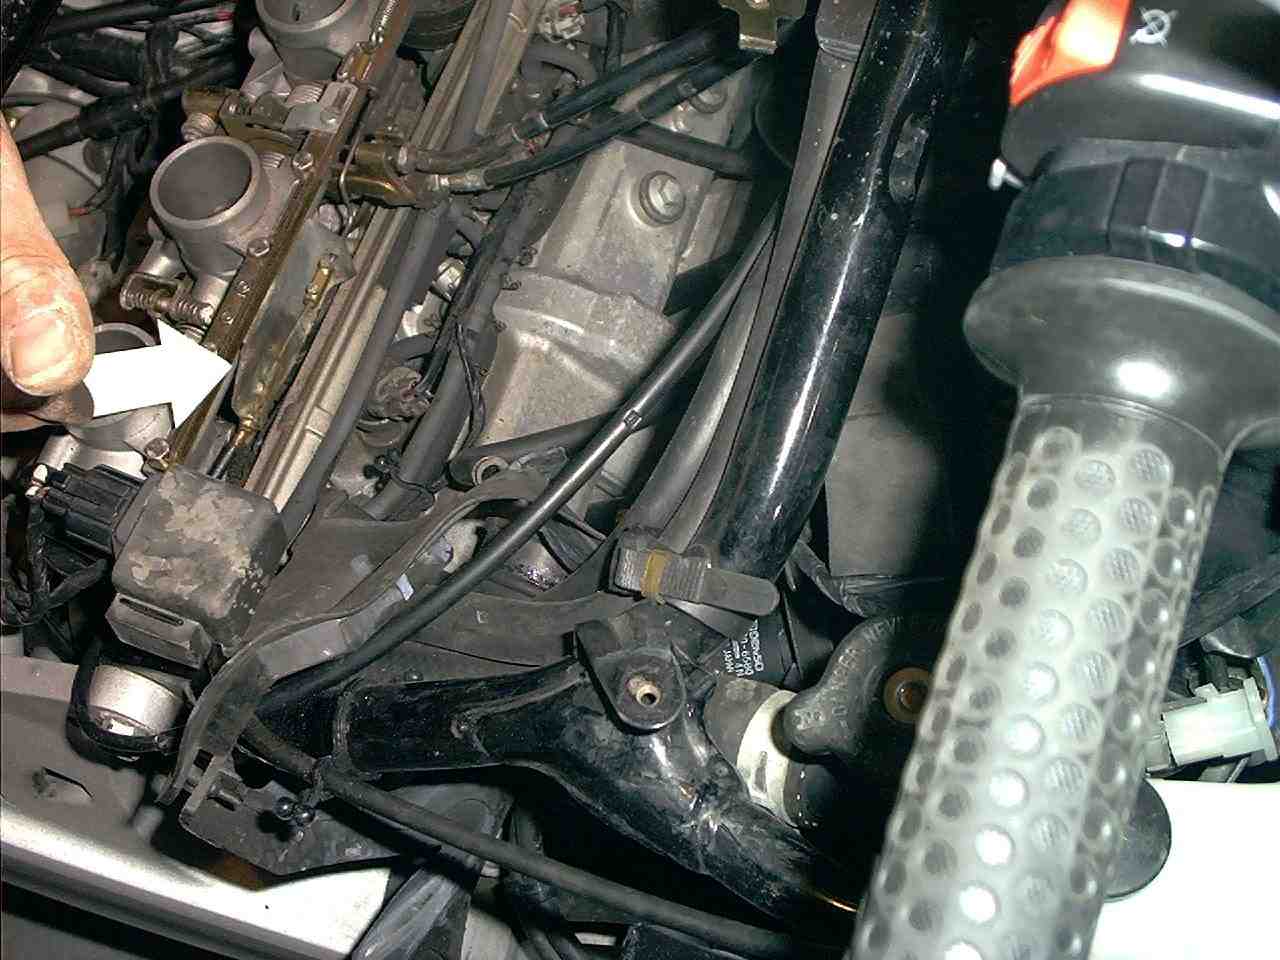
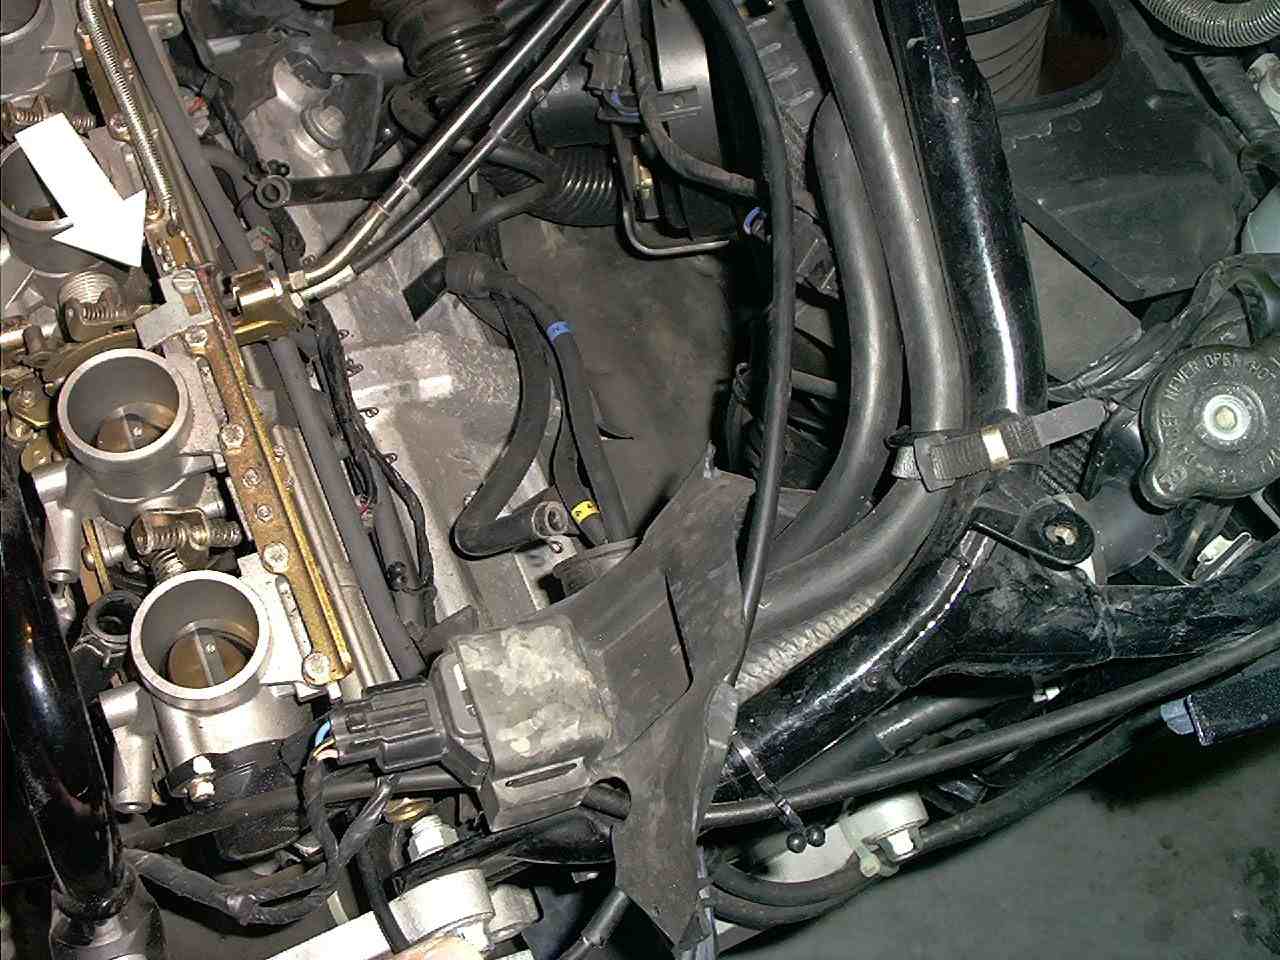
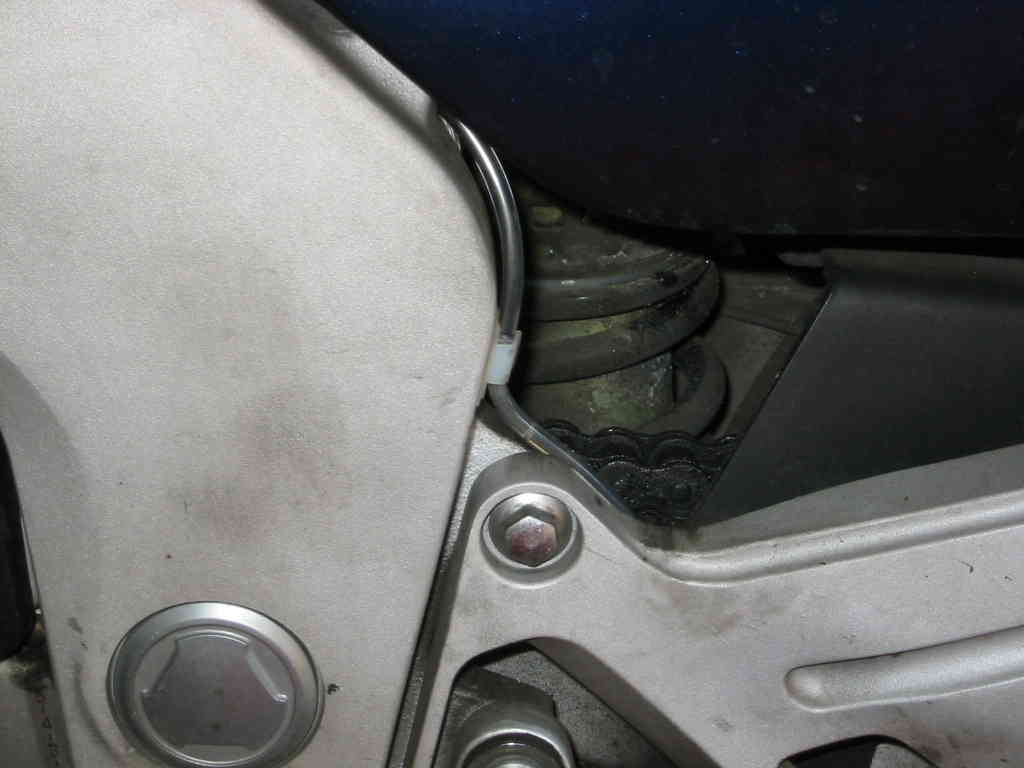
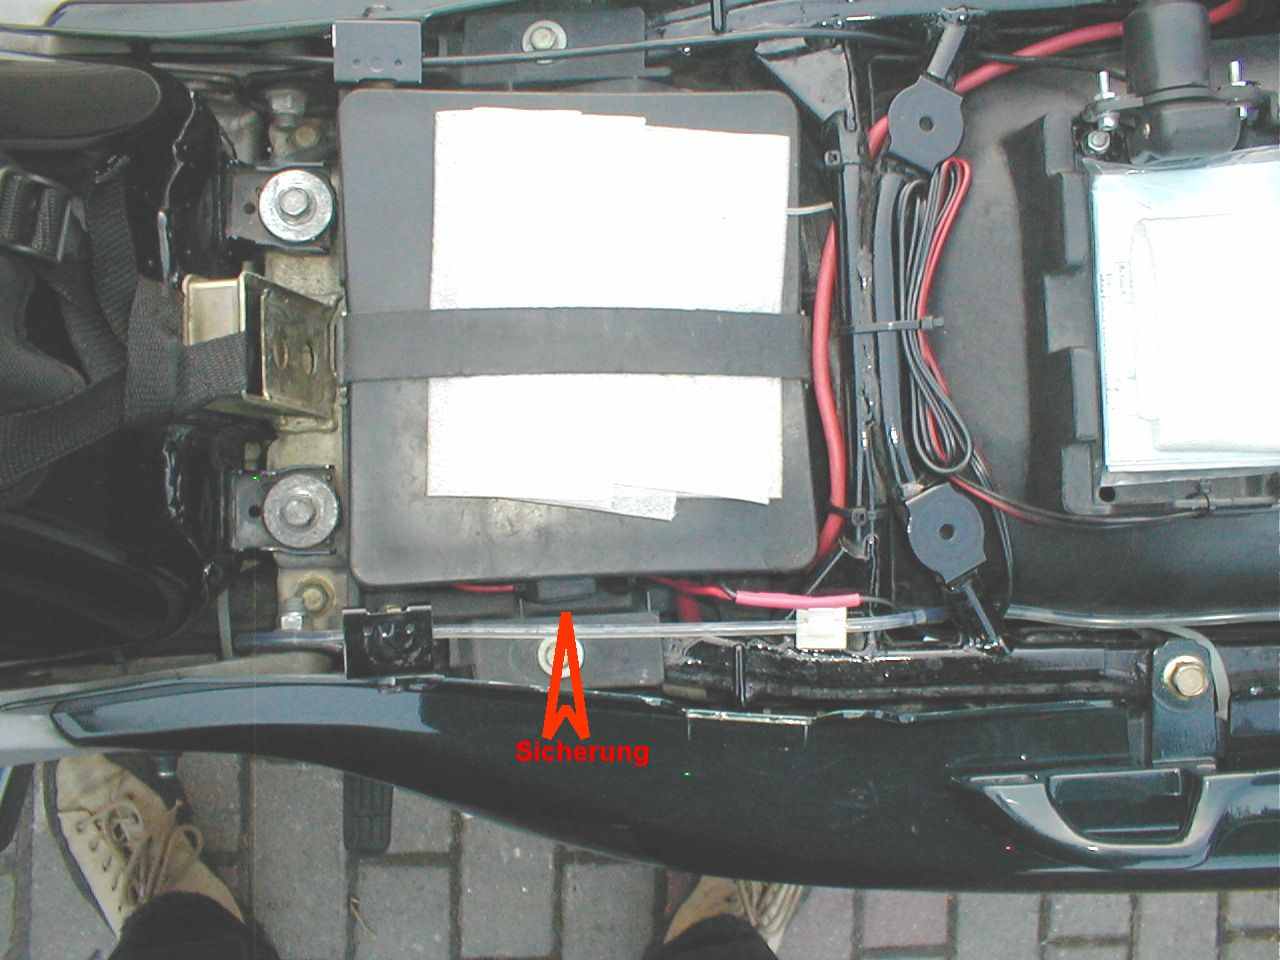
The following remark also comes to the CLS 200 µ from Arno Kretzer together with picture:
Hello stub axle steered, still a tip for the accommodation of the safeguarding of the chain Oilers of Stefan Mende. One does not need it fits excellently in the cut-out between control unit and battery receptacle to take the safeguarding apart/build, see picture. Greetings Arno.
I got these pictures of Pascal Van the H. from Luxembourg:
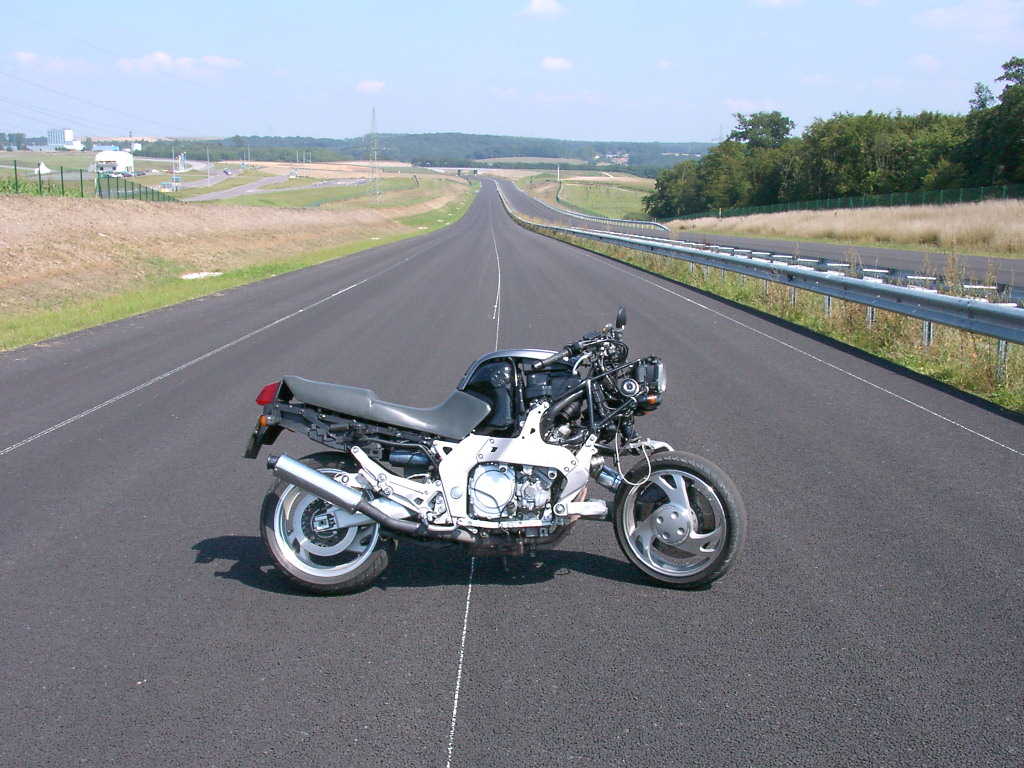
( !!! ) Naked GTS
I would like to write the story for this reorganisation here, unfortunately, the owner of the piece of jewellery is unknown (yet):
Therefore I already must say: Hat as of ...
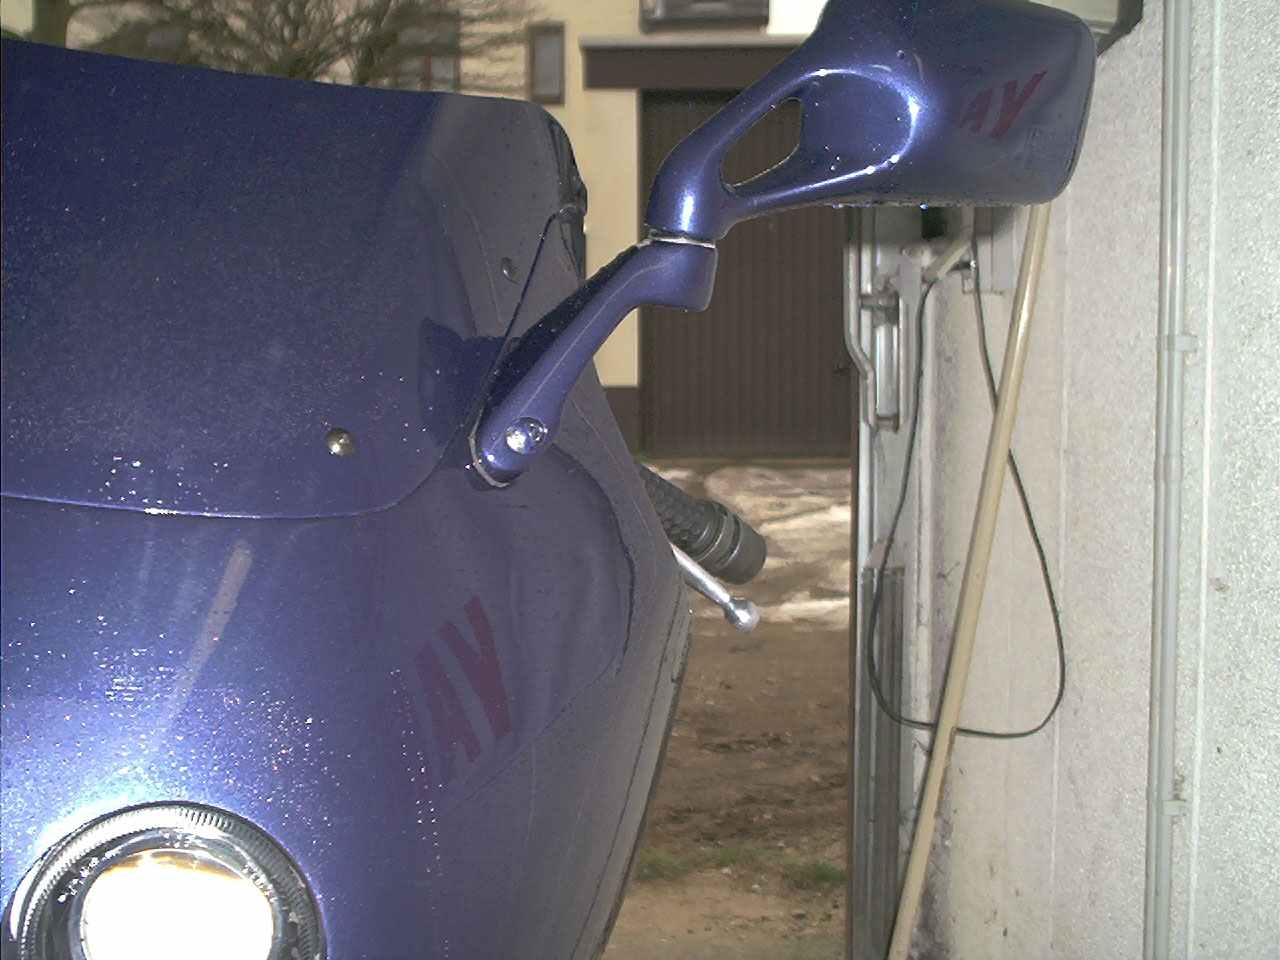
Ralf Koch mounted the mirrors from a Honda(!) on his GTS:
Hello from Berlin, i have changed at my EFI this weekend what
has annoyed me since the first journey. The outside mirrors. Have which one
added of Louis of the CBR 600/900/1000. Price per piece 24.95 €. Order-No.:.10028065
and 10028066. Approx. 4-5 hour work. The disguising changed, new or greater
holes into the disguising drilled and the self-adhesive aluminium metal (also of
Louis for € 3.95) cut original hold plates to size of under than cover for the
holes. The success is fantastic, I do not need my gloves for me now any more,
this looks at the levers and the elbows in the mirrors but sees what happened
behind me. The mirrors are approx. 5-6 cm further out and also ca.5-6 cm higher.
Joy at more consideration, Ralf.
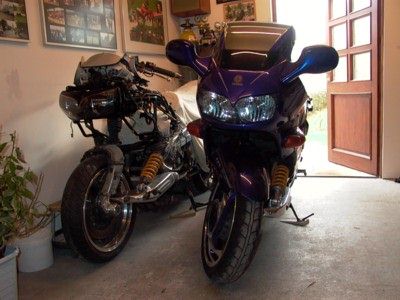
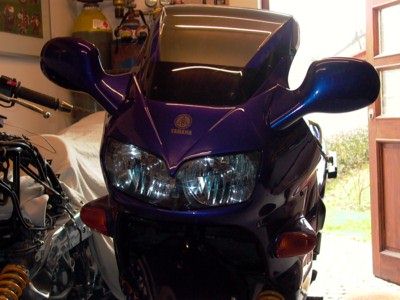
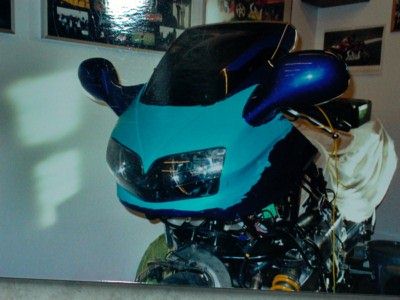
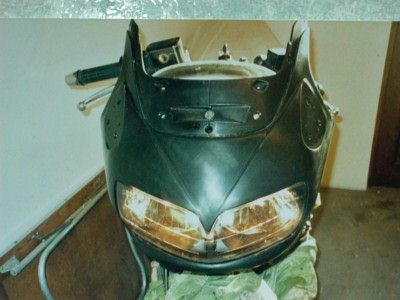
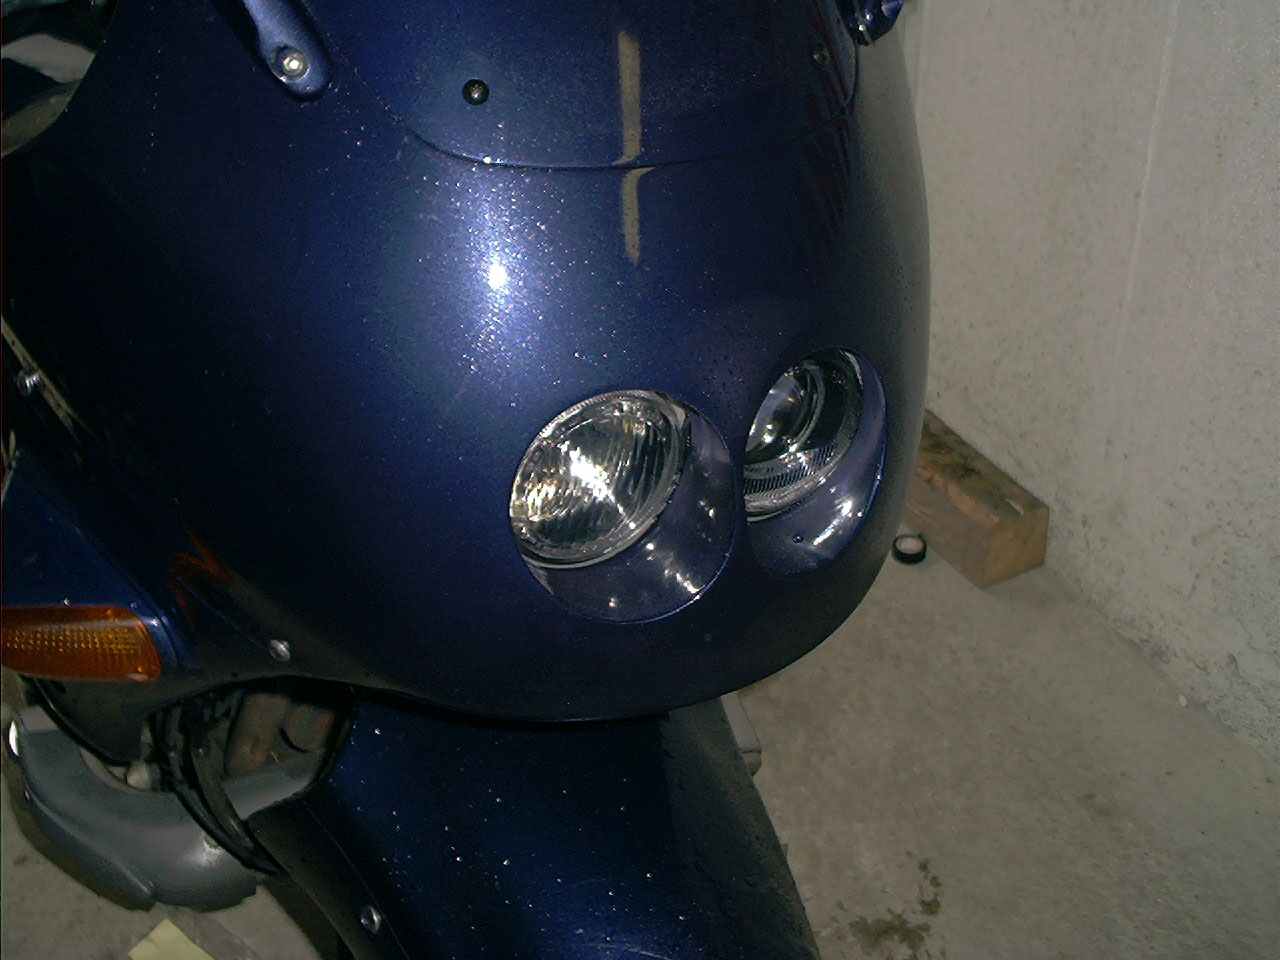
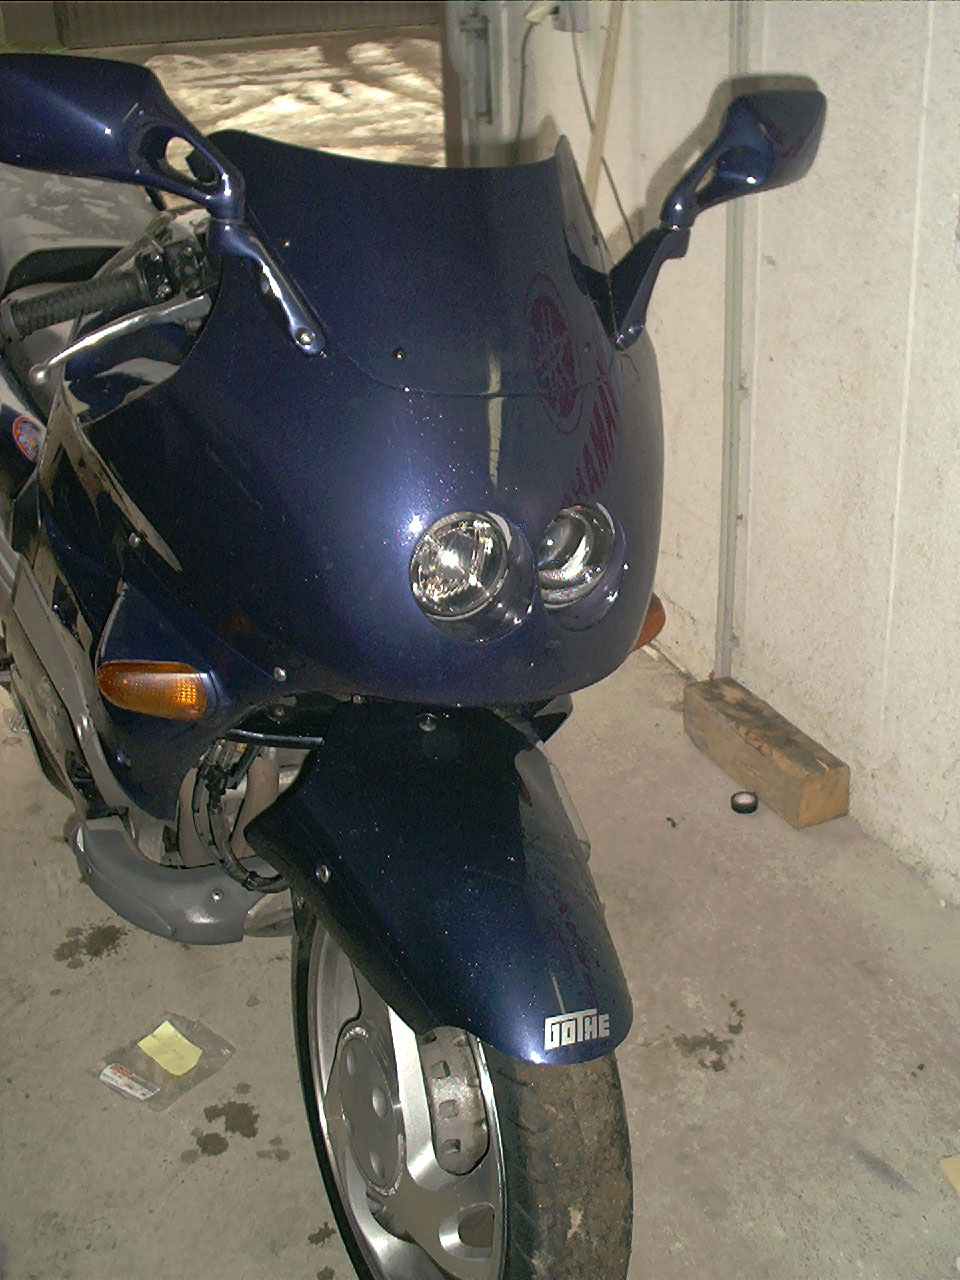
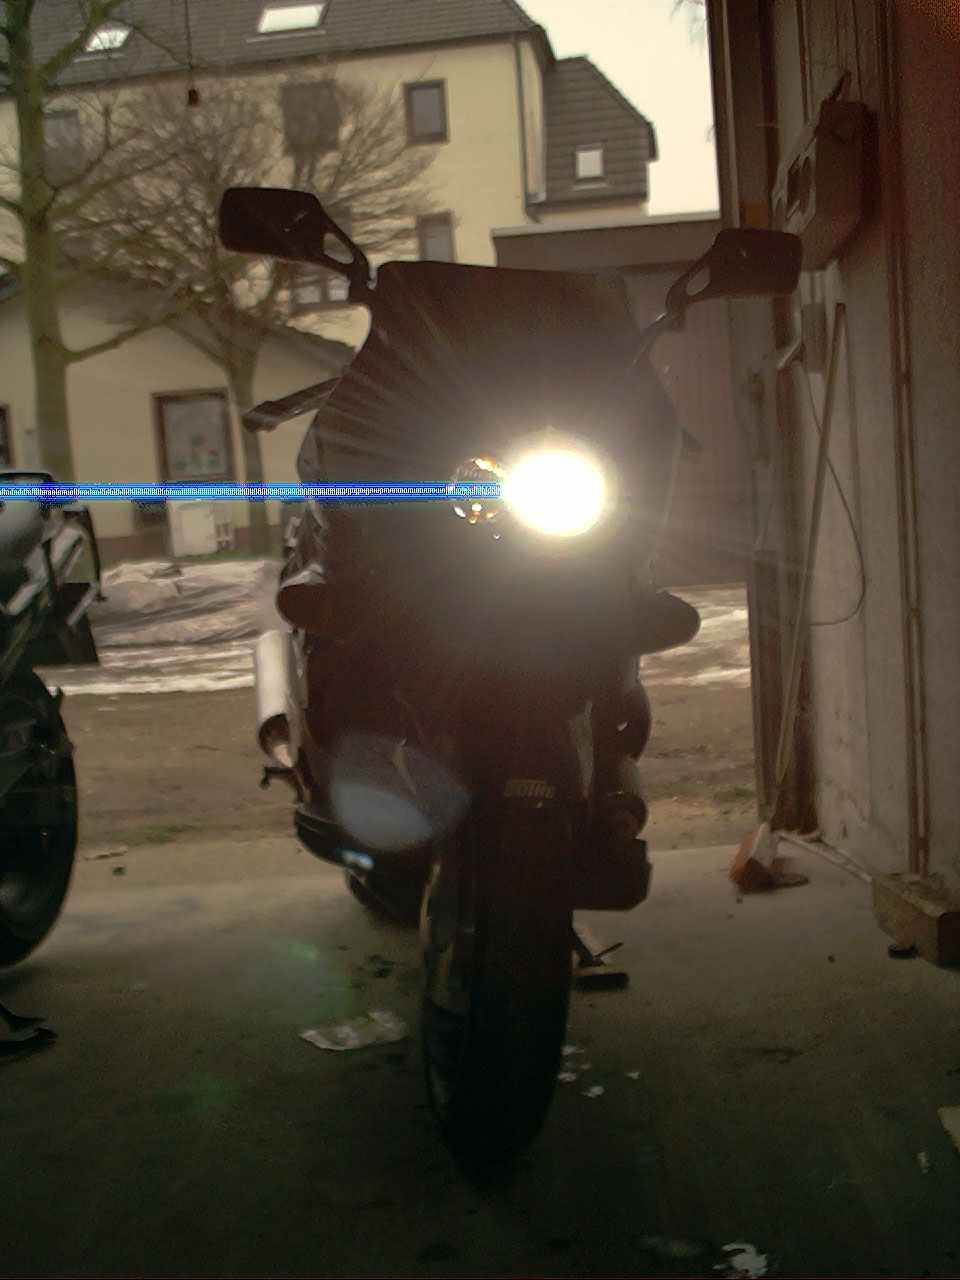
An GTS with double headlight has built Dieter F.:
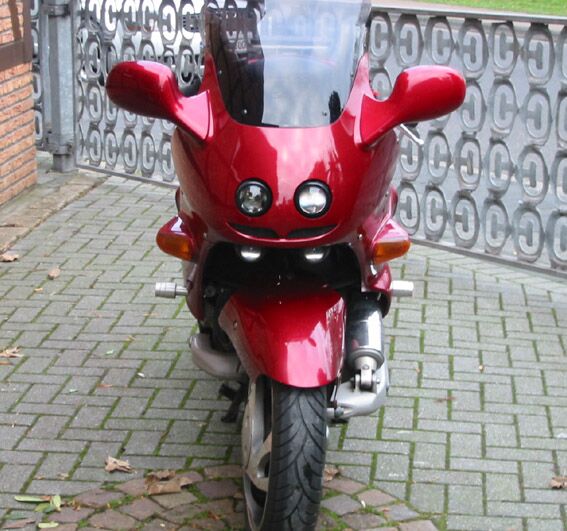

Dirk N. walks along another way, the headlight is from an Honda VFR 800:

Also Knut B. needed apparently a new inspiration:
Who does say that there must be only the GTS and the Bimota with stub axle, then?
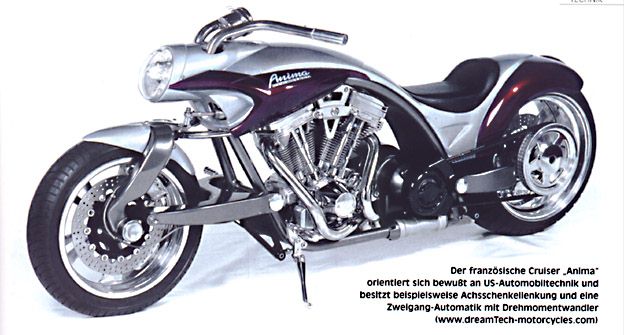
So I can not help me but the stub axle seems well-known to me. You also?
Bike with stub axle in racing use.
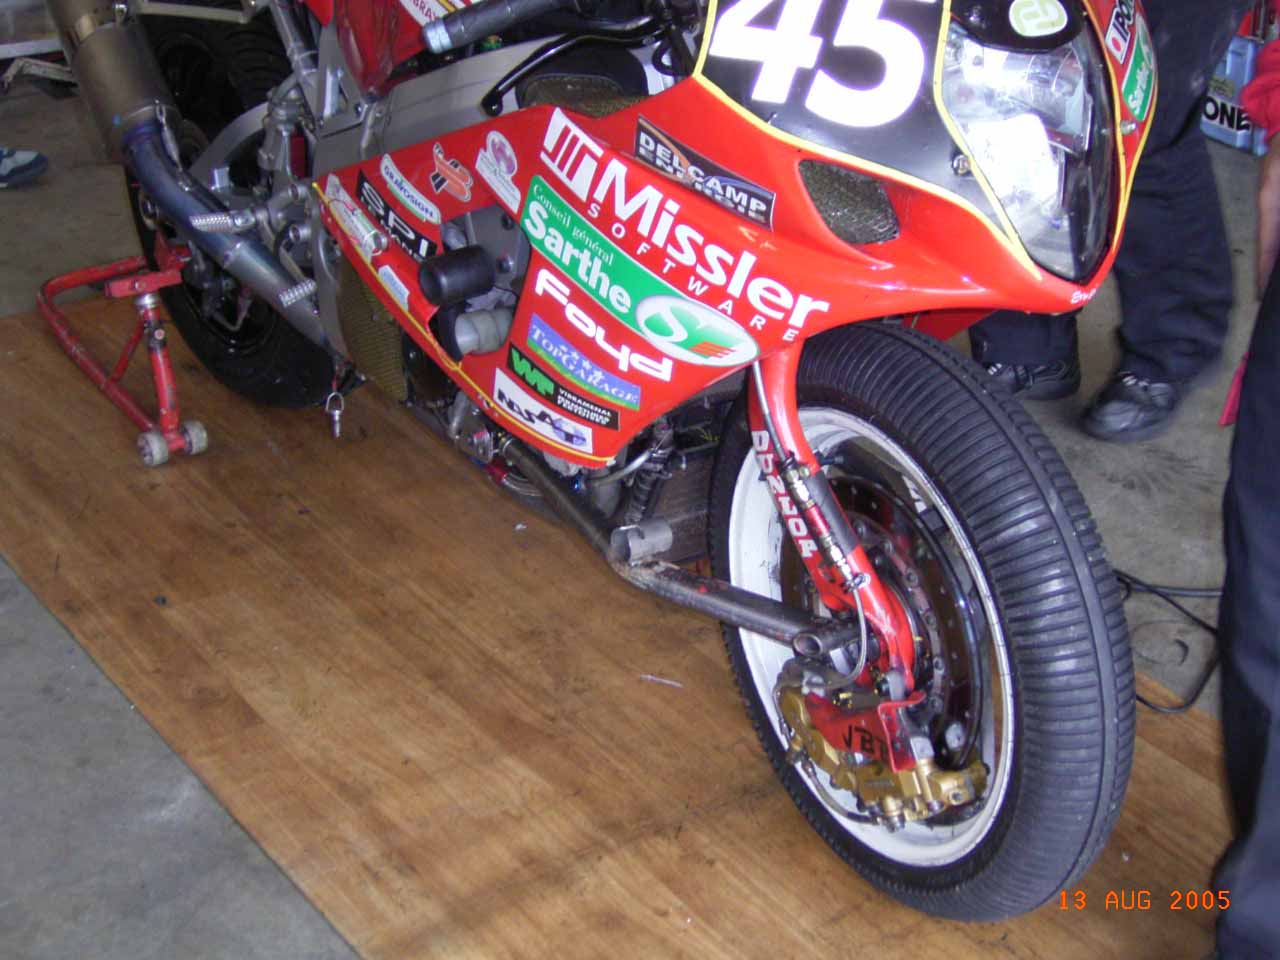
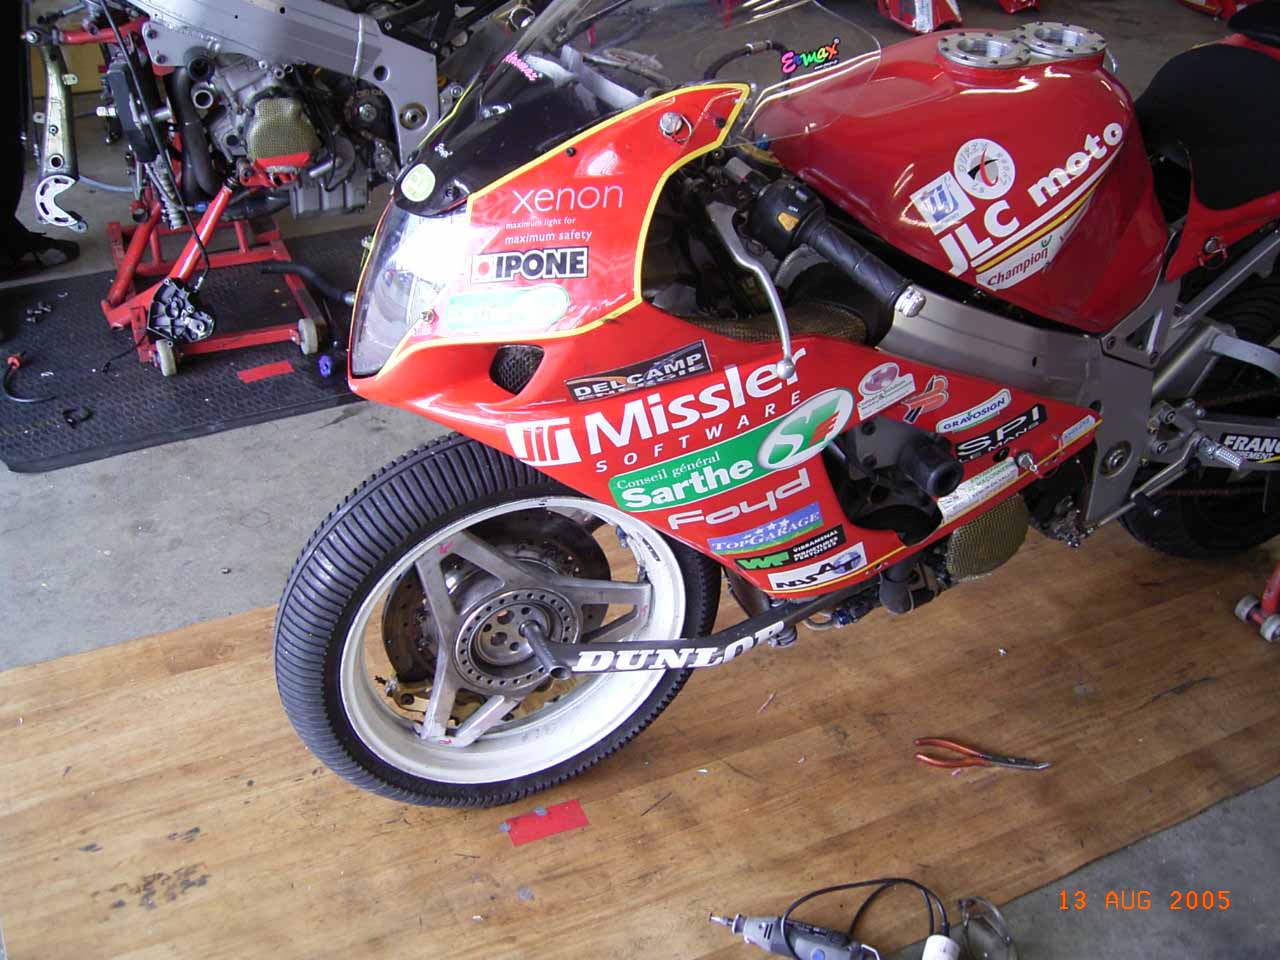
Ralph Weiß has sent me the pictures. Unfortunately, the racetrack is not known to me.
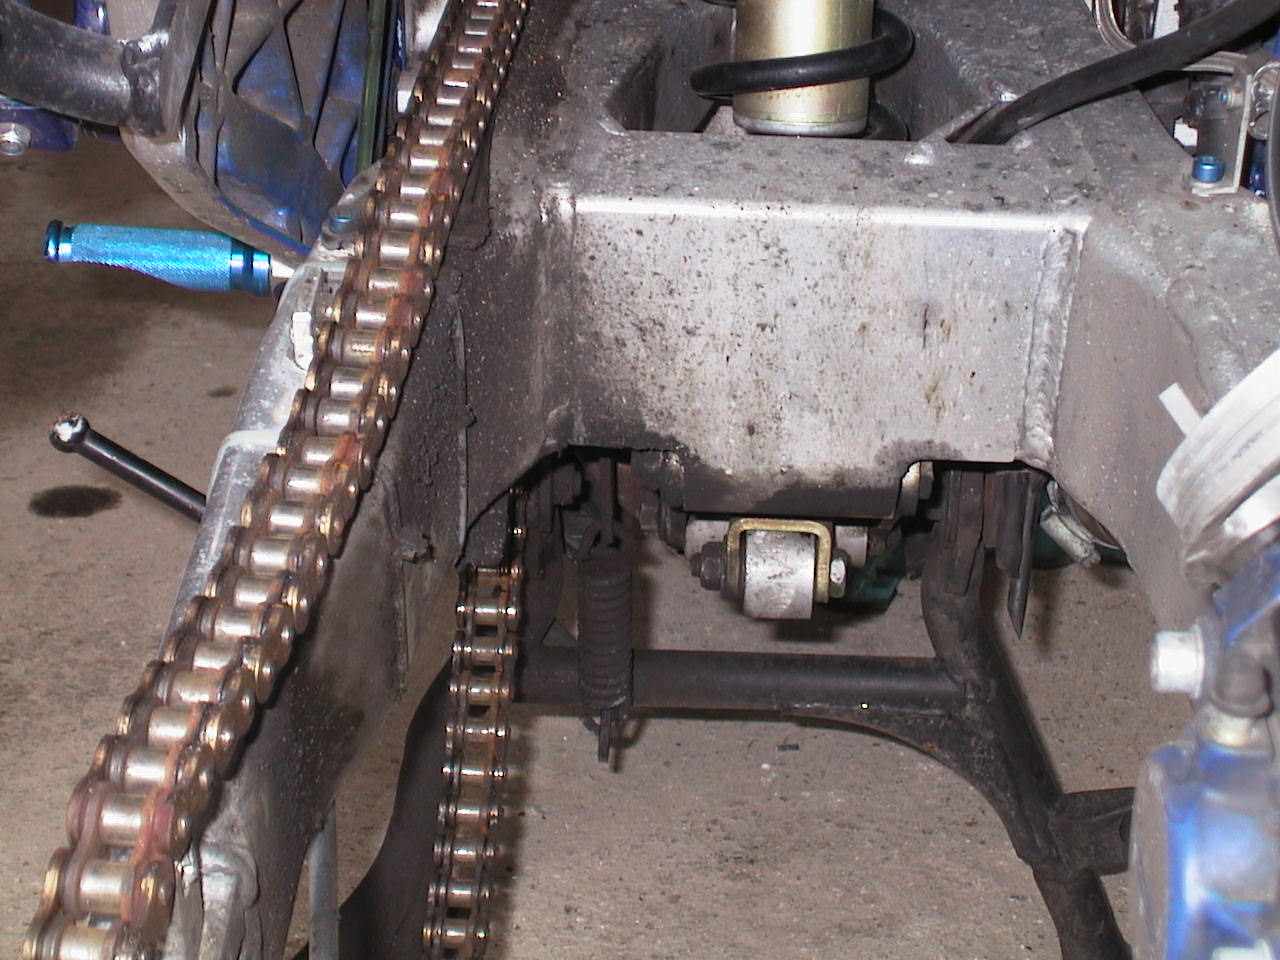
Pictures following all of us may remain saved by Paul from Denmark:
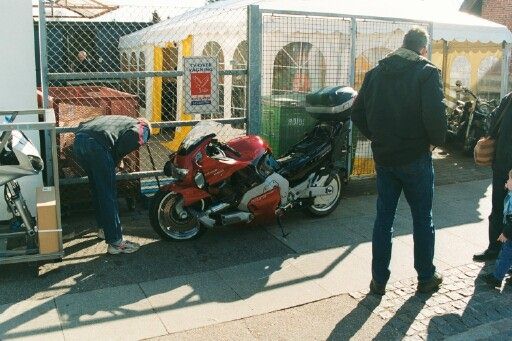
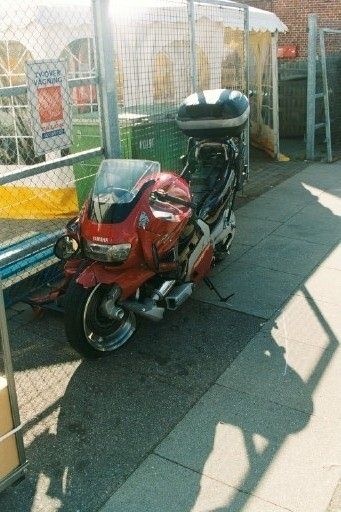
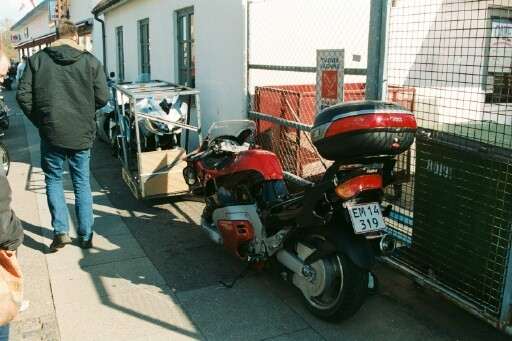
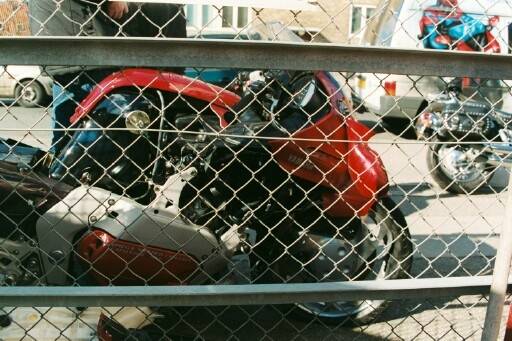
He wrote this to me. He turned out on a secondary road into thick smoke because a farmer had made fire next-door on the field. He lost the orientation completely and drove frontally together with a car whose driver also could see nothing in front of smoke. Result: An impressive interior view of the stub axle ... . From 2006 the new one: Paul has bought the GTS of his dealer back. He gets the required spare parts favourably from an in front of leading model of Yamaha Denmark.
I recently had the big drum for stirred Bio-Fix quickly in the forum. Do not wrongly, have a look at the photos.
Waited and wiped off respectively ca.5 min, one sprayed twice. The gleam still is polish, has refreshed it with Autosol only easily again of the last. Bio-Fix quickly is degradable fully biologically as said and you deliver into amounts of 1.2 or 5 l. There it but for normal pollutions 1:10 proportionally is mixed with water it suffices eternally. The notorious insects on the disguising and the plate are no more topic with the things either. Service, waiting, wipe off...away. And it attacks in no way varnish. Dispatch and a sample bottle (only at the 1st order) cost 1 L, incl. € 19.90 €uro, incl. VAT. At interest on the bottle clicks, you then come directly to the supplier where I have ordered it. The things put away only for certain, then if your better halves get them into the fingers it is too late ...
So that Arno always finds the way home for certain, he has mounted on his EFI a GPS device:


Hello, here a couple of pictures for the extension of a navigation system on Pocket PC basis (Aldi Medion MD 41600) to the GTS. Turns excellently, tried out already. What must be changed still but I think this comes only in the winter (also new pictures then come) the power supply is, this one shall to a watertight area, this is not the case at the moment yet? Yes, drives also only in fine weather.:-) Greetings Arno
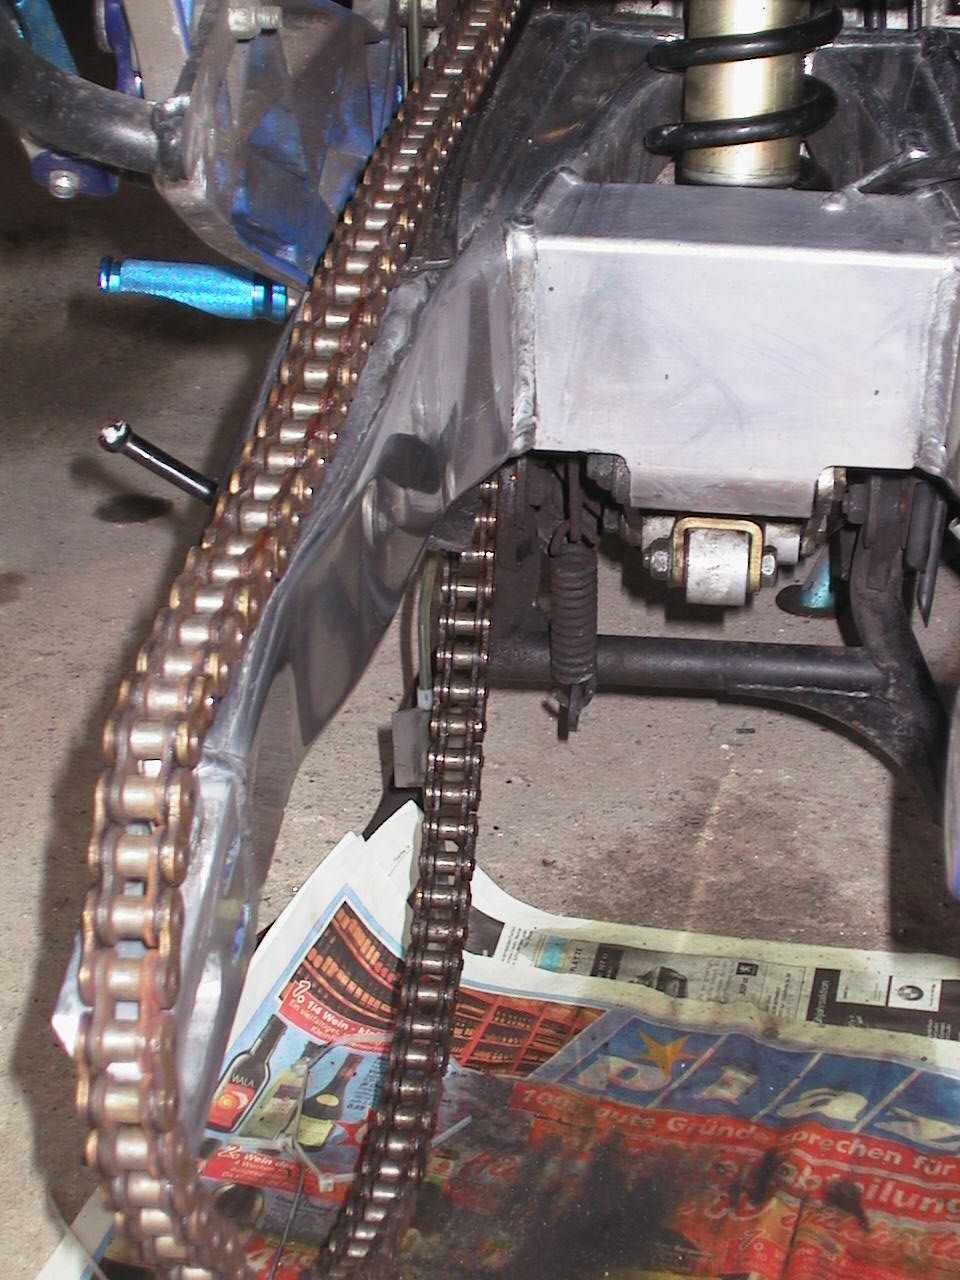
The photos and the declaration about the removing of the Tank lid also come from Arno:

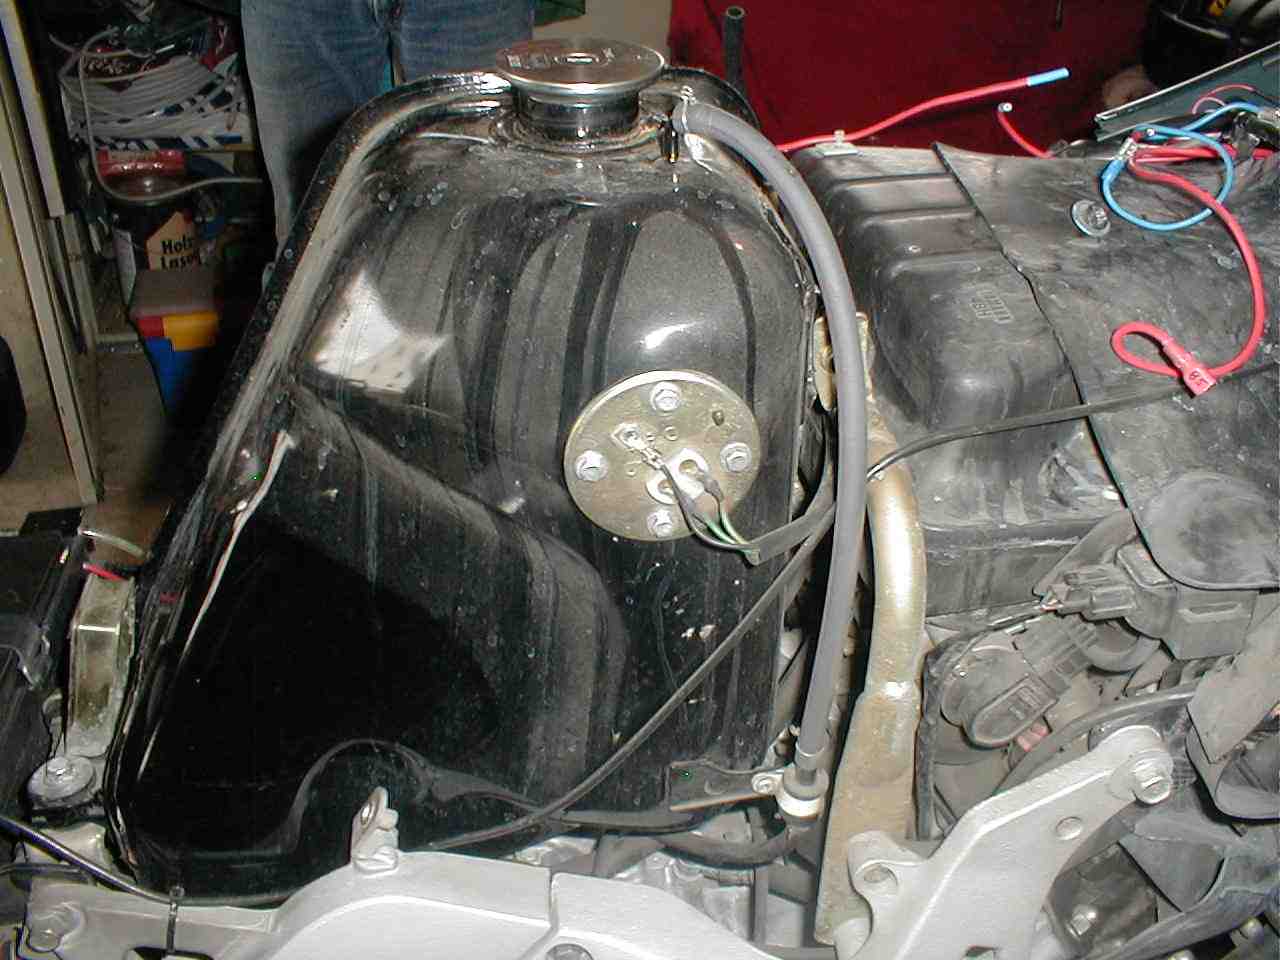
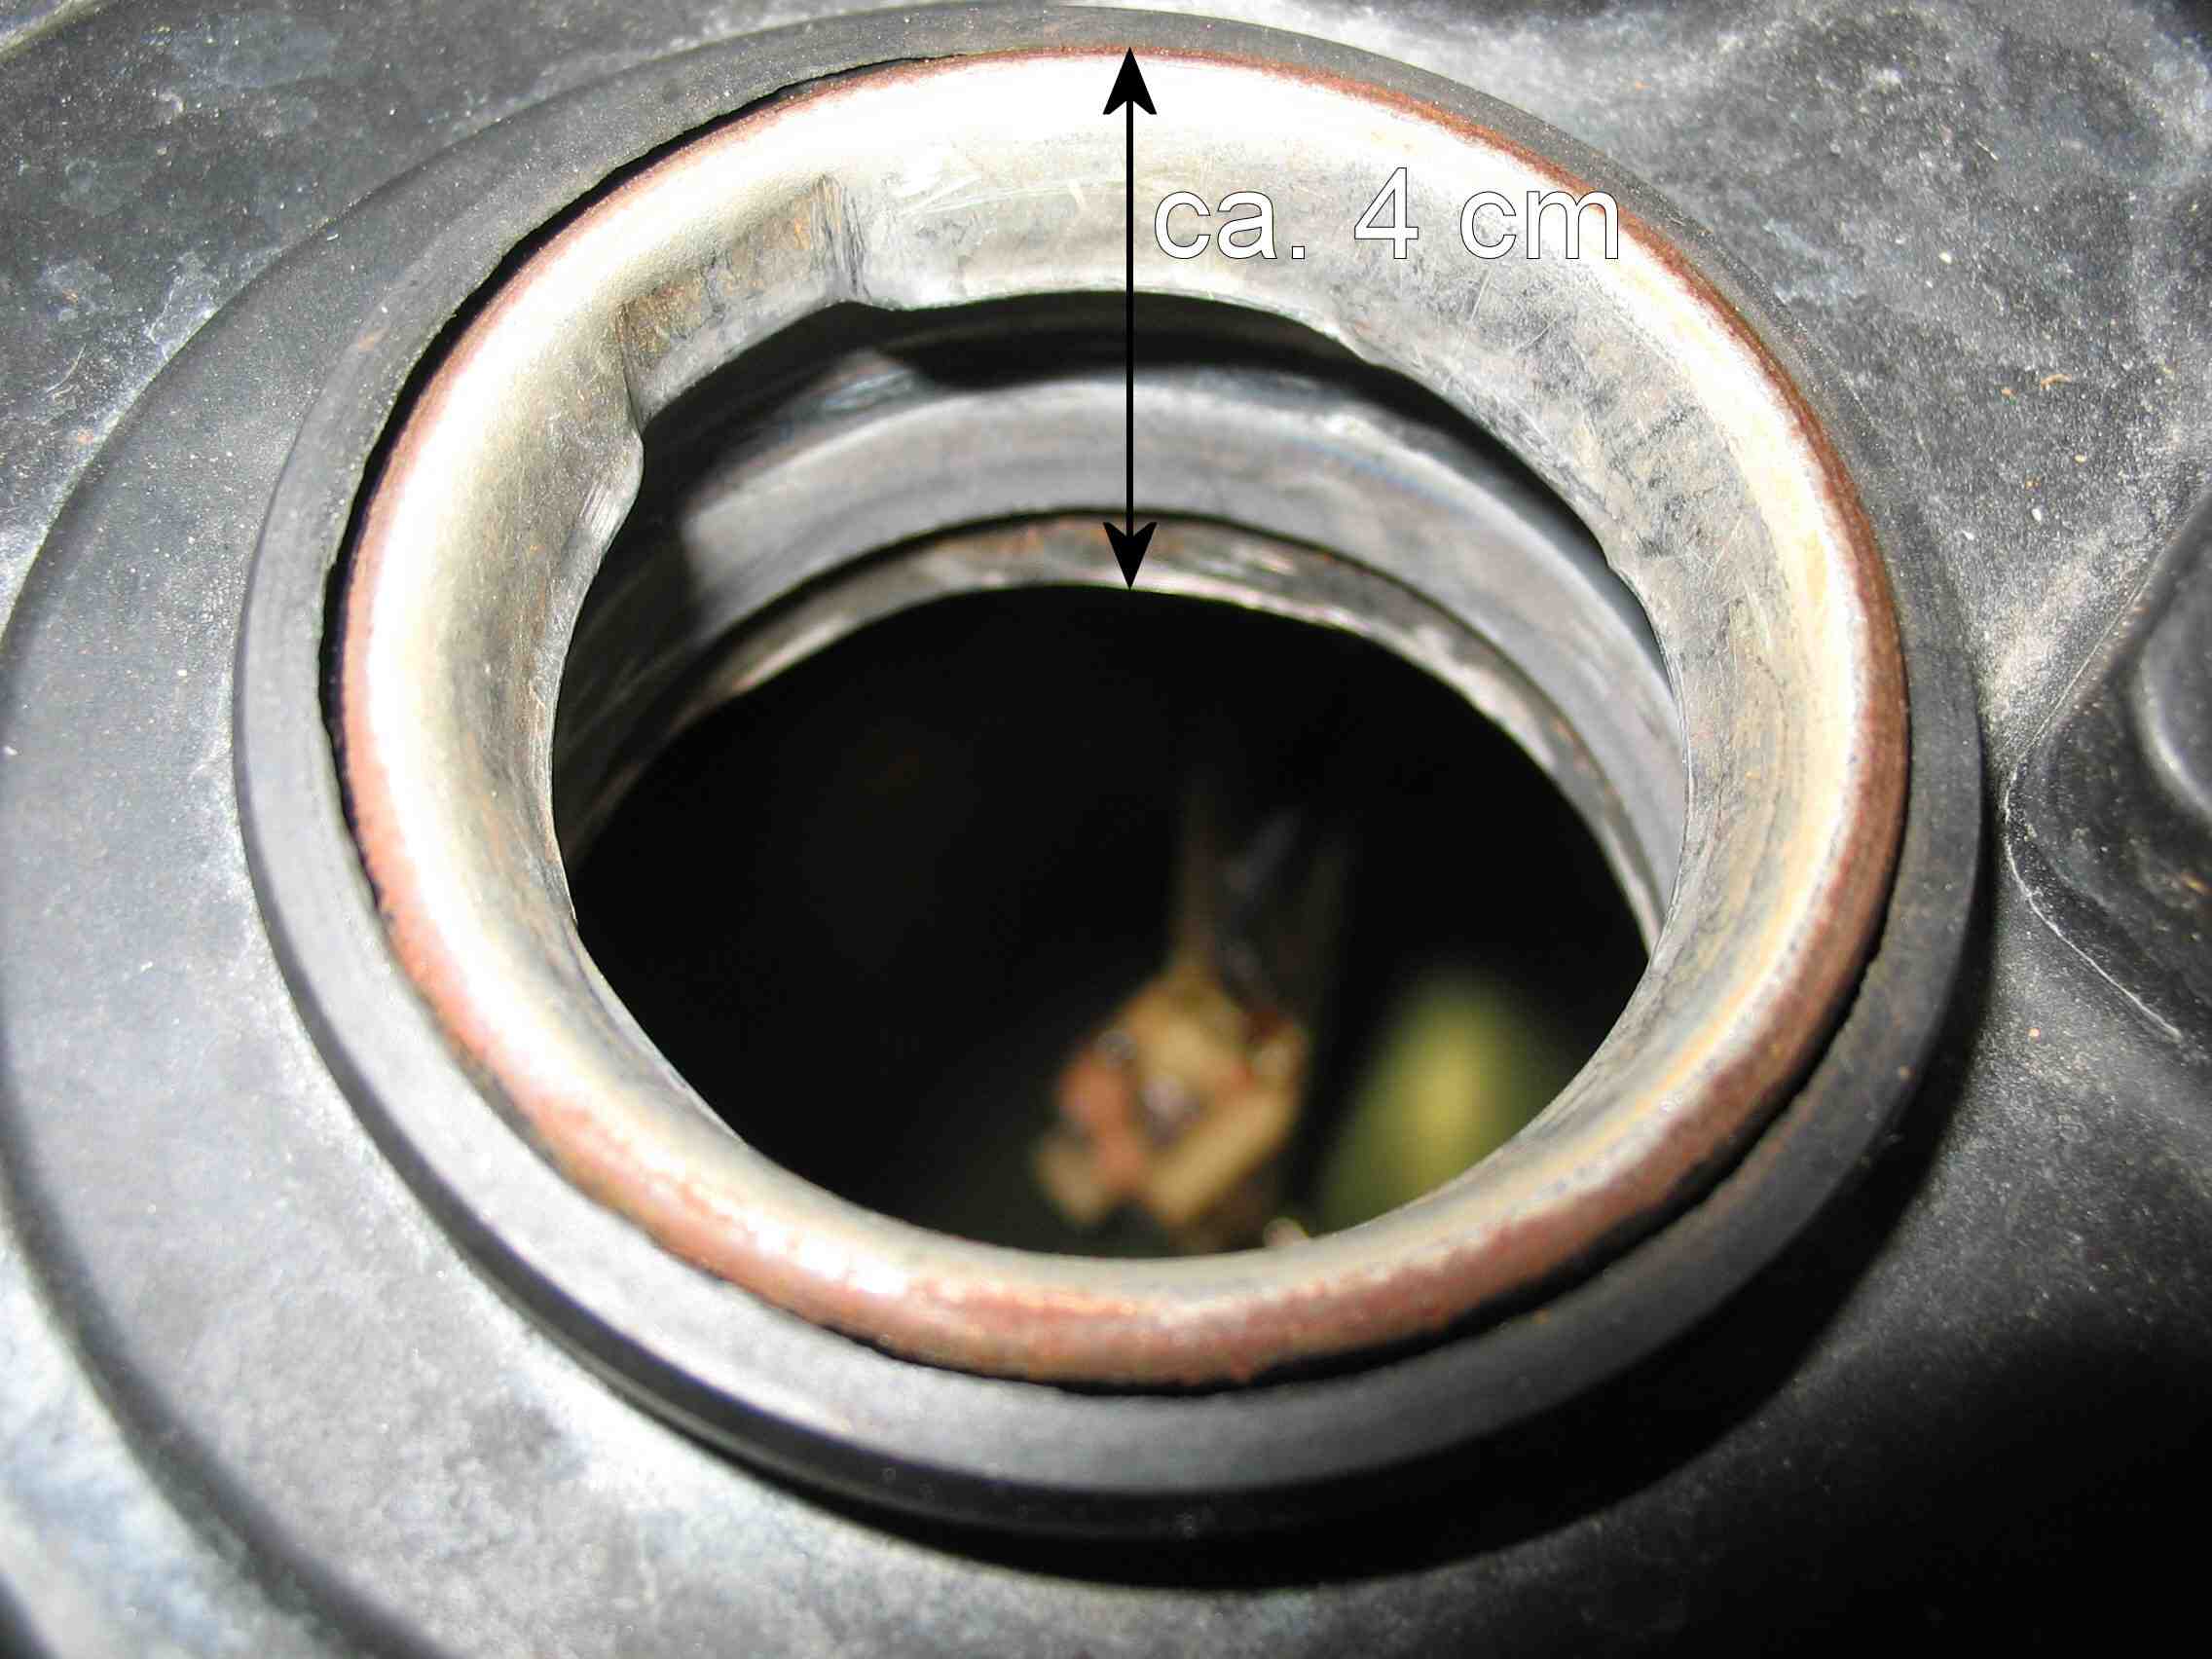
Emptying the tank. The tank and side disguising must down improve to this -- respect dismantle the side disguising after behind move away at an angle -- otherwise break off the hold pieces. The fuel pump raked side improve the signaling transmitter of the fuel gauge on the left side improve on this one. Putting eight screws on when installing on the specified torques over cross. Rinsing out the tank with water, letting dry and ventilating absolutely for 1 -2 days. Then unite magnets at the tank of the outside below fasten then cut use with the Dremel and separating plate firm intention approx. 4 cm of the upper edge (in the deepest place) out. By the hole of the fuel pump you can easily take out the firm intention from the tank. Vacuum cleaners collect switched on and pulled away from magnets the tank shaken a bit so that himself all shaving at this magnets, industry vacuum cleaner (a normal also does it) on the shaving held. Magnet again on this, water poured swung and once again. However, goes also without magnet if you fairly often rinse out the tank. Tubes on this, disguising to this see above have dried, install (take caution torques into account), petrol in and the post goes. To this day no problems. Time expenditure approx. 1 hour greeting Arno.
The GTS quite differently:
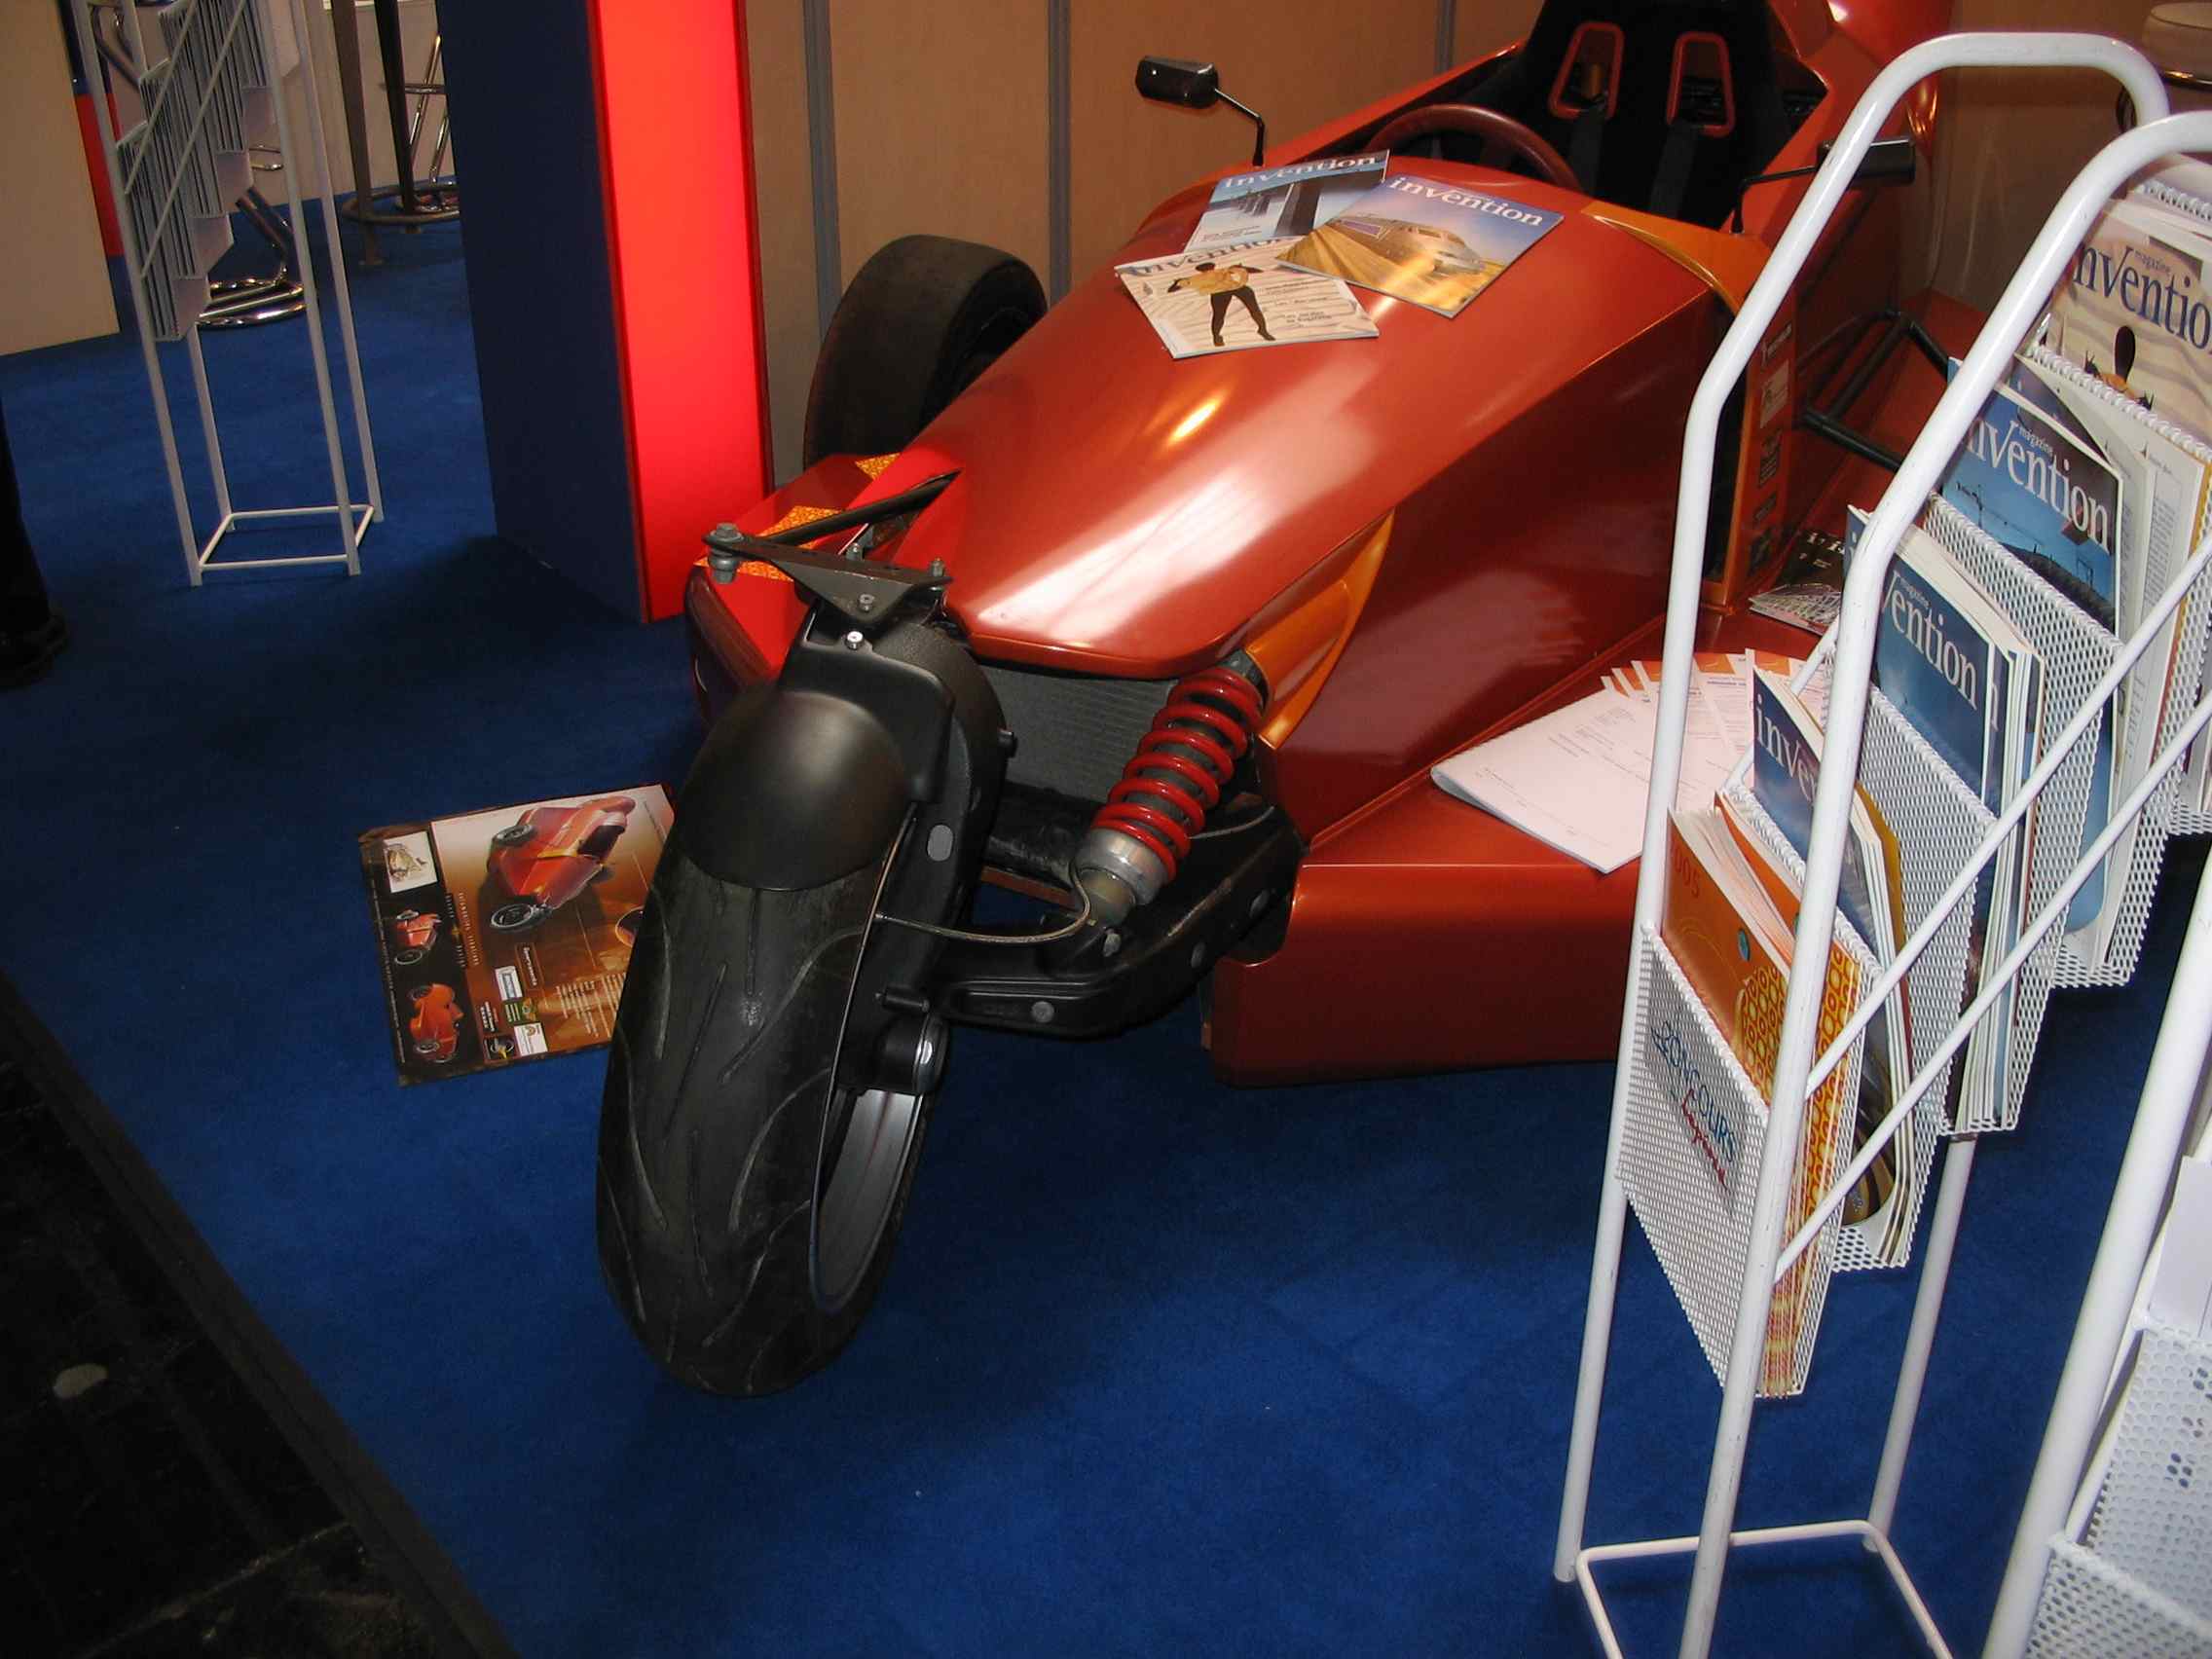

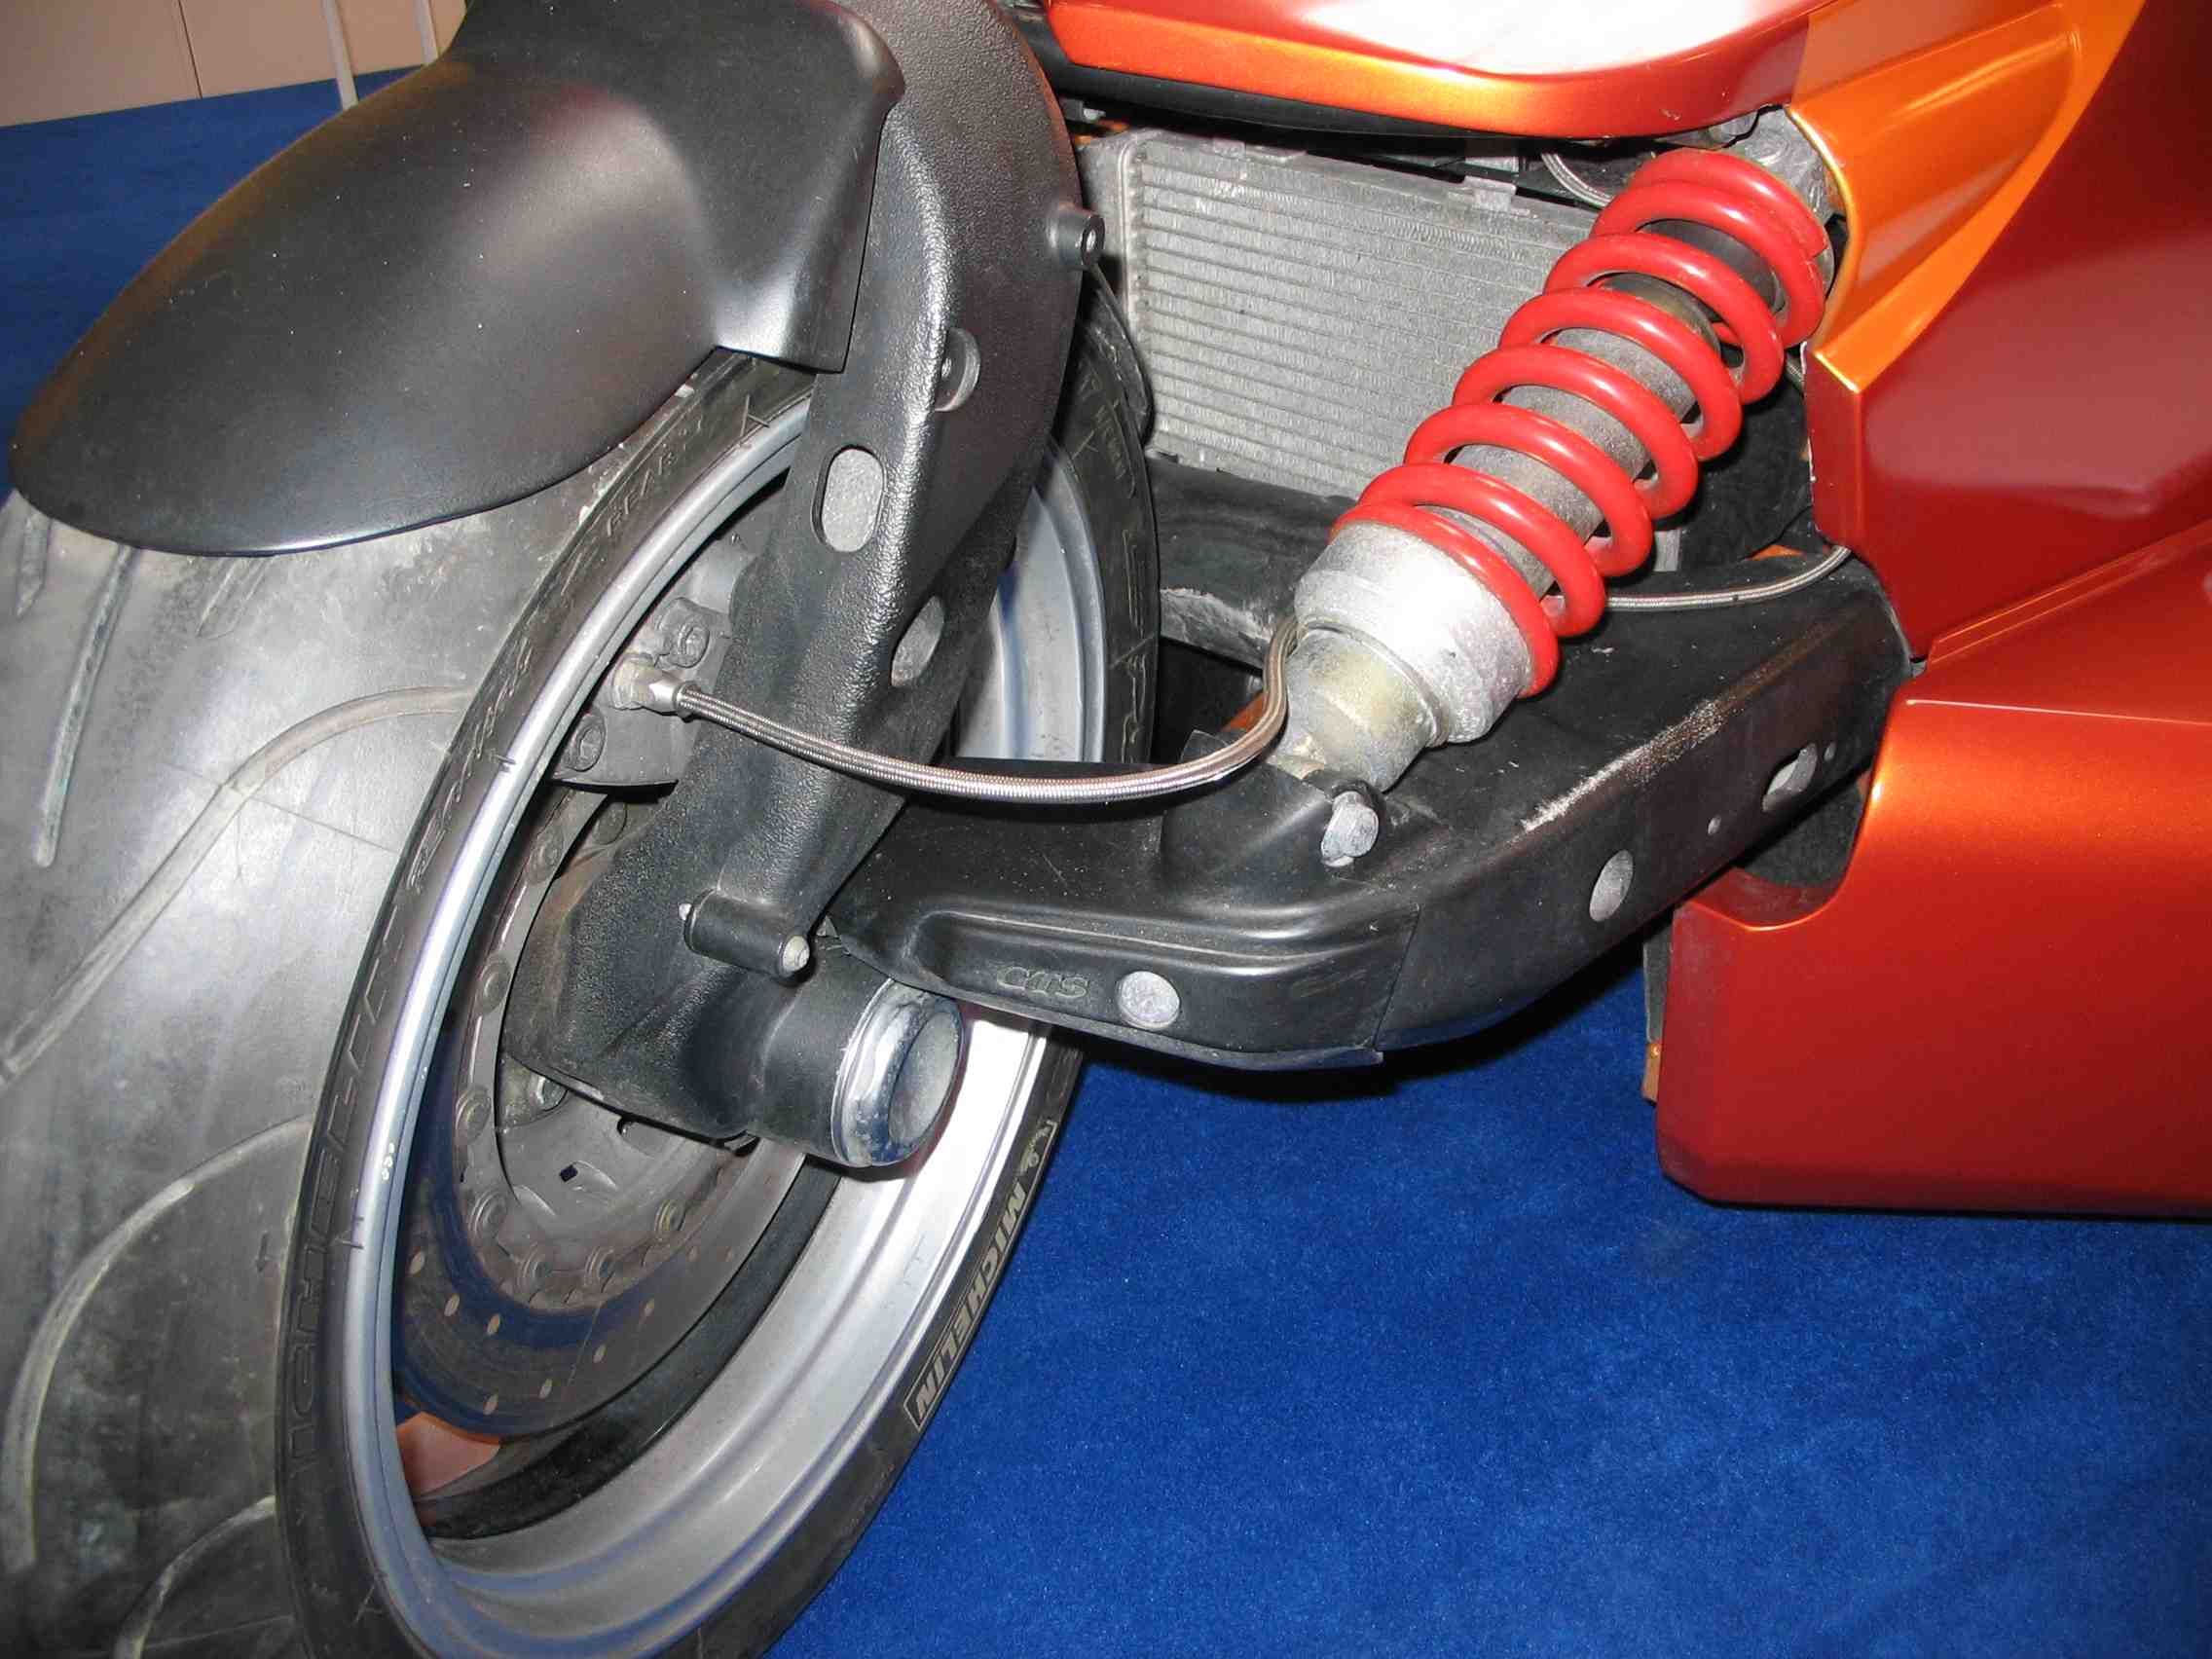


The pictures are from the Kawa driver Volkmar Heinz, manufactorer of the warning indicator and a good friend and helper of Arno. You pays special attention to the plastic cover of the stub axle in the 3rd picture. Bullets at the Hanover fair 2005th Volkmar, many thanks and I hope we see us in Bad Herrenalb.
Martin Seifert has very often looked into mirrors over the winter. The result is very beautiful:


I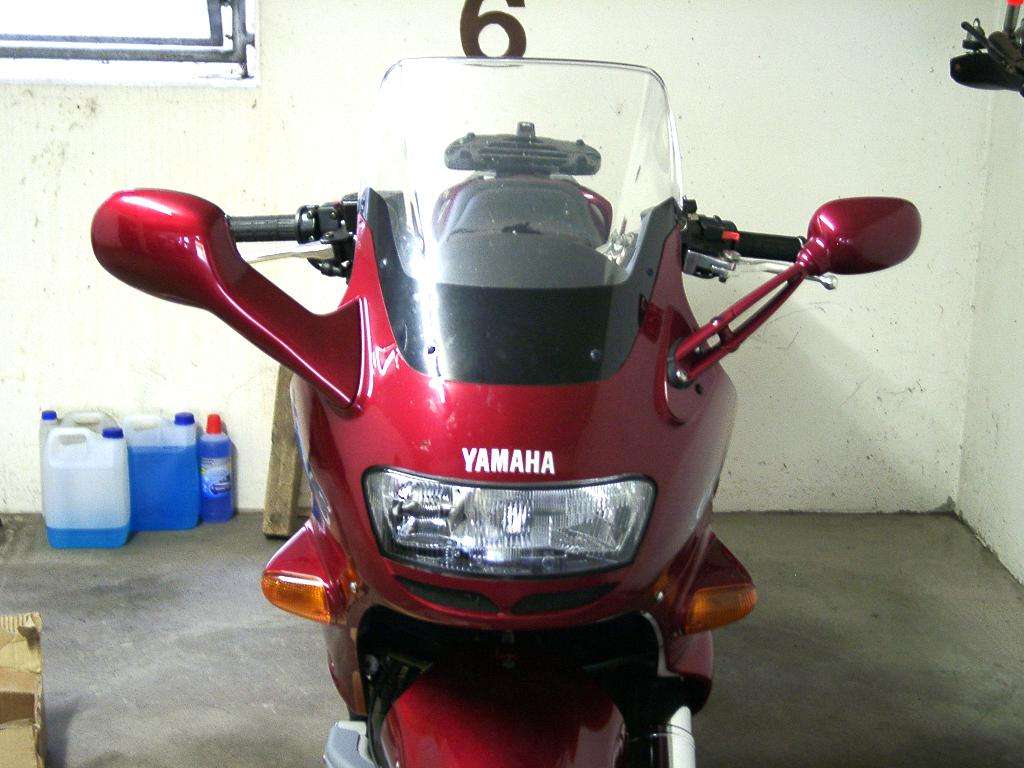

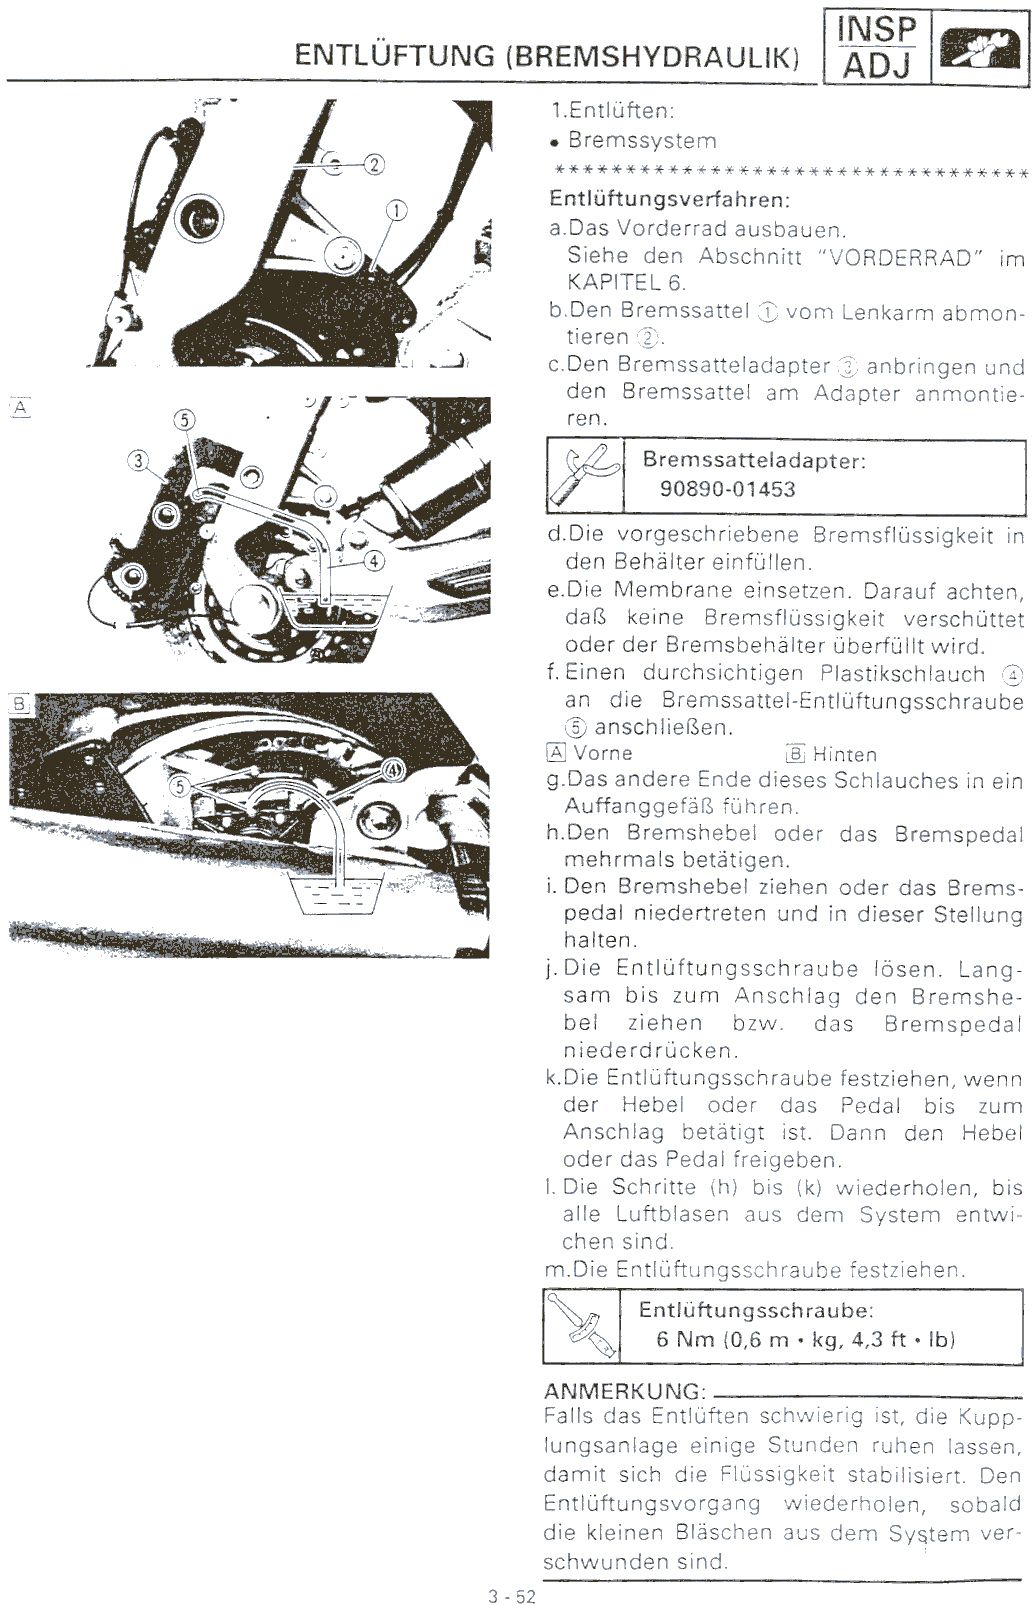
To the brakes topic ventilates at the front wheel I have scanned the corresponding sheet from the german service manual: